The saying an onion a day will keep everyone away is understandable, especially when you are in my personal space talking to me. Onions are very healthy veggies that can be started from seeds, sets, and even the rooted bottoms from the ones you’ve picked.
Onions are an easy crop to grow due to its hardiness. They are considered a cold season crop. Onions can grow just about anywhere, and be started at different times of the year for a lasting supply.
It is time to start your onions when the ground can be worked in the spring. Do not start your onions when the night time temperatures still get below 20 degrees Fahrenheit (-6 celsius).
It is usually safe to plant in late March to early April. At planting, you should add nitrogen to your soil. Onion bulbs need lots of nutrients to grow big, so you will have to be sure to fertilize the ground well.
Onions can be planted in raised beds, containers, in the ground, and even in pallets between the boards. When planting your onions it is best to leave about four to five inches in between them and make the rows about 12 to 18 inches (30 to 45 cm) apart.
This is so the bulb has plenty of room to grow. It is important to plant your onions in a loose soil that is well drained and in full sun. Mulching between the rows and around the plants is recommended to help hold moisture, and to prevent growth of weeds.
Onion Varieties
There are different types of onions that you can grow depending on how sweet or strong you like them. There are different flavors from sweet to very pungent.
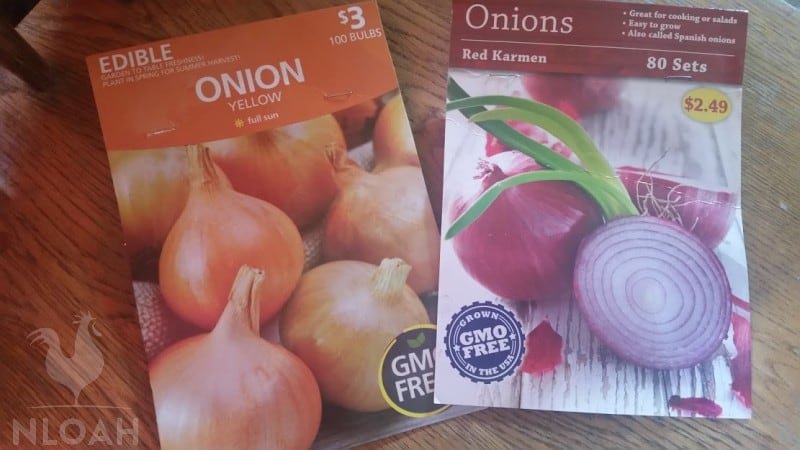
- Yellow onion – your most common onion. Used in several dishes, and can be very pungent. Usually a tear jerker when cutting.
- Sweet onion – very tasty in salads, and as garnish. Sweet onions such as the Vidalias or Walla Wallas have a pale yellow skin, and look white inside, but are actually yellow onions.
- White onion – can be strong, at first but tends to have less after taste. A slightly sweet onion that makes for great salsa and guacamole. Used as a side in a lot of burger joints for sandwiches.
- Red onion – have a very pretty deep-purple color to them. Can be a spicy onion, and good roasted or grilled and added to your sandwiches.
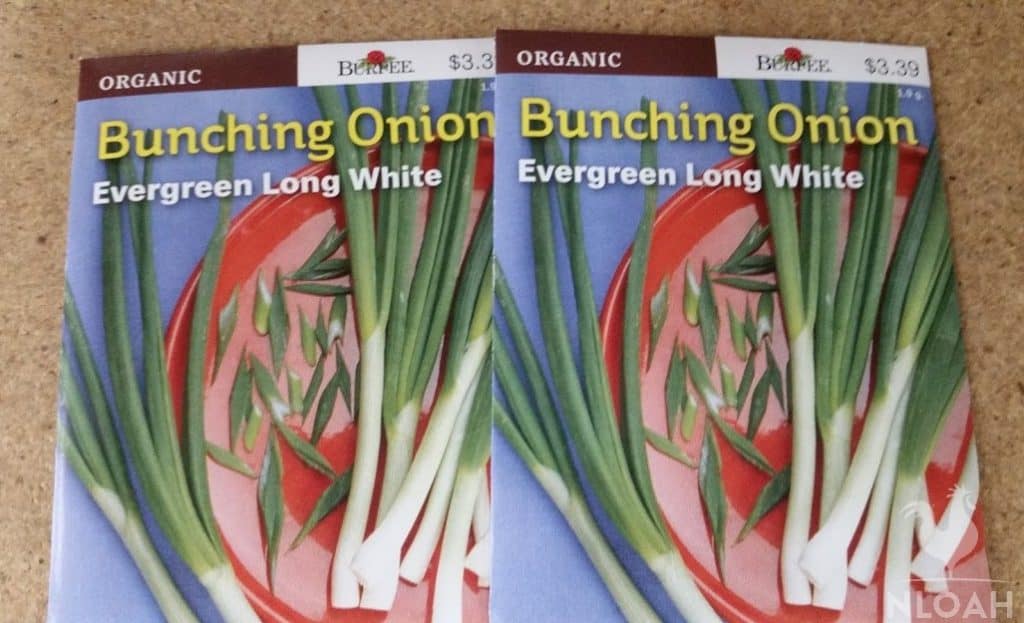
- Scallions – also referred to as green onions. These onions have a mild flavor and can be eaten raw or cooked.
- Shallots – these taste like a mix of garlic and onion. They are bulb-shaped instead of round. Used in sauces, and can be substituted with any other type of onion.
For a sweeter onion, water more while you are growing it. To help tame the pungent flavor, them thin, then soak the slices in cold water for a while, even overnight for the really strong ones.
4 Ways to Start Onions
With all of the places that you can start your onions, you also have choices of how you can start them.
By Seed
To grow your onions by seed you will want to start them indoors about six weeks before you are ready to plant them outside. Onion seeds are short lived, so you will need to acquire new ones each year to be sure that you will have a crop.
Start the seeds inside just like you do anything else, lightly cover them with soil and keep it moist. In six weeks you can transplant them outside.
By Transplant
Once your onions have started or if they are too thick, then you can thin them out and transplant them. Be sure to dig up or pull up the whole onion plant, then replant it in your desired location with the needed spacing.
It is a good idea to add nitrogen at this time, as onions like a soil rich in nitrogen. After you have transplanted your onions, you only need to do maintenance of watering and weeding until you are ready to eat or harvest them.
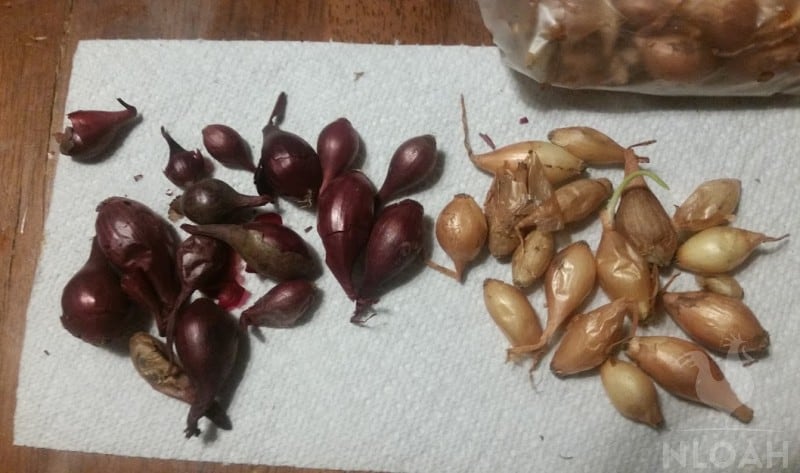
By Sets
Onion sets are the easiest way to get your onions planted. I always start my onions with sets. Space the onion sets about four to five inches apart in the row, and leave the rows spaced about 12 inches apart to allow room for the bulb to grow.
When planting your onion sets you put them in the ground, and cover them with no more than an inch of soil. Planting sets gives you a higher success rate for actually getting onions than using seeds.
By Rooted Bottom
This is able to be done after you have already planted your onions. When you pick your onions while they are small you generally clean them before eating.
You would clean them by washing off any dirt and then cutting the rooted bottom off of it.
You generally would throw the bottoms in the compost or the trash. Instead of tossing them just replant them. Bury the rooted bottom in the soil just like you would an onion set, and wait.
This method will work and it saves you a little money and you will have less waste.

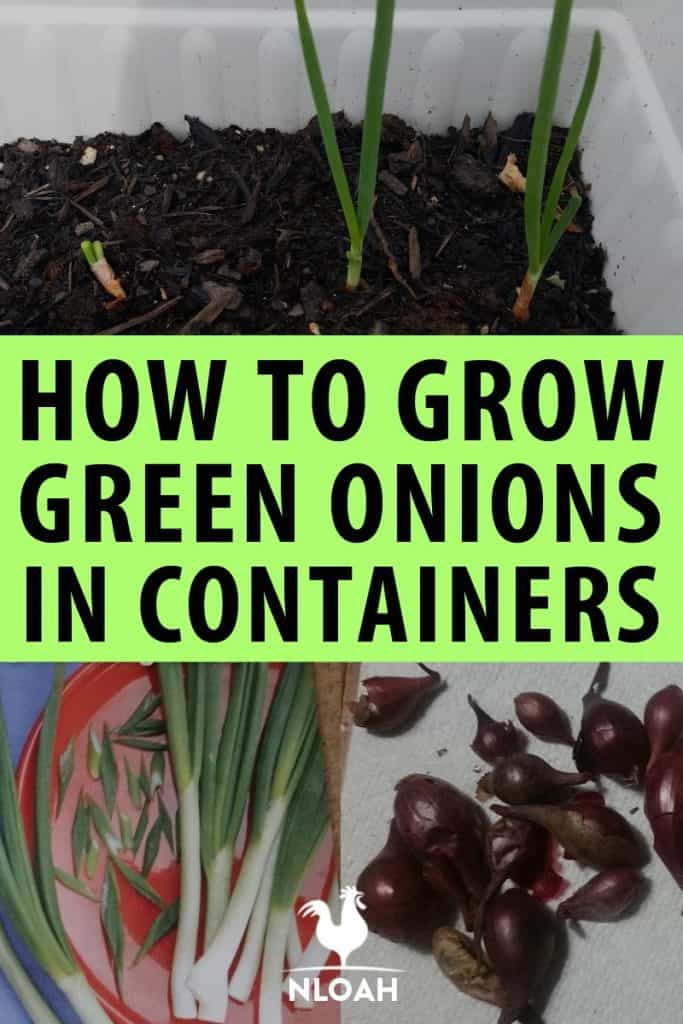
Container Planting
When you are choosing where you want to plant your onions there are things to consider. Planting in containers and in pallets, you will not give your bulb much space to grow.
When planting in containers I plant the sets closer together because I do not need to allow space for the bulbs to grow. The size of the container will determine the amount you can plant, and the size your onions will get.
The bigger the greens get, the tougher they are to eat. If you want a tender green onion pick it while it is still small. About eight inches or so is what my family prefers. There is no right or wrong size for picking your onion for eating.
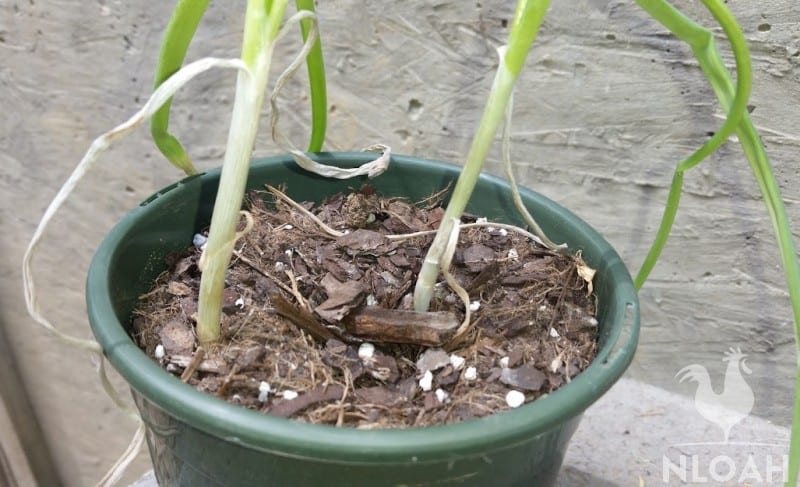
I like to grow green onions in a container in my window seal in the winter. That way, we still have fresh onions for snacking.
My family loves to pick the fresh green onion, clean it off, dab it in a little salt and enjoy. They eat the green tops and the bottoms that are still small.
In the summer months, it is handy to have a container of green onions on your back porch for adding some flavor to your dinner or salad.
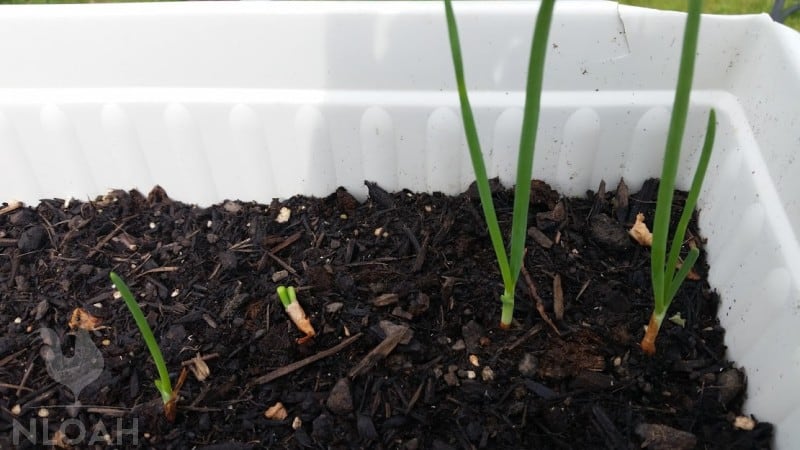
These are some container green onions that I have planted. They will be ready for picking after they grow about three more inches.
When it comes to container planting it makes more sense to grow green onions in it. The green onions do not need left to grow as big as a regular bulb onion, therefore they are perfect for containers.
The green onion is actually an immature onion that is picked before it is fully grown. When picking your green onion look for unwilted, bright green tops and smaller white to pale green bulbs for eating.
To harvest your green onion, gently pull on the top and remove it from the loosened soil.
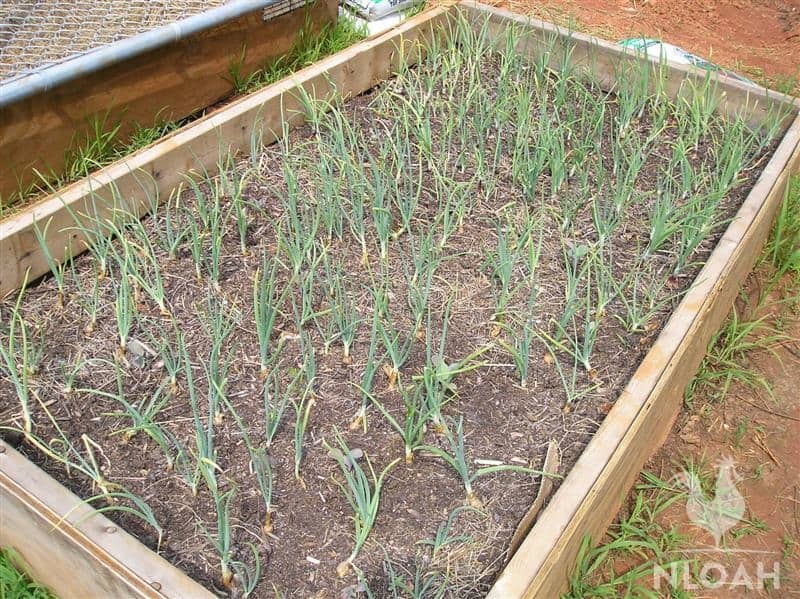
Garden and Raised Bed
Planting in raised beds or directly into the garden soil is how you will provide your onions with the space that they need to actually grow your bulb for harvest.
The soil in your raised bed and garden needs to be at least four inches deep to allow room for the bulb to grow.
Onions need lots of nitrogen to produce large bulbs. It is recommended that you fertilize your onions every few weeks with nitrogen. Onions only need about an inch of water a week (including rain water).
If you mulch around them then you will be able to water less due to it holding moisture. As the bulb starts to grow and mature, you will see it through the dirt, do not fertilize any longer, and do not cover it back up with soil.
Harvesting Green Onions
If an onion has stopped growing it will send up a flower stock. If this happens, you can go ahead and pull the onion. These don’t store well so, they will need to be used or processed within a few days.
If the tops of the onion start to turn yellow, this means the onion has matured. You can go ahead and bend them over to allow the onion to start to dry.
You can even stamp around on the tops to speed up the process some. Loosen the soil around the bulb so that it can help it to dry more. Once the tops are fully brown then go ahead and pull the onion.
Do not harvest onions in the cool fall temperatures, as it may cause the matured onions to spoil. Be sure to harvest at the end of summer.
While harvesting and drying your onions also be careful to not damage or drop thm. The slightest bruise will start the onions to rot.
Once the onions have been pulled, you need to cut the roots off. Simply snip them off with scissors.
Leave the onions on the ground to dry for a few days, weather permitting, or you can lay them out on a screen off of the ground to finish drying.
How to Store Onions
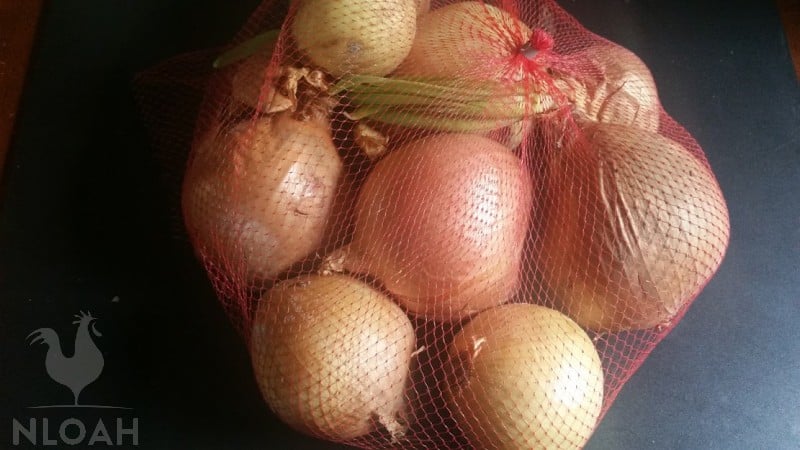
There are three ways to store your freshly harvested onions:
- Clip the tops back to about an inch high, and store them in nylon stockings or in mesh bags.
- Leave the tops on, and braid them together. After they are braided you can hang or store them in mesh bags.
- You can also process them by dehydrating them, or chopping and freezing for later use.
A pungent onion will store longer than a sweet one.
Onion Pests
There are few pests that disturb the onion but it does happen. The onion fly and thrips are two of the most common pests in your onion patch.
Onion Flies
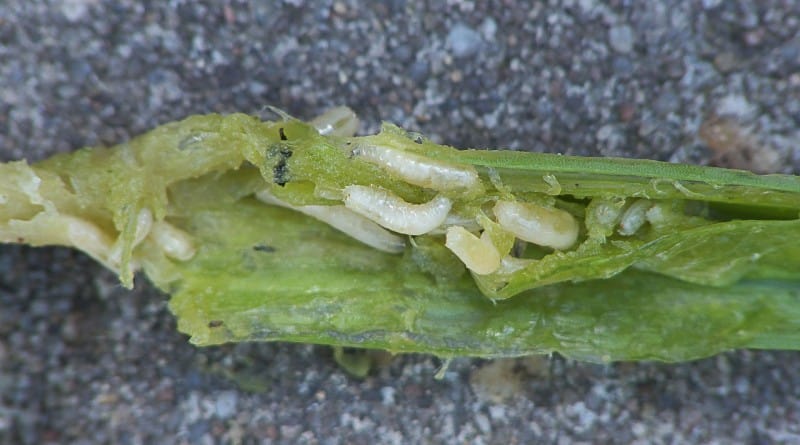
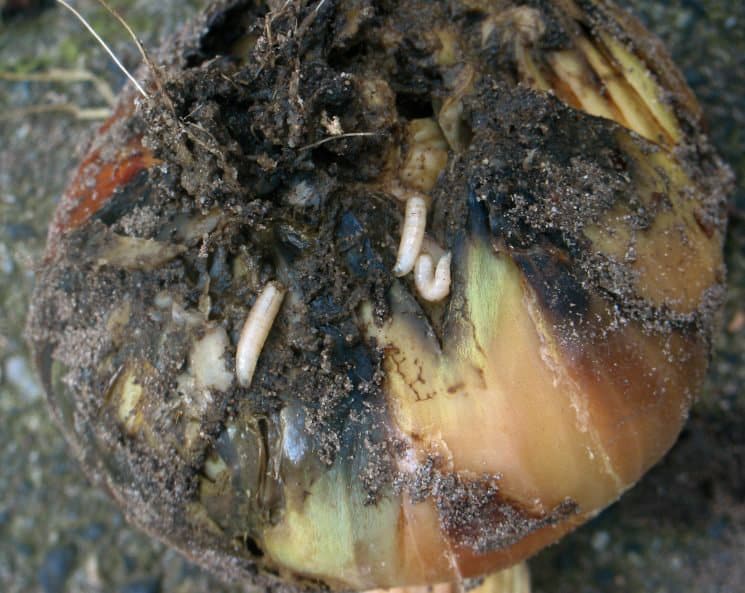
The onion fly looks like a small house fly, and is seen in the early summer flying around. It lays eggs in seedings, or in the soil at the base of the plant. The eggs hatch, and will grow into maggots.
The maggots then eat into the young onions between the leaves and roots. In older onions the maggot eats away at the onion bulb.
The onion fly will cause the plant to wilt and die off. If it eats into the bulb it will cause it to rot from the inside out.
The maggots grow into flies, and they start the cycle over again. At the end of summer the pupae lay dormant in the ground, and start the cycle over again in the spring with your fresh crop.
The onion fly tends to follow the row of onions bulb to bulb, making it easier to spot the infestation and eliminate it.
To rid your garden of the onion fly you need to dispose of all infected onions as soon as you notice them. You may want to consider removing the soil from the infected onions to be sure you didn’t leave anything behind.
To deter the flies from infecting more, be sure to move the onions around in various spots of the garden for planting. Also, it is recommended that you lay an insect-proof cover around the onions so that the fly has nowhere to lay its eggs.
Thrips
Thrips are another pest that can destroy your onion crop. They are females insect that don’t need males to produce eggs. The thrip cuts into the skin of the onion and sucks the sap out.
The eggs are also laid in the leaves, or greens, of the onion. The leaves become blotchy white and sometimes deformed when they have been infected by thrips.
Eliminating thrips is difficult. They are small insects that are yellow as nymphs, and become darker as an adult. You can look and actually see them moving about on your plants.
To prevent infestation of thrips you need to clean the garden area from any old onion products at the end of season. It is also best to not compost old onions, so that thrips can’t reproduce. Use a dry much instead of fresh-green mulch.
The thrip population likes hot dry weather, heavy rains, and routine watering can cause a decline in numbers. The thrip is somewhat resistant to insecticides.
The larvae stage can be killed by using insecticides, but the adult has a harder outer covering that helps protect them. They also have a tendency to fly or move quickly to get out of the way, and can go into the soil where they can’t be reached.
Onion Diseases
Most onion diseases are fungal. Damp and warm conditions can cause the onion to become diseased or to rot.
Leaf Blight
This disease spreads rapidly and it is hard to kill it. Leaf blight is white to golden specks that will kill the leaves and then the entire plant.
Onions are most vulnerable to blight when the leaves are growing and the bulbs are developing. You must remove the infected onions from the garden and burn, bury, or seal them in a bag and dispose of them.
Spraying with an organic fungicide can help to treat blight if you see it early.
Leaf Fleck
This is a mild fungal disease and it will not kill your plant. Leaf fleck is slow to spread and it causes pale green to white flecks on the surface of the leaves.
White Rot
This disease is the most dreaded for onion growers and it is impossible to eradicate. This fungus produces tiny black dots that affect all members of the onion family.
The first signs of white rot are the leaves turn yellow then die. When you pull the plant you will notice that there are no roots but in its place is white mold.
This fungus can live in the soil for up to 15 years. To rid your garden of white rot you must remove all infected plants and burn or seal and dispose of them.
Do not compost the infected plant as the white rot will stay. Do not plant new onions within 16 feet of the infected area, and be careful not to cross-contaminate the soil from walking in the old soil and transferring it to the new planting area.
Downy Mildew
This fungal disease thrives in damp and cool environments. Downy mildew is where a white mold spreads down the entire plant and causes it to fall over.
To control downy mildew use an organic fungicide weekly until the bulb starts to develop.
Purple Blotch
This disease creates purple blotches on the leaves. This fungus develops in moist and humid conditions. Purple blotch can be treated by having a good drainage system, and regular spraying of an organic fungicide.
Onion Smut
Onion smut is a fungus that attacks seedlings as they grow. It doesn’t always kill the seedling but if they survive they are not a healthy plant.
Smut doesn’t affect older plants, but starts with a dark lesion on the seedlings leaves.
The affected seedlings will develop a thicker plant with dark blister patches on the leaves. The bulbs can be stunted in size and shaped oddly.
To rid smut from your garden you need to destroy the infected plants and to rotate your onion crop and not use the infected space for at least 2 years. If caught early enough you can treat with an organic fungicide.
Smudge: This disease mostly affects mature or stored onions. The plant develops sunken pale patches that turn grey or black and the leaves become twisted. Treating smudge is done the same as the treatment for smut.
Pink Root: This fungus causes the roots, and sometimes the outer layers of the bulb to turn pink, and then darken to a deeper purple. Pink root actually kills the roots causing them to shrivel up and die.
This disease doesn’t always kill the plant, but will stunt its growth. Crop rotation is the best method for eliminating pink root.
It is important to remember to rotate your onion crop every year, to prevent diseases from developing. It is also wise to be sure to rid all diseased onions and to not compost any onion to prevent diseases from starting or spreading.
These are not all of the diseases that can affect onions, but some of the most common ones.
Happy harvesting and enjoy them onions for months to come! And be sure to pin this for later on your favorite Pinterest board.
Sarah Rodriguez is a homesteading wife and mother of five living in Appalachia. She grew up in a homesteading and logging family.
She and her husband Arnie work their 10-acre homestead together alongside their growing family. Sarah honed her self-reliance skills through 4-H and FFA at an early age and is now teaching her children to live off the land, raise livestock, and the importance of both sustainability and frugality.