Gourds are one of the first plants ever cultivated. They were grown not only as a food source, but perhaps primarily to make eating utensils and make portable storage containers for a multitude of items – water in particular.
There are multiple different varieties of gourds. Some boast edible young fruit and seeds, others are merely good for only storage containers and ornamental use.
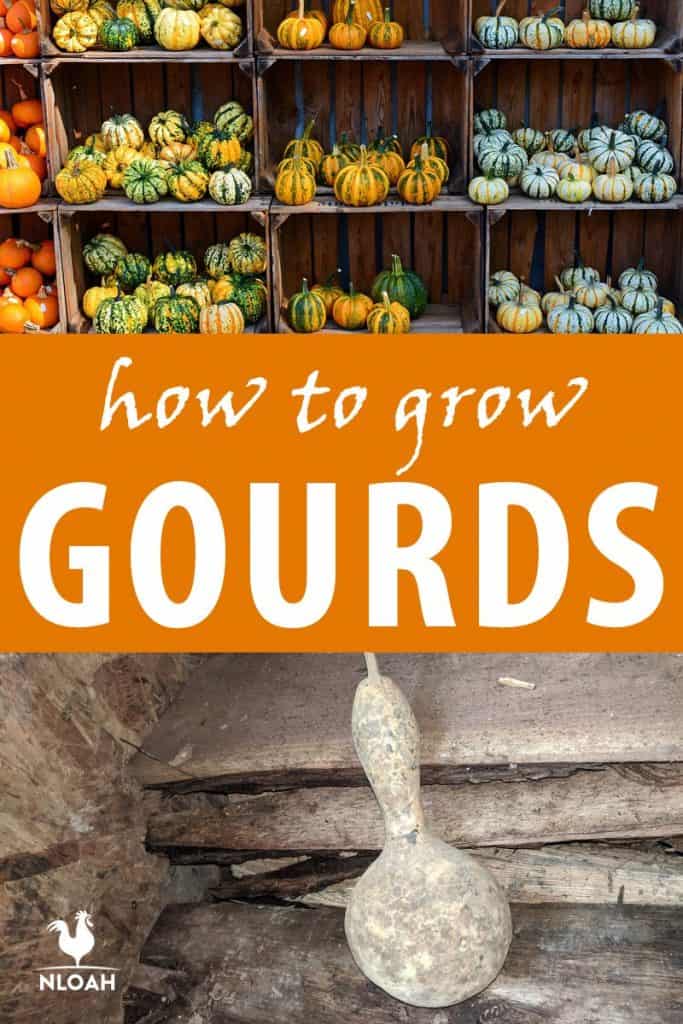
Dipper gourds, bottle gourds, and birdhouse gourds are “cousins” of squash, cucumbers, and melons as they are all a part of the Cucurbit family.
The three most common types of gourds are the Cucurbita, the Luffa (or Loofah) and the Lagenaria.
Table of Contents:
10 Most Common Gourd Varieties
- Small Dipper Gourds
- Long Handle or Large Dipper Gourds
- Bottle Gourds
- Birdhouse Gourds
- Caveman’s Club Gourds
- Drum Gourds
- Apple Gourds
- Calabash Gourds
- Maranka or Dolphin Gourds
- Swan Gourds
Gourds are often grouped in rather broad categories. The gourds most often used for traditionally for storage vessels and crafting are the dipper gourds, birdhouse gourds, and bottle gourds.
They produce white flowers, an extremely hard shell, and are often varying shades of tan in color once mature. The more colorful gourds spawn yellow flowers and have thinner shells.
It is these thinner skins that make them ill-equipped to be used as vessels for food, water, planting seeds, or as a supply container.
History of Gourd Use
Using gourds as tools, containers, musical instruments, and as pots dates at least as far back as 7000 B.C. One of the oldest known gourds was found in Mexico.
Gourds are largely believed to have originated in Africa and traveled and/or floated across the ocean to find their way to the New World, and all points in-between.
Before the invention of clay pots, gourds were used to store food and other necessary supplies. Due to their natural ability to float once mature, gourds were also used to making fishing bobbins.
Gourds they grew extremely large were even hollowed out, and once used as cradles for newborn babies.
Gourds have also been made mention of in the Bible and found in Egyptian tombs. During the Neolithic time period, gourds were used as prosthetics.
When covered in gold leaf, gourds were even used in early attempts at brain surgery as a means to repair skull fractures.
In what is now Tennessee, inhabitants in 2440 B.C. were cultivating not just squash, but bottle dipper gourds.
Native Americans used the dipper gourd as an early form of a life preserver. They would affix the gourds to fishing nets to make them float much in the same manner as we do inflatable “water wings” on toddlers before letting them get in the pool.
The Cherokee people soaked dipper gourd seeds to create a poultice used to treat skin boils. Seminoles used the gourd seeds in poultices designed to treat general body aches as well as headaches.
This same tribe burned the gourd seeds to create a smoke that was inhaled in an effort to force insanity out of a tribe member’s body.
Nearly all tribes used dipper gourds to make birdhouses for purple martins. These particular members of the swallow family are voracious wasp, fly, and mosquito eaters.
During the 1880s a folk song, Follow the Drinking Gourd, was written as a guide to slaves who were escaping the South on the Underground Railroad.
The drinking gourd referenced in the song symbolized the dipper gourds that resembled the Big Dipper with their long vine handles.
By locating the Big Dipper in the night sky, the fleeing slaves could also find the North Start and use it to guide them from the South and into the Ohio Valley region.
What Can You Make With Gourds?
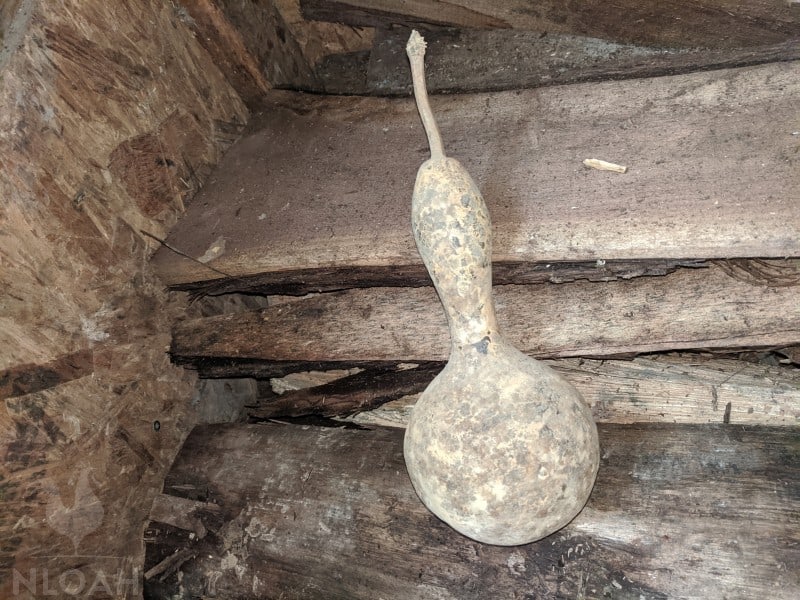
Dipper gourds, bottle gourds, and birdhouse gourds typically last for multiple seasons when dried thoroughly to extend their use as a storage container or utensil type tool.
These gourds come in a vast array of sizes and shapes. Some dipper gourds have a stripe pattern, others have distinctive ridges, while others have little nubbins that resemble warts.
Dipper gourds are best used to tote water. Other items and smaller varieties of the Lagenaria variety of gourds are easier to craft into spoons and other utensil style tools, but dipper gourds can be used for utensil making, as well.
Making a Container
For centuries, gourds have been used to make bowls and dishes for daily use, seed growing containers or flower pots, musical instruments, as well as decorative birdhouses.
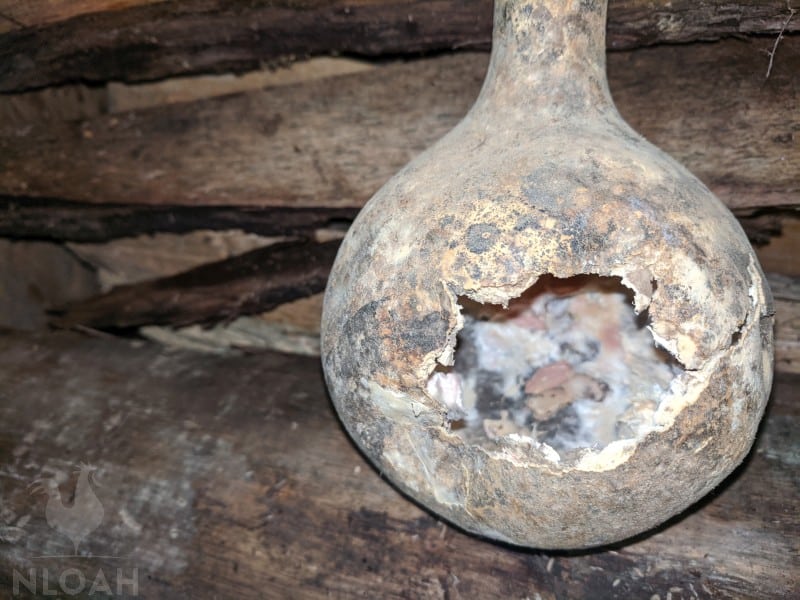
Before you can turn a gourd into a functional container, display piece, or a combination of the two, you must first cut it open and clean it out.
Step 1. To cut open a gourd you should first draw a guideline in pencil or chalk to ensure the placement and design style you want is achieved.
Step 2. To cut open the hard, dried, and mature gourd, you can use a hand saw – hacksaw, rotary cutting power tool, or a large diameter drill bit.
The choice of cutting tool will depend on not only the size and depth of the cut you need, but also on the purpose the gourd will be tasked with. For example, I would recommend using a drill bit if the gourd is going to be used as a birdhouse.
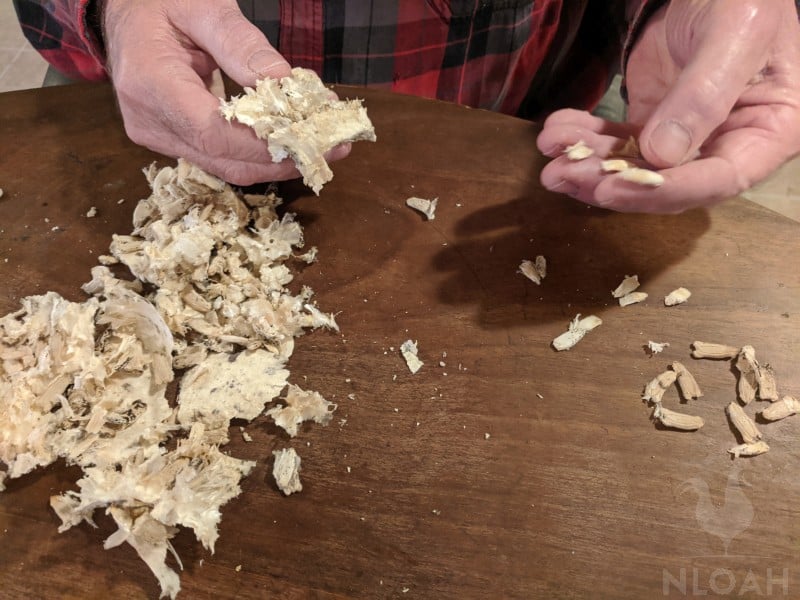
Step 3. Next, the dried flesh and seeds must be removed. Using a metal spoon, clay sculpting tool, or a scalpel can help dislodge stubborn pieces of gourd interior.
It will be more difficult to remove the flesh and seeds if you only cut a small opening into the gourd.
To make the process less frustrating, I strongly suggest soaking the opened gourd in warm water for a half an hour before scooping.
If you use this handy trick, you will have to wait two to three hours for the gourd to dry out completely before moving onto making any decorative elements on the gourd.
Step 4. The interior of the gourd, at least the portion that will be exposed by a hole opening, should also be sanded either by hand, or with a sanding attachment for a power drill.
Making Other Things from Gourds
Gourds can even be turned into lamp bases. This is probably not the most common crafty usage for gourds, but the end result can be stunning.
If you are really artsy and are dreaming of making unique one-of-a-kind gifts from the natural bounty your homestead offers, consider carving onto a gourd vessel you are making.
You can freehand a design onto a gourd, or use a stencil to trace it out. Some beautiful gourds pots have been made that are both painted or stained and feature some carved elements either throughout or only at the open top.
You can make a decorative vessel of a flower pot with gourds, as simple or as ornate as you wish. The woman in the video below purchased a pre-cut gourd and did not grow her own, but the rustic look she created using liquid ink dyes follows the same application process.
You can also include filigree work, macrame, or simple braided twine to make a hanging gourd pot – or a foraging container that slips over your shoulder.
Drums are one of the simplest and most fun musical instruments to make out of a gourd – especially if you are working on the project with children.
Because nearly anyone can keep the beat by tapping on a drum, you do not have to be any type of real musician to pick up this homemade instrument that was grown on your homestead, and have a good time.
If there is a musician in your family or group of homesteading friends, perhaps he or she would love a gourd banjo or a gourd dulcimer to use the next time they play a tune.
These instruments are more intricate to make and require a fairly large gourd, but with some patience and time, making a basic banjo that you decorate yourself, could become a cherished family heirloom.
How to Dry Gourds
How long does it take to dry out a gourd?
The duration of the drying process will depend on the thickness and overall size of the gourd. Typically, you should expect the drying process to take at least one but up to six months.
During the first few weeks of the drying process the exterior skin will harden and the colors of the gourds will begin to set.
You can wash away any mildew stains on the gourds, but many folks allow the black speckle to remain and merely wipe away the dirt because the black spots can create added visual interest.
Once the exterior of the gourd dries completely, then the drying of the interior begins to take place. This process takes roughly four weeks to complete.
After the gourds have dried they can be clear coated to preserve them for extended use, or to be painted and used as decorative elements indoors or out.
Oil based paints, ink dyes, and leather dyes are the best types of media to use to create both bright or rubbed and muted shades on a dried gourd.
You can also use a wood burning tool to make a design or pattern on gourds. Just don’t press too hard or hold the wood burning tool on the dried skin too long, or it will poke a hole into the vessel.
In most agricultural growing regions, gourds will mature and have time to dry before the first snow falls. The easiest and traditional way to dry gourds is to leave them on the vines where they were grown.
A mature dipper gourd is fully capable of withstanding multiple frosts, as well as freezing and thawing multiple times. Although the gourds themselves are hardy against frost, their seeds are not.
If you want to harvest the seeds for planting, the gourds will have to be removed from the outside and hung to air dry indoors.
If the gourds have matured but have not dried by the end of the growing season in the fall, they can be left on the vine to dry out over the winter, and then removed from either the vine or collected from the ground come spring.
Once the gourd plant turns brown and dies, the gourds will naturally fall free and land on the ground.
The exterior skin of gourds is non-porous and hard. Leaving a few inches of the porous stem attached to the gourd better allows moisture trapped inside to escape during the drying process – helping to prevent rotting.
The dipper gourds will continue to dry while on the ground, but you run the risk of rot occurring on the portion of the gourd that touches the ground.
As long as the gourd has matured, you could gently remove it from the vine, and take it indoors to hang dry over the winter months.
Another option to dry dipper gourds (and all other varieties) is to cut the vine each mature gourd is growing upon at the end of fall. Leaving at least a few inches of vine stem the gourd is attached to is highly recommended.
If you have gourds that have not matured by the time the first frost is looming, simply snip them from the vines and enjoy them as temporary decorations – just as you would use pumpkins.
Attempting to dry immature gourds in any manner will always lead to a rotting, stinking, and disappointing mess. Immature dipper gourds are typically a shade of green.
When drying gourds indoors, it is always best to give them a wash with warm and soapy water first.
Some folks use a 1 part bleach (or a DIY natural bleach alternative) to three parts water solution to wash the gourds, then rinse in clean cool water instead. This may help prevent any odor from the drying gourds from infiltrating your home.
Drying gourds in an unheated area, like a barn, garage, or shed is not recommended. A cool environment can cause mildew and rotting of even gourds that were harvested after they matured.
I strongly recommend against drying gourds by placing them on a table or in a similar setting. Hang drying will continuously expose all sides to the air that is required to dry them both evenly and thoroughly, reducing the chances of rot from developing.
If the gourds must be placed on a table to dry, rotate them at least once a day to infuse more air flow into the drying process.
Drying gourds in direct sunlight can fade the color of the exterior skin. I like to gently apply rubbing alcohol to the gourds once they are dry to prep them to better receive paints or dyes and to kill any remaining mold spores.
How to Tell if a Gourd Is Ripe
Gourds are ripe or mature, when the stem that attaches them to the vine turns brown, and dries out.
Using Gourds As Food
Dipper gourds have a bitter taste that appeals to some folks, and is not pleasant at all to others.
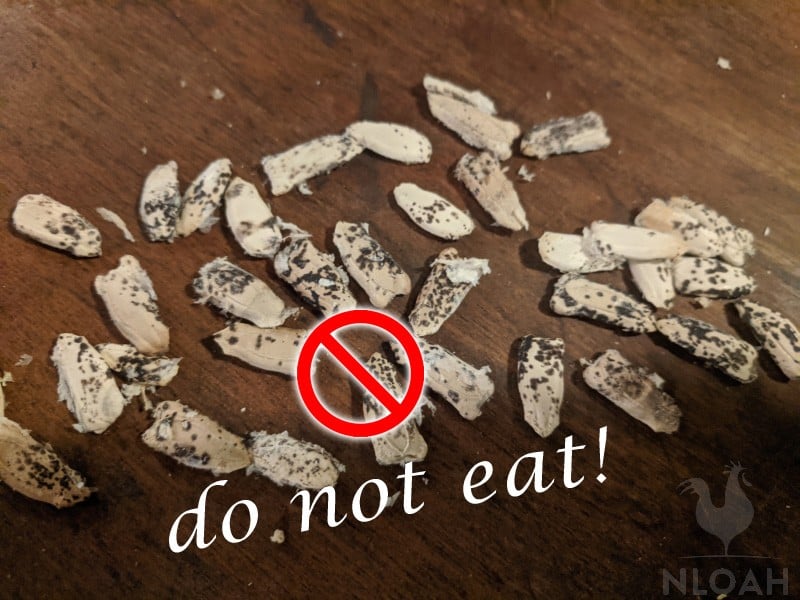
Some folks pitch the seeds with discoloration entirely, but we have had good luck with even speckled seeds producing a healthy and robust new crop of gourd plants.
4 Ways to Eat Gourds
- Gourds can be cooked and eaten like squash when they are young and their fruit is tender.
- Using the fruit from immature dipper gourds in salads as an alternative or enhancement for cucumbers is also common.
- Toast the seeds and cook them like you would risotto rice dish. Throw in a little vegetable or chicken stock, garlic, onions, butter, and stir in some Parmesan cheese for a robust treat – or even use it as a dip for crackers.
- This flavorful and nutrient rich curry is gourd-based. It takes only 20 minutes from start to finish and is simple enough even for a novice cook to pull off.
Gourd Growing Tips
Many varieties of gourds highlighted in this article mature in roughly 120 days.
Gourds prefer a light sandy soil that is well draining.
The area where the gourds will be planted should be turned over to a soil depth of eight inches, then leveled out with a hoe or rake.
Dipper gourds prefer temperatures that range from 70 to 78 degrees F (21 C to 25 C).
Gourds need something to grow against, like fencing or, preferably, a trellis. The vines grow tall and heavy, and need firm support to flourish.
Seeds should be planted in hills that are positioned approximately 8 feet apart.
Plant 6 to 8 seeds in each mound, sowing them 3 inches apart.
Cover the seeds with approximately one half of an inch of good quality soil.
Most varieties of gourd seeds will germinate in one to two weeks.
Once the seed sprouts are about two inches tall, thin out the mounds to only three to four plants per hill.
Gourd plants must be kept watered well during times of dry weather. They need approximately one inch of rain per week in order to be watered naturally.
Do not water the gourd plants from the top down as you will decrease the likelihood of plant disease like rot, from developing. Always water early in the day to allow the gourd plants to dry completely before the evening cold and darkness come.
Gourds prefer full sun to partial shade.
Never plant gourds or any member of the squash family in the same soil spot two years in a row.
The initial gourd shoot that develops will be the “leader” and spawn only male blossoms. The female blossoms will appear on branching laterals and produce the fruit – gourds.
You should aid in the formation of female blossoms by pruning the tip of the leader shoot so it grows to no larger than about 10 feet long.
Next, snip off just the tip every lateral shoot that grows as soon as it produces four leaves. Do not prune the shoots that emerge from the laterals.
Then when each lateral has developed four leaves, snip off its tip, but don’t prune the shoots that form on the laterals.
It is fine to apply two courses of fertilizer to the gourd plants during the growing season, but do not do so and decrease watering when the gourds are nearing maturity and their shells start to become hard.
If you want to shape the gourds as they grow to better define their shape to match your needs, do so when they are still very young.
You can secure rubber bands or twine around various parts of the gourds to train it to grow in the formation or shape that you want.
If you want a true bottle shaped gourd for dipping, place the very young gourd inside of a plastic bottle so it grows into the same shape – cutting away the plastic when the gourd has matured.

Gourd seeds are thick. For best results, I recommend snipping the tip on the narrow end with fingernail clippers, and soaking it in a Lukewarm dish of water overnight before planting.
Gourd Plant Diseases
Alternaria Leaf Blight
Alternaria cucumerina presents yellow to brown spots that develop on older leaves; they also often have a green or yellow “halo” around them.
As leaf blight disease takes hold of a vine, it makes and widens wounds, causing leaves to curl and, ultimately, die.
Leaf blight is caused by a fungus, and usually occurs when the rainfall is sporadic and the temperatures soar.
Watering plants at ground levels to prevent the dampening of leaves, can help curtail or prevent leaf blight – as can rating the planting area to avoid increasing levels of inoculum in the soil.
Scabs
These brown and angular scab-like lesions present on not just the leaves and stems of the plant but on the gourds themselves. They are often a pale green to brownish in color.
Holes form in the leaves when the scab dries out. The fungus that produces the scabs comes from either the soil, or it can be seedborne.
This gourd plant disease often happens when the temperature dips just below 70 degrees F (21 C), and the weather has been exceptionally wet.
To help avoid the development of scabs, plant in only well drain soil, use your favorite fungicide, and rotate cucumber family crops at least once every two years.
Colletotrichum Orbiculare
This particular plant fungal disease targets gourds and other members of the cucumber family. It happens particularly when the weather is humid, hot, and there is a lot of rain.
Lesions that are tan to brown in shade appear on the petioles, older leaves, fruit, and primary stem of the plants.
To help prevent this fungus, rotate the growing area annually, keep the growing area debris free to prevent the fungus from being spread by the wind or top to bottom watering.
Remove any plants showing signs of this fungal disease immediately to avoid cross infection.
Powdery Mildew
This plant fungal disease is caused by poor sun exposure and poor air circulation between the plants. It presents as white spots on the underbelly of leaves, causing them to yellow.
Powdery mildew most often occurs during times of high humidity and dry weather.
To prevent powdery mildew, give these widely growing plants plenty of room, sun. and only use sanitized gardening equipment on the vine plants if you suspect powdery mildew of being present anywhere in your growing plot.
Downy Mildew
Pseudoperonospora cubensis presents as brown and angular wounds on the top side of leaves. Gray mold forms on the underbelly of the leaves, as well as purplish to gray spores also form on the underside of the leaves.
The fungus turns the leaves brown before killing them. Typically the dead leaves Angular brown lesions on the upper side of leaves; purple to gray spores and gray mold on underside of leaves; brown leaves; dead leaves that remain attached.
Downy mildew often develops when plants are overcrowded and/or watered from top to bottom instead of at the base.
Septoria Leaf Spot
Septoria cucurbitacearum is also a fungal disease. White to beige small water filled spots appear on the leaves and cause lesions that develop a brown border. Eventually the lesions dry up and crack.
These same spots can also appear on the fruit of the plant. Septoria leaf spots can live in garden debris for more than 12 months.
To help prevent this yield killing disease from developing, rotate crops at least every two years, keep weeds and other garden debris cut back, and treat the gourd vines with fungicide.
Cucumber Mosaic
This virus causes plants to become deformed and stunts their growth. Cucumber mosaic presents as a yellow pattern on the leaves that cause them to curl toward the ground.
It is not uncommon for afflicted plants to grow green blossoms instead of white or yellow. Any fruit that develops will also be discolored and stunted in size.
The virus is transmitted by aphids and contaminated garden tools. Keeping the aphids population in check should substantially decrease the chances of your gourd crop becoming afflicted with the cucumber mosaic virus.
Squash Mosaic – Plants afflicted with this disease typically get blistered and speckled leaves, stunted growth, poorly developed fruit – which often has speckled skin, and protruding veins on the margins of leaves. This disease is spread by striped cucumber beetles and infected seeds.
Fruit And Crown Rot – Gourd plants stricken with this disease seem to wilt overnight. The brown lesions that appear cause the fruit to rot as they stunt the overall growth of the plant.
This type of rot typically occurs during times of heavy rain and when the crop was planted in soil that was not well draining enough.
Gourd Pests
Squash Vine Borer
These destructive insects are the primary gourd pest. They damage the stems, leaves, and blossoms of gourd plants.
Squash vine borers spend the winter burrowed into the dirt and under leaves on the ground. They can also transmit bacterial wilt.
Cucumber Beetles
These bad bugs eat the leaves, fruit, and blossom flowers of plants.
Aphids
These tiny pests transmit the mosaic virus.
Squash Bugs
This type of destructive insect is also commonly called “stink bugs.” These bugs eat the vines, leaves, and fruit from plants.
They are highly damaging insects that piece the plants a copious amount of times to such is dry of sap. The saliva they release contains a bacteria that is toxic to all cucurbit plant varieties.
Cutworms
These curly bugs are the caterpillar larvae of moths. The mature moths do not cause damage to plants but the cutworms kill young crops by munching down upon the stems at soil level.
To help curtail gourd pests, take advantage of natural complimentary companion plants. The best destructive insect deterrent plants for gourds include: broccoli, radishes, marigolds, catnip, dill, Buffalo Gourd, and tansy.
Final Words
Although it may seem a little odd at first to cultivate a crop that you may or may not even eat, there are numerous ways to enjoy gourds on the homestead.
If you are a homesteading and homeschooling family, take the classroom both outdoors and onto the art table by tasking the children with tending to this intriguing crop that they can help turn into a useful item, artwork, or special gift.

Tara lives on a 56 acres farm in the Appalachian Mountains, where she faces homesteading and farming challenges every single day, raising chickens, goats, horses, and tons of vegetables. She’s an expert in all sorts of homesteading skills such as hide tanning, doll making, tree tapping, and many more.