Bugs in the garden is not necessarily a bad thing. Sure, there are vile, destructive insects that want all of your growing groceries for themselves – but then there are other bugs that yearn to dine upon the bad bugs.
Many bugs that are good for your garden are probably already living in the growing plot, just not in large enough numbers to ward off the bad bugs.
Buying bugs to introduce into your garden is likely not something you though to factor into your spring growing – I know didn’t for a long time. While doing some research last year for new, natural pesticides and herbicides to use in my garden to thwart Japanese beetles, I stumbled across an intriguing report about beneficial insects. Once I delved into the subject, I was eager to give good bugs a go in our gardens.
Factoring the purchase of good bugs into your gardening budget can help you save not only your crops, but perhaps even a substantial amount of money (and time) spent applying pesticides on the plants throughout the growing season.
Top 10 Beneficial Insects For Your Garden
Nematodes
These microscopic good bugs live underground, spending their time searching for and then killing in excess of 230 different breeds of destructive insects. Nematodes are exceptionally hardy, worm-like creatures that can survive in almost any requirement.
Nematodes are one of the few natural predators of Japanese beetle in the United States. To be more exact, nematodes kill the eggs and growing larvae of the highly destructive beetles before they can reach maturity and burrow out of the soil… and onto your crops.
These beneficial insects also hunt and consume fungus gnats, fleas, and borers. As soon as the nematodes are released in your garden, they begin searching for their prey – they are voracious eaters. Nematodes track their next meal by sensing out the heat and the carbon dioxide they release.
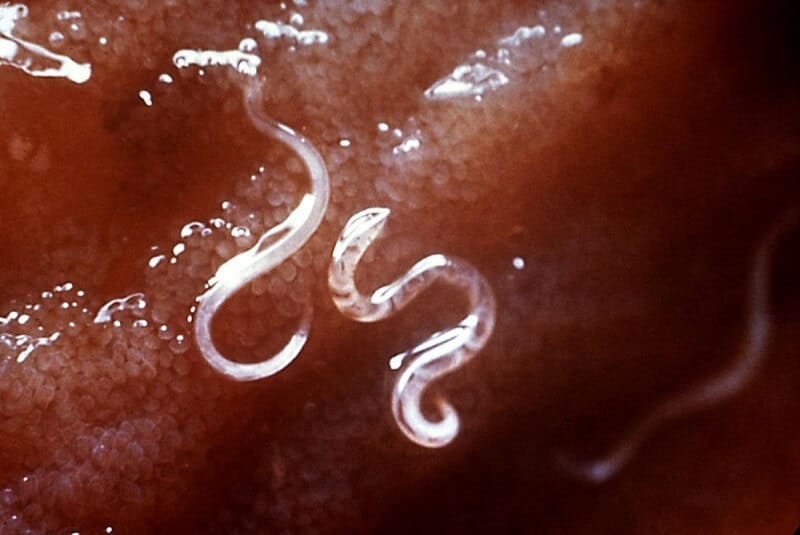
Once the prey is found, the miniscule worms enter the body of the bad bugs via any open orifice, and secrete bacteria that will kill their host over the course of the next 48 hours.
As the host dies, the nematode eats the decaying remains – usually fellow microscopic worms show up for the pest eating party, as well. The released bacteria will not harm the soil, your growing crops, or non-host insects.
Introducing nematodes into your growing area will not cause harm to beneficial insects that are already living there (or are introduced) such as ladybugs or earthworms.
Nematodes work quickly, but the drop in destructive bug populations will not happen overnight. Within a week or three you should notice a distinct drop in the garden pest population in your growing pots and planters.
The nematodes are released directly into the garden ground soil or potting soil in growing containers. They prefer to live in moist dirt to facilitate easy freedom of movement when tracing their prey.
It will take roughly 10 million nematodes to effectively treat a growing area of 550 square feet. This sounds like a whole lot of beneficial bugs – and possibly a lot of money, to invest in this natural pesticide alternative. But, because nematodes are so small, 10 million of the hardy little bugs will fit into a 1 pint container. It will cost approximately $30 to purchase the number of bugs needed to treat the space noted above.
How To Introduce Nematodes Into Your Growing Area
- Gently disperse the nematodes in the container in garden, or growing containers.
- Water the dirt after scattering the nematodes so they can easily and quickly burrow inside and not get scalded by the sun. Releasing the nematodes in the early morning or late afternoon will also help protect them from the heat.
Fungus Gnat Killers
These good bugs are small mites that primarily hunt fungus gnat larvae, thrips, springtails, and similar soil-borne larvae.
Even adult fungus gnat killers are incredibly hard to spot with just the eye due to their petite stature. They tend to dell on top of the dirt, and build their homes in moist ground. These good bugs puncture the larvae of their prey and eat their inners.
It will take roughly 25,000 fungus gnat killers to treat a growing space of 5,000 square feet for a cost of approximately $75.
How to Introduce Fungus Gnat Killers Into Your Growing Area
- Gently shake the vial fungus gnat killers shipping container to dislodge them from the damp sponge inside.
- Spread the beneficial bugs evenly over the soil being treated. Never spread the good bugs directly onto the stems of the crops growing in the garden. You want to border the disbursement of the fungus gnat killers around the crops you are trying to protect so they can kill the larvae of bad bugs before they mature and get anywhere near your plants.
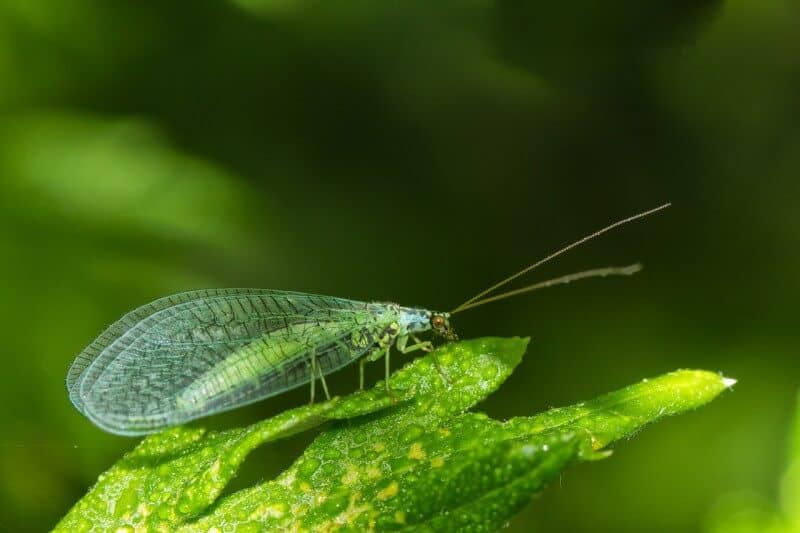
Green Lacewing
Green lacewing larvae dine up a broad range of soft-bodied harmful insects and their eggs, as well as mites. These powerful beneficial bugs are also often referred to as “aphid lions” and “aphid wolves.”
Adult green lacewings will compete with honeybees for nectar and pollen – their sole dietary source once they mature. Because it is only the larvae of these good bugs that help destroy destructive insects, you must do a bit of math and make sure the population roaming about in your garden is not too large.
A proper amount of the flying green lacewings placed into the growing area can kill more than 200 aphids in just seven days. Again, do a bit of math before releasing these beneficial bugs into the garden. If they run out of their natural food source, the green lacewings will cannibalize the other members of their own colony.
These beneficial insects typically hunt aphids, and lay their eggs among them so the offspring will have an ample food source once they hatch. It is unlikely you will see the tiny eggs, but they are laid on plant stalks and the underside of leaves.
Once the green lacewing eggs are hatched, the larvae will feed upon bad bugs for 21 days before spinning a cocoon to live inside for the five days it takes them to mature.
It will require approximately 1,000 green lacewings to treat roughly 1,000 square feet of growing space – for a cost of around $15.
How To Introduce Green Lacewings Into The Growing Area
- Release just a small portion of the green lacewing eggs at a time in varying locations around the garden.
- Turn and gently shake their shipping container before opening it.
- Spread the green lacewing larvae and the natural matter they were shipped around the growing area.
- Repeat this same process in about two weeks, spreading the rest of the green lacewing eggs about 14 days later.
Pirate Bugs
These little bugs are mighty predators in the garden. They hunt and feed upon thrips, aphids, spider mites, and caterpillar eggs both during their nymph and adult stages.
It is not uncommon for mature pirate bugs to eat a minimum of 30 spider mites every single day. The pirate bugs use their long and sharp beak to impale the body of their prey and then such them dry – vampire bugs might have also been a great name for these little garden savers.
Pirate bugs typically lay their eggs on the underbelly of plants to better protect them from predators. Because it only takes around 21 days for an egg to hatch and reach maturity, it is possible to have as many as three generations of these beneficial insects call your garden “home” during just one growing season.
Expect these beneficial insects to use your corn, tomato, and soybean plants as their homes – but they will not harm the plants. Pirate bugs also lie to lay their eggs amid alfala, clove, ornamental flowers, and daisies.
You will need roughly 1,000 of these garden helpers to treat up to 20,000 square feet of crop cultivation space – at a cost of around $170.
How to Introduce Pirate Bugs into the Growing Area
- Gently shake and turn the pirate bugs container before opening.
- Spread the natural matter inside the container over the plant leaves evenly – especially on crops that these beneficial bugs favor.
- Spread out the pirate bugs so you are developing individual colonies of about 75 to 100 bugs each – this encourages avid reproduction.
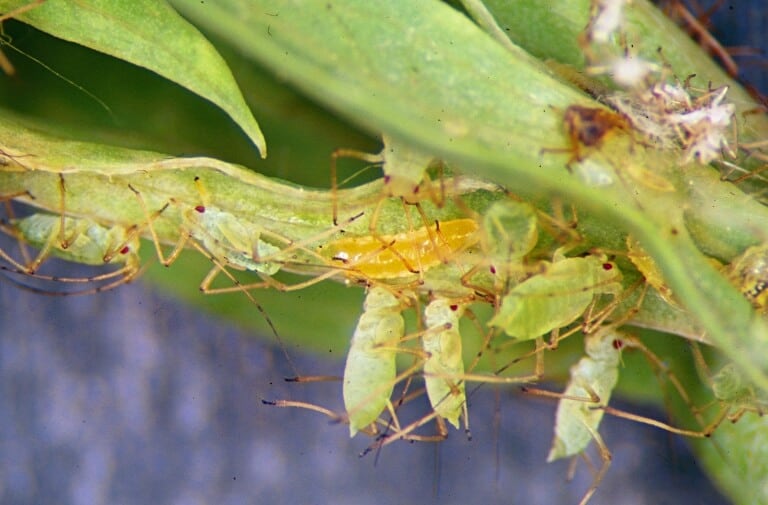
Aphid Parasites
This variety of good bugs are actually parasitic wasps – they do not sting. Aphid parasites lay their eggs inside of aphids – causing them to first mummify and then die.
Aphid parasites track their prey by sniffing out the honeydew scent secreted by the aphids.The bad bugs also send out what is often dubbed a distress signal to warn their colony members the parasites are invading. Sometimes the panic that ensues after the warning signal goes out causes aphids to rush off of a plant and fall to their deaths.
It will take around 1,000 aphid parasites to treat a 7,000 square foot gardening space – for about $100. The parasitic wasps can also be released inside of greenhouses – but remember, they are capable of laying up to 300 during their short lifetime.
How To Introduce Aphid Parasites In Your Growing Area
1. Spread the aphids eggs and natural packing matter evenly over the topsoil in the growing area. Do not release all of the parasites at once, but stagger the release to ensure colony longevity within your garden.
2. Repeat the release about once every two weeks until all of the insects are gone.
3. It is best to release the parasitic wasps should not be released when the temperature is above 80 degrees F (26 C) to avoid scorching.
4. You should find mummified aphid remains in your growing area about 10 to 14 days after releasing the parasites.
Soldier Bugs
If you have trouble with corn earworms, flea beetles, gurbs, Mexican bean beetles, beet armyworms, corn borers, potato beetles, caterpillars, or the cotton bollworm, investing in soldier bugs would be wise. They prey on about 100 different types of destructive insects.
These good bugs kill poe a sword like proboscis into the bodies of their prey as they suck out their bodily fluids. Soldier bugs are extremely mobile and maneuver around in “brigades” to invade the colonies of their favorite prey.
Soldier bugs patrol their territory both on the ground and by air.They fly onto each plan to eat any bad bugs they can find. Soldier bugs lay large clutches of about 30 eggs on plant leaves – laying up to 1,000 eggs before dying.
These good bugs are staunch predators even when they are nymphs. Every nymph soldier bugs has a voracious appetite during four of its five of nymph states. They stick close to the egg clusters when so young, but still search for prey.
Adult female soldier bugs up to eight weeks – males typically die sooner. These highly beneficial insects can also be released in greenhouses. It will require approximately 250 soldier bugs to treat 250 square feet of gardening space – at a cost of about $160. It takes two soldier bugs to protect one square foot of growing space during a heavy pest infestation.
How to Introduce Soldier Bugs into the Growing Area
- Disperse the soldier bug eggs on the leaves of plants near where their prey is known to exist, or on crops they might invade.
- Do not release soldier bugs during the heat of the day, they will scorch, It is best to do it shortly before dusk or early in the morning.
- Eggs will hatch quickly, and the nymphs should start going to work on their prey rapidly.
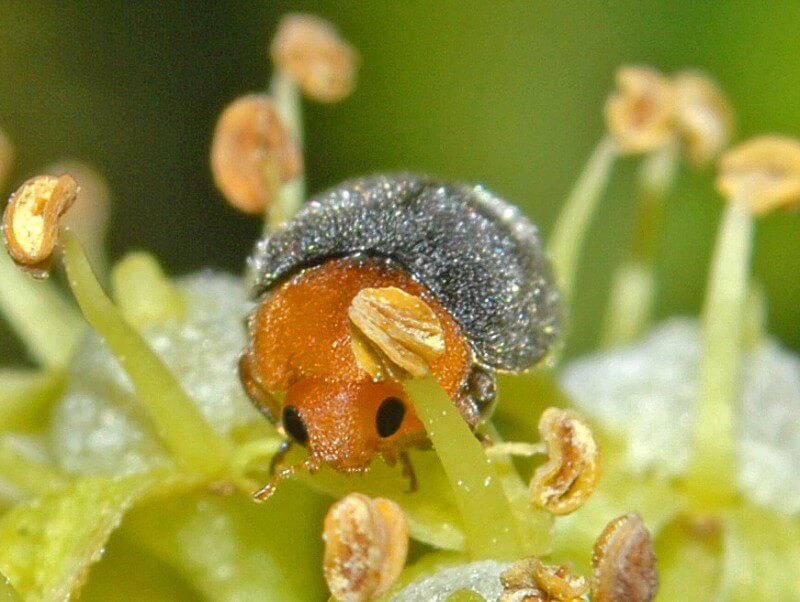
Mealybug Destroyer
Mealybug destroyer beetles hunt aphids and other soft-bodied insects. They were first introduced in the United States as part of a citrus pest biological control program – they hail from Australia.
These beetles are deadly to bad bugs as both mature and larvae. Mealybug destroyers hunt for clutches of eggs of their prey and then lay their own egg clutches nearby.
The purchased larvae will emerge from their eggs in about five days, and immediately begin hunting. Once mature, a female beetle will lay about 400 eggs in her 60 days of life.
The mealybug destroyers should be introduced into the garden area during the early spring, before the larvae of destructive bugs get the chance to hatch. These beneficial insects are typically most active when the temperature is at least 70 degrees. They have been known to mistake their own larvae for that of their prey.
It generally requires about 100 crypts of mealybug destroyer eggs to treat around 50 plants, at a cost of $85.
How To Introduce Mealybug Destroyers Into The Growing Area
- Release the mealybugs at a rate of approximately five beetles per infested or vulnerable plant.
- Water the growing area where the predatory beetles will be living before their release.
- Gently shake the contents of the vials in the crypt over the dampened soil.
- Do not release the mealybug destroyer beetles during the heat of the day. Releasing them during the early morning hours of around dusk should prevent them from getting scorched.
- If you are experiencing a large infestation, a second round of releases might be necessary.
Thrips Predator Mites
These mites consume both the eggs and larvae of thrips. They attack egg clutches and larvae upon discovery, which in turn prevents numerous thrips from reaching maturity, and dining on your crops.
An adult female thrip mite can lay up to three eggs every day, keeping the population of beneficial insects increases throughout the growing season. Mature thrip mites of either sexes are each capable of eating three mature thrips on a daily basis.
Thrip mites thrive in high humidity, and can live both outdoors or in a greenhouse. Thrip mites prefer living in conditions where the temperature is a minimum of 68 degrees with 75% humidity for the majority of the day.
Once thrip mites had ridden your garden of thrips, they will dine upon both spider mites and pollen. Introducing the beneficial mites early in the spring before the growing season starts should help you deter thrips, and be able to spot their emerging presence more easily.
Nymph mites will start feeding on thrips shortly after emerging from their eggs. But, it does take a bit of time for their population numbers to grow large enough to combat a high presence of their prey.
Thrip mites lay their fragile eggs on the underside of leaves in the fine hair that exists on the green matter. The typical thrip mite life cycle lasts just about three to four weeks. They tend to spend all of their time on the leaf veins or stems when not hunting for thrips – but you would need a magnifying glass to see them.
It will take about 50,000 thrip mites to treat 2,000 square feet of garden space – at a cost of about $85.
How To Introduce Thrip Mites To The Growing Area
- Gently turn and then shake the container the thrip mites were shipped in.
- Spread the mite eggs on plant leaves throughout the garden.
Aphid Predators
The aphid predator midge tracks its prey by the honeydew scent of it secretes. Adult aphid predator midges lay their eggs in colonies that relentlessly attack once they develop into larvae.
Even during the larvae stage, these beneficial bugs are expert killers. The aphid predators are capable of devouring more than 60 different varieties of aphids in both outdoor gardens and greenhouses.
The aphid predator midge typically feeds at night. During the daylight hours, the larvae hide on the underside of plant leaves. It takes 72 hours for aphid midge larvae to hatch. The larvae cycle through all three larvae stages in only two weeks – eating aphids throughout this portion of their lifecycle.
When the aphid midges hit the pupal stage, they spend about two weeks underground and then emerge as adults.
To treat about 10,000 of growing space, you will need around 2,000 aphid predatory midges – at a cost of about $135.
How To Introduce Aphid Predatory Midges To The Growing Area
- Gently turn, and then shake and turn the container the aphid destroyers came in.
- You can either hang the container between crops plants to protect the eggs from ants, or put it on the ground between plants. Never scatter the midges into the garden, the egg will be destroyed by the shaking or ants.
Releasing beneficial bugs into your gardening areas comes with both pros and cons. But in my opinion, based on my past experience, the pros outweigh the cons.
If you make certain that you do not purchase more beneficial insects than can work your growing areas, the population balance should remain under control. If you have more good bugs than bad bugs to feed them, the various species will often begin consuming their own or just leave.
When good bugs leave an area, your garden crops are once again unprotected against predatory. Another aspect you must consider when deciding the breeds and quantities of good bugs to purchase, is the pollen and nectar they can consume.
When mature beneficial insects begin competing with honeybees for their food source, the bees can flee the area for more lush pasture – leaving your crops without the necessary little pollinators to help them grow.


Tara lives on a 56 acres farm in the Appalachian Mountains, where she faces homesteading and farming challenges every single day, raising chickens, goats, horses, and tons of vegetables. She’s an expert in all sorts of homesteading skills such as hide tanning, doll making, tree tapping, and many more.