I don’t know about you, but I can honestly say there’s nothing cuter than an adorable baby duck. That’s reason enough to get them if you ask me! But ducklings will eventually grow up into adult ducks, and if they’re going to get there, they need lots of help from you…
Ducks are notable for being very healthy, especially compared to chickens, but caring for ducklings is trickier than you think. If you think you’re going to bumble your way through it or figure it out as you go, you’re going to end up with a lot of sick and dead birds on your hands.
I know you don’t want that, so for your sake and the sake of the little ones, you need a guide. I’m here to help with everything that you’ll need to know to take care o baby ducks on your homestead.
Should You Buy Ducklings or Hatch Your Own?
I get asked this question all the time by prospective, first-time duck owners. Should you buy ducklings, or hatch your own fertilized eggs in an incubator?
Let me cut straight to the chase: if it’s your first time, I recommend in the strongest terms that you buy ducklings from a hatchery or breeder and then bring them home to raise them. You do need to get them young so they can bond with you, but trying to hatch them is fraught with peril.
Even with an incubator, a lot that can go wrong during development, and duck eggs have their own specific needs requiring turning, humidity, and temperature.
Save yourself a ton of grief and a ton of disappointment by going with newly hatched ducklings.
How Fast Do They Grow?
Ducklings grow fast. Really fast! At least, they grow faster than you’re expecting. They grow much quicker than chickens, I can tell you that.
The actual time to fully mature varies from breed to breed, but generally, by no later than 8 weeks, ducklings have all the signs of physical maturity and a complete set of juvenile feathers.
A month after that, they will molt and grow their adult feathers, looking indistinguishable from other adult ducks of their kind…
So, a good rule of thumb is to plan on caring for your ducklings full-time for no less than 8 weeks. They might be ready to go outside permanently by as early as 6 weeks, but this just depends on the breed.
A rule of thumb is that your smaller breeds like Mallards will grow and mature quicker, whereas larger ones like Rouens will grow more slowly.

Setting Up the Brooder
The very first thing you must do if you want baby ducks of your own, even before you get them, even before you think about getting them, is setting up a brooder.
A brooder is not an incubator, though beginners sometimes confuse and use the two terms interchangeably. It’s simply an enclosure that keeps ducklings contained, safe and warm, and provides them with a place to eat, drink, and sleep. That’s it.
Brooders can take the form of a DIY enclosure or other space, or they can be bought as a kit or ready-made unit that you can set up and then simply place your precious babies in when they come home.
The following sections all cover important considerations about brooder selection, placement, and setup, so don’t skip them. If the brooder is inadequate for keeping your ducklings, they’re going to be stressed, and that can cause them to get sick… or worse.
Placing the Brooder Properly
Spend some time thinking about where the brooder will be best in your home. An ideal spot is quiet and out of the way so ducklings won’t be stressed, and a spot that is protected from all drafts. You never want to scare, startle, or chill the babies.
Evaluate after you pick a spot and set it up: You might place the brooder only to realize that the location you picked is inadequate or it won’t work for your family for whatever reason.
Ducklings MUST Be Protected from Pets!
If you’ve got other pets in the home, be it a dog, cat, rodent, or even some other kind of bird, you must take all precautions to protect the ducklings from them.
I don’t care how docile and friendly this pet is. I don’t care if they’ve never hurt a fly before. Cheeping ducklings activate prey drives in all kinds of animals.
If you’ve got other animals in the home, you must surround the brooder entirely with no larger than half-inch hardware cloth or similar durable mesh to keep the ducklings in and other critters out.
Skip this step at your own peril!
Improvising a Brooder
As mentioned, you can buy a brooder or a brooder kit if you really want to, but it’s easy to improvise your own and save some money.
You can use a large plastic tub or box or, my favorite, an unused bathtub if you have one to spare. Anything that is easy to rinse and clean is a bonus.
You can also set up walls on the floor to contain the ducklings as long as you can put down enough bedding or other insulation so they don’t get a chill from the surface. More on that in a moment…
Whatever the case, you’ll need to provide enough space for your ducklings…
When they are hatchlings of less than a week old, they’ll only need about 30 square inches per duckling. This is roughly the size of a standard postcard. They can get by with a little less as long as they can move around freely, but overcrowding quickly leads to stress and health problems.
Keep in mind, ducklings grow fast, and they will need more space soon so your brooder must be expandable or it must change to a different enclosure altogether.
By the time the babies are several weeks old, they won’t be little fuzzballs anymore: they’ll need a few square feet per, at that point. Plan accordingly!
Consider a Backup or Duplicate Brooder
A nice luxury, but not strictly necessary, is having a backup container or enclosure on hand and ready to go. This can make your life a lot simpler since you can transfer the ducklings right into it and do what you need to do to clean and refresh the other.
The Bedding
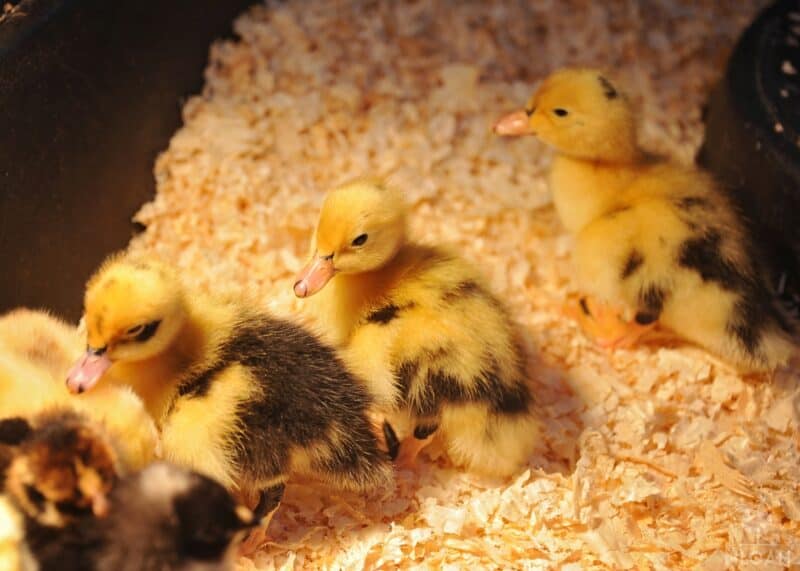
If you want to go with natural bedding, the very best bet are large flake wood shavings, specifically aspen or pine. Aspen is excellent because it produces very little dust, but pine is acceptable, more available, and more affordable.
Do not use cedar or any other wood, or any other kind of material, that contains substances that might be irritating. Ducklings are incredibly susceptible to all sorts of illnesses and especially respiratory tract problems.
Should You Use Absorbent Layers or a Mesh Floor?
Another possible approach that some people prefer is using layers of absorbent material on the floor of the brooder to make cleanup easier and also save money compared to using natural bedding above.
Ducklings are incredibly messy and you’ll be burning through a huge supply of whatever you put on the bottom – so it makes sense to save cash if you can.
One of my favorite money-saving hacks is to put down a thick layer of newspaper on the bottom of the brooder followed by an upper layer of that rubberized tool drawer liner that kind of looks like a checkerboard pattern in miniature.
This allows them to walk around without slipping or wading through wet, soggy newspaper while also being easy to rinse and clean.
You’ll need something warm for them to sleep on though, so place some dry, clean cloths at the far end, opposite their food and water bowl, for them to snuggle into. Be prepared to change those out regularly, too!
Placement is Important
Your brooder, whatever it is and however large it is, should be placed in a place protected from drafts. Windows, air conditioning vents, doors, drafty exterior walls, whatever.
One of the leading causes of death for young ducklings, particularly those two weeks old or younger, is getting chilled. Take this seriously!
Be Prepared to Clean Up Daily
I’ve already said it a couple of times, but it bears repeating. No matter how you set your brooder up, no matter what kind it is, no matter what sort of bedding you use, be ready and willing to clean it up daily, or maybe even twice a day.
Ducklings poop constantly, get water and food everywhere, and make a mess at all times. Leaving them in damp, unsanitary conditions will quickly lead to sickness which will burn through your young flock and leave many of them crippled or dead.
Keep it clean, keep it dry, and change out bedding, food, and water regularly. We’ll talk more about food and water in just a few sections.
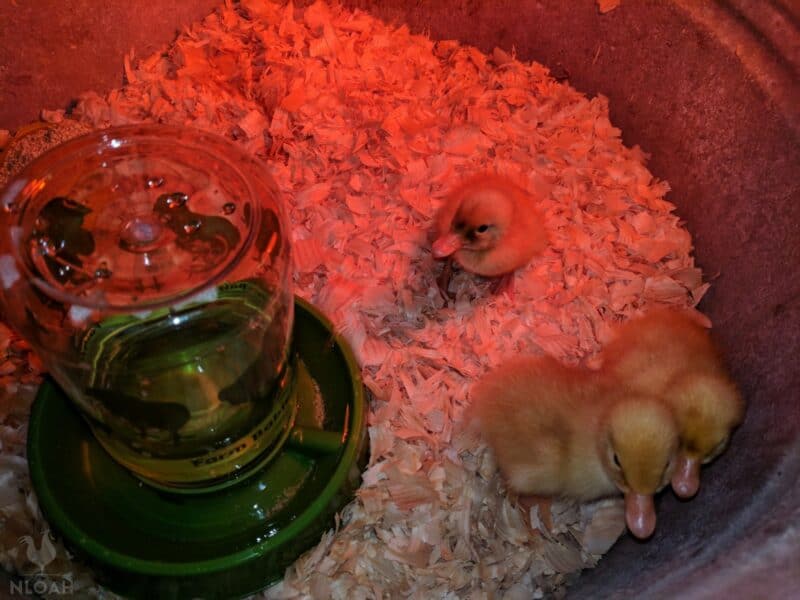
Heat Lamps and Ducklings: Keeping Your Babies Warm
Part and parcel of any brooder is a heat lamp for keeping ducklings warm. Ducks are famous for their resistance to cold, wet weather but that only comes later once they are mature and have their adult feathers.
Prior to growing up and getting their feathers in, they won’t be able to regulate their body temperature, and cold can kill them like I said.
However, installing a heat lamp properly and placing it correctly to provide enough heat, but not too much heat, is crucial. Consider all of the following tips:
A Thermometer is a Must
Guesswork won’t cut it when it comes to proper brooder temperature. Your babies will give you clues if they’re warm enough or too warm, but if you have a growth schedule to go by you won’t have to guess as long as you have a thermometer installed.
Brooder thermometers are not expensive and very easy to use. Install them inside the brooder on the side where you direct the heat lamp so you can get an instant, accurate reading of what the ambient temperature is.
Are Heat Lamps Mandatory?
Heat lamps are not mandatory, but heat sources are. Heat lamps are what most duck owners rely on because they are the cheapest option, and among the most versatile tools to help keep your ducklings warm.
Regrettably, they’re also quite prone to starting fires when they fall over or come into contact with any sort of flammable material. If you fail to secure a heat lamp, or it there is an accident, it can kill your babies from heat stroke.
Any heat lamp you choose must have a fully secured mounting system that will eliminate any chance of it falling over or slipping.
You should also buy a specialty red bulb for it that’s either 125 or 250 watts. The red bulb is important because it allows you to leave it on at night without disturbing their sleep.
Make sure you position the heat lamp so that it provides a hotspot of warmth on one side of the brooder but not the entirety of it. This will allow your ducklings to move away from it if they get too warm.
Heat Source Alternatives
If the idea of a heat lamp makes you too nervous, don’t worry. There are alternatives you can use. Brooder heaters are one of the very best, as they’re designed to provide plenty of warmth for ducklings with none of the safety hazards inherent to heat lamps.
Good ones won’t be able to tip over or fall, and if they do they have auto-off functionality to prevent fires and other accidents.
Heat pads can also be used, but you’ll need to babysit them to make sure they don’t get too hot or shut off automatically, leaving your ducklings shivering.
If you aren’t going with a brooder heater or a heat lamp, make sure you check out our other articles on providing heat for ducklings for more ideas.
How Long Do They Need to Stay Under a Heat Lamp?
Ducklings need constant heat for at least the first three weeks of life. Once they hit week 4, assuming the ambient air temperatures don’t dip below 69° F (20° C), you can start shutting off the heat at night.
Remember, though, that anytime temperatures start dipping below the baselines for their stage of development, they will need heat to prevent a chill!
Keep that in mind for now, I’ll give you a week-by-week guide here in just a minute…
Can Ducklings Survive Without Heat? How Long?
As a rule, not very long, but it depends on their age and how cold we are talking about.
Those first two weeks are a real doozy as mentioned, and in cold conditions without their heat source ducklings might die in an hour or less. If it is just chilly they might be miserable for some time before getting sick and then expiring later. It just depends.
But no matter what happens, do everything you must to keep your ducklings warm: as soon as they get cold they will start cheeping loudly and insistently to let you know.
Do Heat Sources Need to Be Turned On 24/7?
At first, yes. Ducklings must be kept comfortably warm at all times, 24/7, for that first week to two weeks of life depending on how quickly they grow.
But as they grow, they can tolerate lower temperatures for longer periods. Accordingly, you can start turning off the heat during the warmest part of the day as long as they are comfortable. Once again, I’ll give you a complete guide for that here soon.
Pay Close Attention to How Your Ducklings Act in the Brooder
How can you tell if your ducklings are too hot or too cold? I said earlier that they will give you indicators, and if they are truly uncomfortable you can’t miss them.
If your precious babies are too hot, you will see them moving as far away from the heat lamp as they can get. This is because they’re seeking the coolest part of the brooder. You need to raise the lamp to lower the temperature or change out the bulb for a lower wattage one to reduce output.
If the ducklings are clustered tightly together directly under or on the heat source, you’ll know they are too cold. They are trying to get as warm as they can under the circumstances!
If you have the brooder temperature just right for their comfort, the ducklings will be spread out, exploring, napping, eating, drinking, and so forth. When they want to warm up, they’ll move under the heat for a time and when they are warm enough they will move away.
Don’t forget to open your ears, also: ducklings that are distressed will cheep loudly and insistently! That’s always your cue to come running!
Caring for Your Ducklings, Week by Week
The following is a rough guideline for keeping your ducks warm enough while also allowing them to get some time outdoors with supervision. Remember, to reduce the temperature in the brooder you need to turn down the heater or raise the heat lamp up higher so the hotspot isn’t as intense.
Week 1: newly hatched ducklings are highly vulnerable to chilling; they must have steady 90°F / 32°C temperatures at all times. Keep them in the brooder unless you’re cleaning it, no other exceptions!
Week 2: ducklings are growing steadily, but still need plenty of warmth. Adjust heater temperature to 83°F / 28°C. Ducklings can take short, supervised swims in room-temperature shallow water, but must be put back into a warm, dry brooder for safety.
Week 3: ducklings are noticeably larger and feathers are starting to grow in. Brooder temperature should be between 75°F and 80°F (23° C and 26° C). If outside temperatures are no cooler than a 10° difference with the brooder, short visits outside are okay.
Week 4: ducklings are considerably more resistant to cooler temps than previously. Brooder temperature should be around 70°F (21°C) or slightly higher. If nights are no cooler than 68°F they don’t need heat at night.
Week 5: brooder temperature can be reduced to 62°F (16°C). Ducklings can spend a lot longer outdoors as long as the temperature is mild and they have an enclosure to keep them safe.
Week 6: quick-growing breeds will have adolescent feathers by now. Slow-growing breeds will be right behind them. Brooder temperature should be kept right at 55°F (12° C). Note ducklings can tolerate short periods of cooler temps indoors or out, and they are ready to spend all day outdoors if temperatures don’t drop below this point.
Week 7: ducklings can handle 50°F (10° C) at all times. They are ready to go outside permanently as long as they have a coop to stay in and nighttime temperatures don’t drop below 50°F.
Week 8: Except in the case of the slowest-growing breeds like Rouens, your ducklings are now true adolescent ducks and are ready to go outside and join the flock as normal. They can resist truly frigid temperatures now and will be as waterproof as adults.
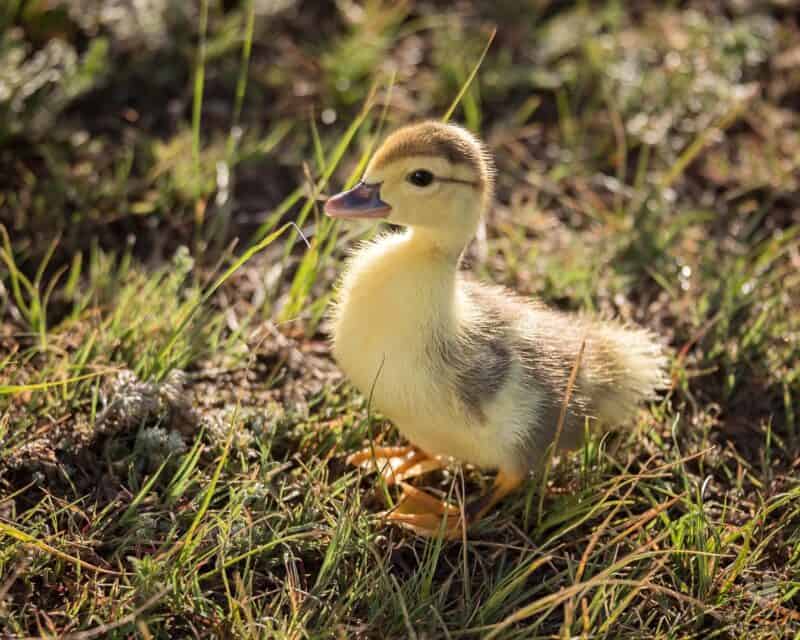
How to Take Your Ducklings Outside
Taking your ducklings outside for the first time is always fun, but you’ve got to be cautious. They must never be allowed to run off or enter deep water where you can’t rescue them if they get into trouble.
There’re a couple of rules of thumb that will make this process safe and fun…
The first is to only take them outdoors when they can handle it according to the weekly guidelines above, and in any case, the outdoor temperature should be no more than 10° cooler than their usual brooder temperature. Temperature shock is a thing and can be devastating!
Also, pay attention to them and if they seem like they’re getting distressed, bored, or tired, bring them back in and put them in the brooder so they can rest.
Lastly, I strongly recommend you put them inside a mesh baby playpen, puppy enclosure, covered run, or similar structure to keep them contained and also keep other animals off of them. Make sure to keep an eye out for predators!
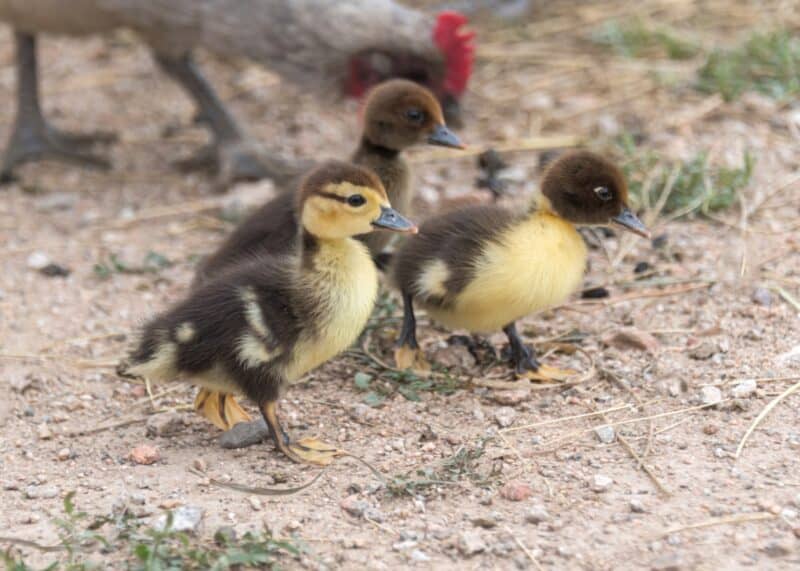
When Do Ducklings Start to Get Their Feathers?
Technically, ducklings have their feathers when they are born, but those are in the form of fuzzy down. After that, their larger, proper feathers begin to come in quite quickly, starting between week 2 and week 3 (depending on the breed).
This will start with the breast, wing, tail, and keel feathers at first but the rest of the body will fill out as time goes on.
Around weeks 6 and 8, your ducklings will look very grown-up, but they will only have their juvenile feathers. These are typically dull and not very appealing, but they should be recognizable for breed standards.
Anywhere from week 10 to 12, your ducklings won’t be ducklings at all anymore because they will have molted and replaced those teenage feathers with a full set of adult feathers!
Do Ducklings Need Water to Swim In?
Yes, they do, but you’ve got to be very careful about introducing them to it. I like to wait until week 2 to let them get in the water, and all water sources must be shallow, room temperature, and have a provision for your ducks to easily wade out if they are tired.
This is because ducklings, though they can swim, aren’t waterproof. They can chill easily and also get waterlogged, making it hard for them to navigate in the water.
If you’re going to give them swim time before they are ready to start spending significant stretches outdoors, have a separate, shallow dish that you can take them out and put them in to let them paddle around.
Once they start to get tired, remove them, gently dry them, and then put them back in a warm brooder.
When are Ducklings Ready to Enter the Water for Real?
Depending on the breed, once they’re 5 weeks old or a little older you can let them decide when they are done swimming as long as you are sure they have an easy way to get out of the water.
Note that by this time they will be big enough that they’ll be swimming in the bathtub or in a kiddie pool; a shallow pan or tub of water is just not going to do it!
What and How Much Do You Feed Baby Ducklings?
Baby ducklings are huge eaters. They grow fast, have intensive calorie and protein requirements, and must get an ample supply of vitamins and minerals in order to thrive and develop properly.
The smart play is to give them free access to food and water at all times and keep both clean. The best bet for ducklings is a specially formulated duckling starter feed that contains the right ratios of all nutrients for their growth requirements and also contains the necessary grit.
It’s possible to use unmedicated chick feed in a pinch, but then you’ll have to fortify it with additional niacin since it doesn’t have nearly enough for the needs of ducklings. That introduces other complications.
Under no circumstances should you give your ducklings medicated chick feed- it will poison them!
If at all possible, stick with duckling starter feed.
Adjust Protein Intake
Even though you should let your ducklings eat what they want if they have the right feed, you need to moderate how much protein they get. Too much protein, too quickly, can actually lead to growth defects. I know you don’t want that!
Again, get an early-life duck feed that is formulated for their stage of development. This will provide plenty of calories and the right amount of protein.
- From 1 to 2 weeks old, your ducklings should be getting 18 to 20% protein in their feed.
- After that, from 3 to 8 weeks old, back them down to 15 to 16% protein.
- Once they hit 9 weeks old, they’ll do fine on a feed containing 13 to 14% protein until they’re fully mature, meaning laying eggs in the case of hens or ready to mate in the case of drakes.
Food and Water Containers
Remember how I said that ducklings are unbelievably messy? You’re about to learn why… No matter what you do, no matter how you try to keep their food clean and dry, they’ll mess it up, don’t worry.
You can put food in a small, shallow dish, or two so they can spread out, or use a feeder at your preference. Place this food opposite the heat source so they’re less likely to cluster around it and poop in it.
Water is also important for drinking. Very shallow dishes should be used to prevent any accidental drowning. Make sure you stay on top of keeping them clean and full. Place the water source on the same end as the food, but as far from it as you can from it to cut down on mess.
When Can Baby Ducks Survive Without Their Mom?
Assuming baby ducks are being raised in the wild or you’re going to let their mother raise them in captivity, they will depend on her until they have their adolescent feathers, anywhere from 6 to 8 weeks.
But, even when they are ready to face the world on their own, they won’t leave just yet until they are ready to fly. That often happens when they get their adult feathers, anywhere from 9 to 12 weeks. At that point, they will be true adults and on their own!
Tom has lived and worked on farms and homesteads from the Carolinas to Kentucky and beyond. He is passionate about helping people prepare for tough times by embracing lifestyles of self-sufficiency.