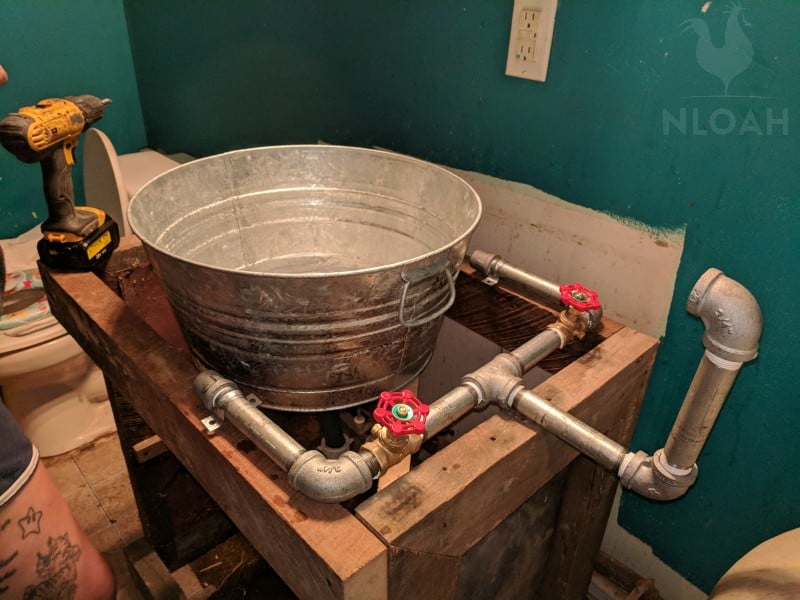
Building a bathroom vanity out of barnwood and making a sink from a galvanized tub yourself can turn out just like the ones showcased on Pinterest. The only cost we had in our new bathroom vanity stemmed from a few pieces of pipe and the nozzles to make the faucet.
We even used barnwood to make the countertop, and some cool old tin from the same barn’s roof to adorn the side of the vanity. Our home was an austere hunting lodge with concrete floors, poured and exposed concrete walls half way up, and only a few recently installed windows when we bought it.
We fell in love with the 56-acre fixer upper land, and knew the house could be whipped into shape – I chose to look at it like a blank slate. We had wanted to build our own home, and since the size and layout of this one was really close to what we wanted, the spartan conditions inside the home we actually a blessing in disguise.
The rehabbing of fencing, fence posts, our private half-mile farm road, the well, and leach bed took close to two years to complete. FINALLY, we were able to start working on the interior of the house in greater leaps and bounds.
The DIY bathroom vanity built from reclaimed barnwood, a galvanized tub, and pipes had been at the top of my “New House” Pinterest board for far too long not to become a reality.
We had to work in a small space to replace the vanity due to the odd way the pipes ran on the wall and the close proximity of the well bladder and hot water heater. Those will soon be encased in a closet that will run floor to ceiling, and provide extra storage and cease being an eyesore.
The videos in this article will show you exactly how we made the vanity, but the project guide below will detail how to build a more traditionally sized double bathroom vanity with or without drawers.
This will allow anyone to adapt the DIY bathroom vanity project to suit their typically larger space and to add more storage to the vanity, if desired.
I also included some standard size board measurements in case you do not have as much reclaimed barnwood at your disposal, but still want to achieve the same rustic look in your bathroom.
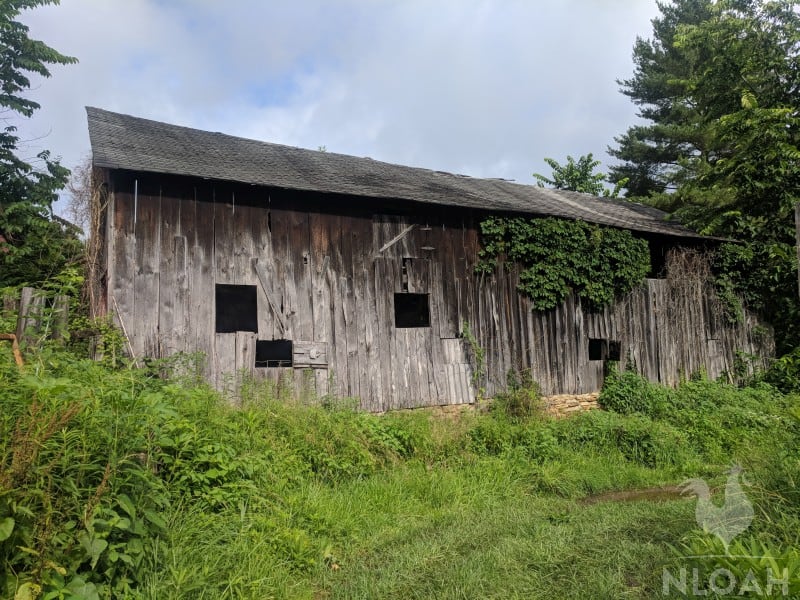
The tin was turned into sides for the DIY bathroom vanity project, cabinet front projects, pantry door fronts, and to make two interior doors that were framed in barnwood, also.
Table of Contents:
Tools
You may not need all of the tools on this list. Some saws can be used to make multiple style cuts, depending upon the skill of the user.
- Jig Saw
- Miter Saw
- Drill
- Kreg Jig
- Power Drill
- Table Saw
- Hammer
- Measuring Tape
- Level
- Pencil or Marker
- Tin Snips
Materials
- Polyurethane and old rags
- Galvanized tub (or traditional sink) we used a 7-gallon tub
- Sink drain and stopper – if not harvesting off the existing sink
- Pipe Sealant Putty
- Pipe Tape
- Stud Finder
- Drawer Pulls – we used fencing staples
- Hinges for cabinet doors – I recommend using 2 or 3 inch hinges
- Metal drill bit large enough to fit the drain being used if making a sink out of a galvanized tub
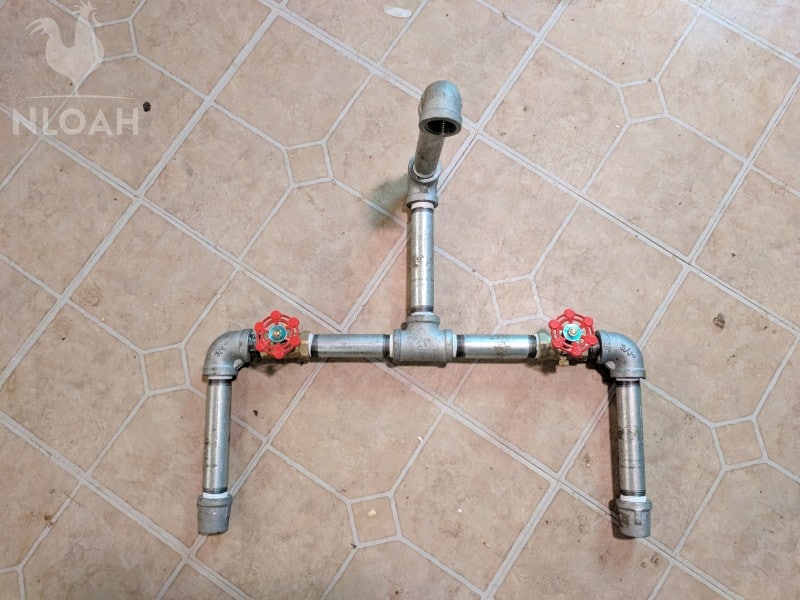
- Metal pipe in your choice of dimensions and faucet handles
- Sandpaper to smooth any rough exposed edges on the barnwood
- 4 x 3.5 inch square wood posts or 4 X 4 barnwood boards for frame and legs
- 2 X 6 hardwood boards cut to the desired size – we used locust and red oak boards for shelves – optional
- Hardwood barn boards for countertop if not using a conventional bathroom vanity countertop – we used a combination of red oak and locust for both the vanity top and a backsplash
- 1 X 1 (approximately) trim boards for galvanized tub sink support if not using a conventional countertop with sink
- Silicone caulking or similar countertop adhesive if using a conventional sink
- If using barnwood for the countertop choose hardwood that is cut to fit, and has been coated twice (drying completely in between each sealing) with polyurethane.
Optional Materials
- Countertop – if not using barnwood
- Faucets
- Wood cleats if adding shelves to the vanity
Making the Cabinet
Step 1. Cut all of the boards to the desired size to fit your space and the amount of cabinet doors and/or open shelving units you want.
Step 2. Coat the countertop boards with polyurethane and allow them to dry thoroughly.
Step 3. Repeat step 2 – it may take a full 24 hours for the clear coat to dry depending upon the weather and your climate.
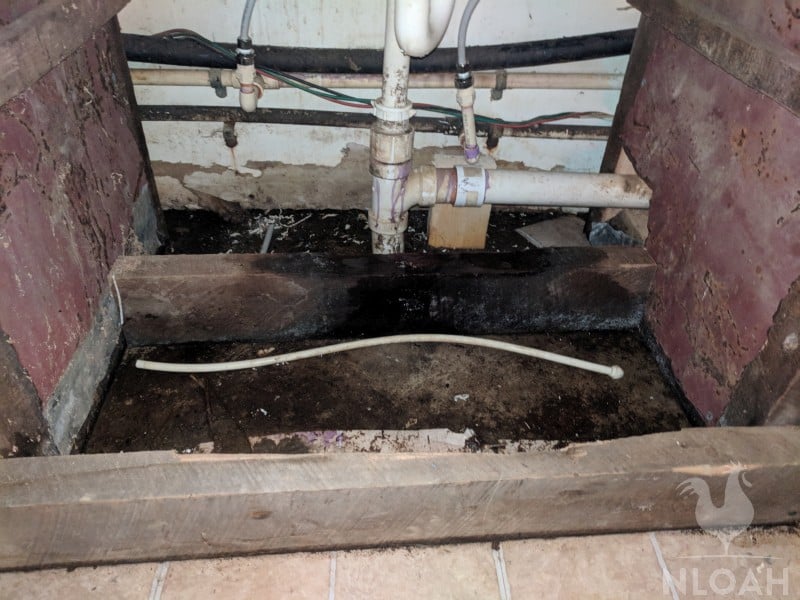
Step 4. Determine the size of your frame by measuring the space you have to work with in the bathroom. Make sure to center the vanity around the faucet plumbing. Now is when you have to decide if you want to make a back for the vanity.
We left our vanity frame open because it was built sturdy with hardwood, and to allow easier access to the pipes when plumbing repairs are needed.
You may also have to cut a notch into the frame if plumbing pipes along the wall parallel to the frame. A miter saw or especially a jigsaw will come in mighty handy if you have to deal with this issue like we did.

Step 5. Attach the 2 X 6 boards to each other to make a rectangular or square frame for the top of the vanity.
We added a 4 X 4 support board across the middle of the bottom frame to make the DIY bathroom vanity yet more sturdy.
I really wish the guys would have used some of the extra bathroom flooring that I had put back for when we pulled the old vanity out. But, I can still clean and then cover the exposed concrete floor by measuring and piecing in the vinyl flooring.
Step 6. Screw the completed top frame onto the top of the 4 X 4 posts with screws to build a basic and sturdy frame. Make sure to check the wall for studs so the vanity back frame can be attached to a center stud board for increased durability.

Step 7. Check the frame at least twice with the level before screwing it to the wall. It is far easier to fix an unlevel board before attaching the frame to the wall than it is to pull it off to make the necessary repair.
The most common cause of leveling issues is dealing with a floor that is not perfectly level – our poured concrete floor was not level so we had to shave a bit off of several frame supports to make the vanity level.
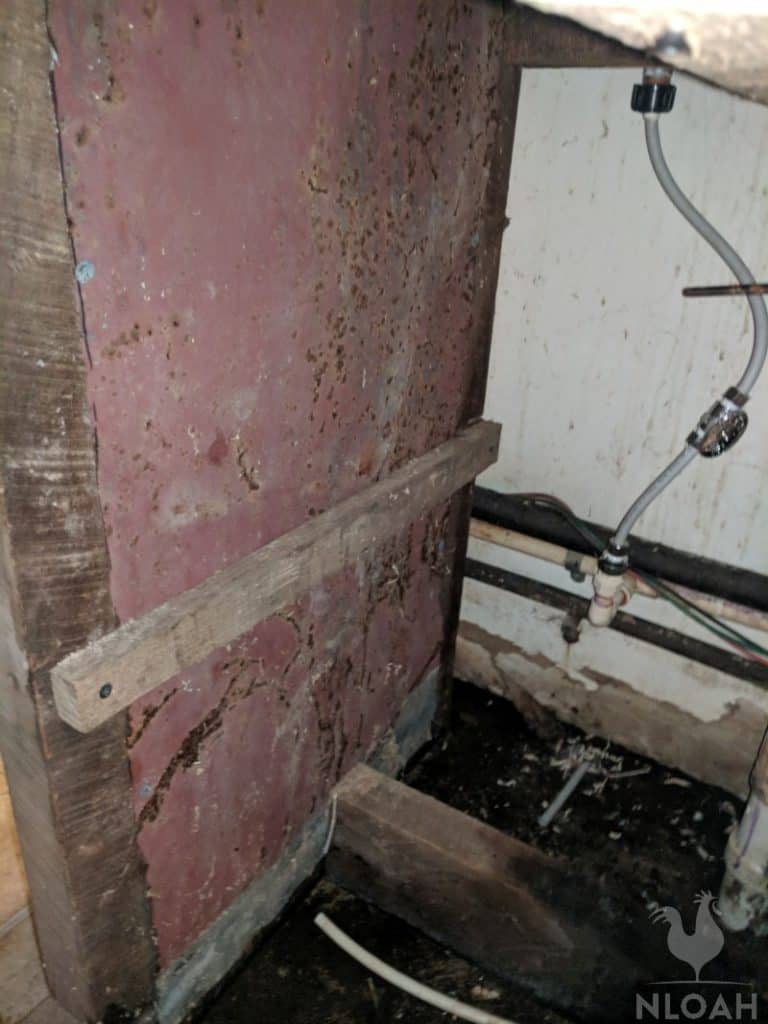
Step 8. If you are not leaving the frame sides open, use barnwood or a combination of barnwood and tin or barnwood and plywood to make closed sides.
The sides of your bathroom vanity can be squared or mitered to have a framed photo style design, like the one in our video:
We screwed some old roofing tin to the back sides of the vanity side panels, then braced it with a thin board to firmly hold it into place.
We coated the tin with several layers of polyurethane (letting each dry in between) before adding it to the project.
I recommend drilling holes into the barnwood with a ¾ pocket hole before attaching the bottom part of the side panels together with the 1 ¾ of an inch screws. You can add some wood glue for extra hold if you wish.
You can also choose to leave the vanity sides open when using shelving units instead of closing them as we did, and adding a hinged door in the front of the frame.
If making a shelf inside of the vanity (whether or not you are adding a cabinet door) cut some small framing boards and screw them to the interior sides of the vanity frame to serve as support for the shelves.
Take into account the placement of the drain and plumbing, and the need to be able to easily reach this area when dealing with a leak in the future.
Step 9. Our side panels fit flush to the vanity, but some folks prefer to inset them about 2 inches to achieve the rustic look. Screw the panels into place in the desired position.
You can see the plumbing pipes we had to contend with when fitting the bathroom vanity into place. We used tin snips to make a pass through opening in the tin roofing sheet and a jigsaw to cut an arc shaped opening in the wood frame to make space for the existing plumbing features.
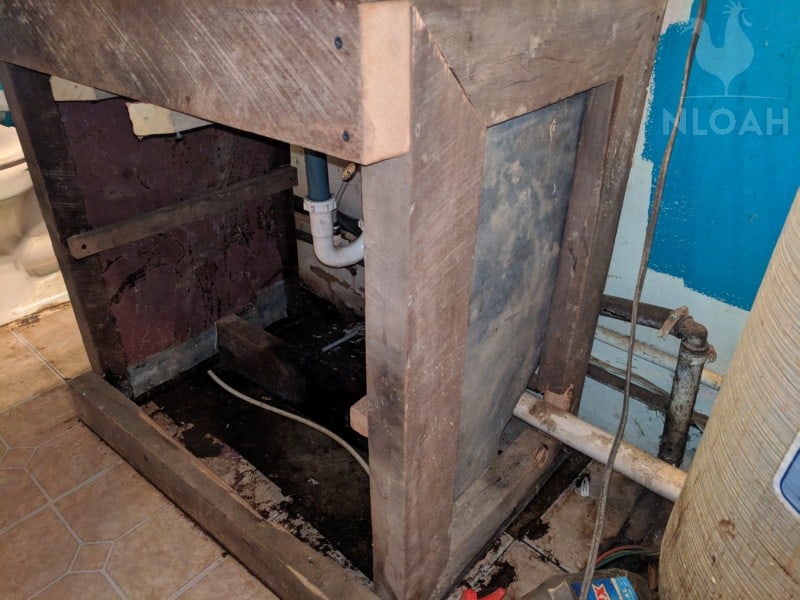
Step 10. Before screwing the frame to the wall, cut out any openings in the side panel area of the frame. Use a jigsaw or a miter saw to cut out the opening needed for any plumbing pipes to pass through.
Step 11. Next, cut the middle cabinet pieces to create open shelves, a solid panel, or make drawers if you are creating a two sink vanity by doubling the size of this vanity plan, and not putting a hinged cabinet door on the front of the barnwood.
Making a Vanity Door
Step 1. To make a vanity door, measure the size of the opening, and use a single piece of barnwood wide enough to fill the space or use more 1 X 1 or 2 X 2 boards to build a square or rectangular frame (a smaller version of what you did with the vanity top).
Step 2. Screw tin sheeting onto it or several 2 inch thick pieces of barnwood with support boards attached with screws across the back, to form a solid back.
Step 3. Attach the door to hinges so it can be secure to your frame.
Step 4. Use the power drill to screw the hinges onto the front opening for the door on the vanity frame.
Setting Up the Sink
Step 1. Measure the space above the frame to make a barnwood vanity top if not using a conventional sink countertop. Remember to determine if you want the vanity to be flush with the frame or having a decorative overhang before measuring and cutting your barnwood.
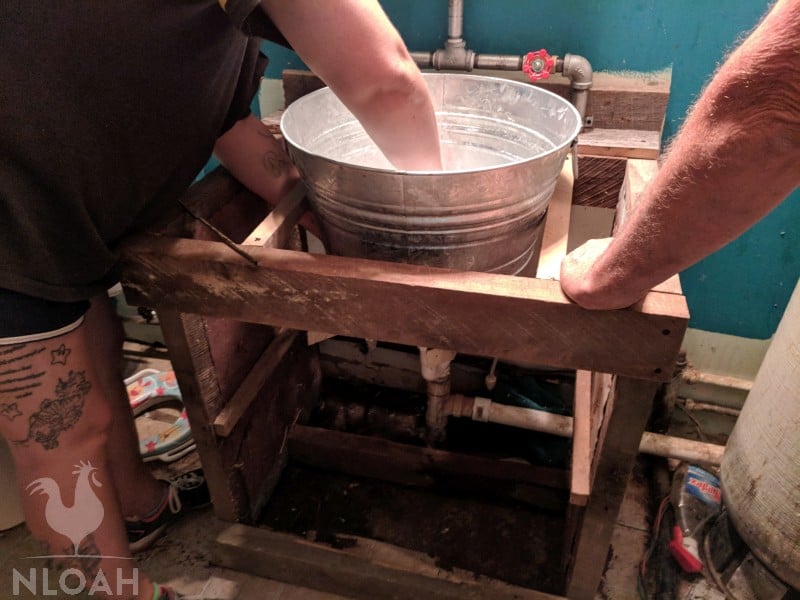
Step 2. Screw your galvanized tub support boards into place.
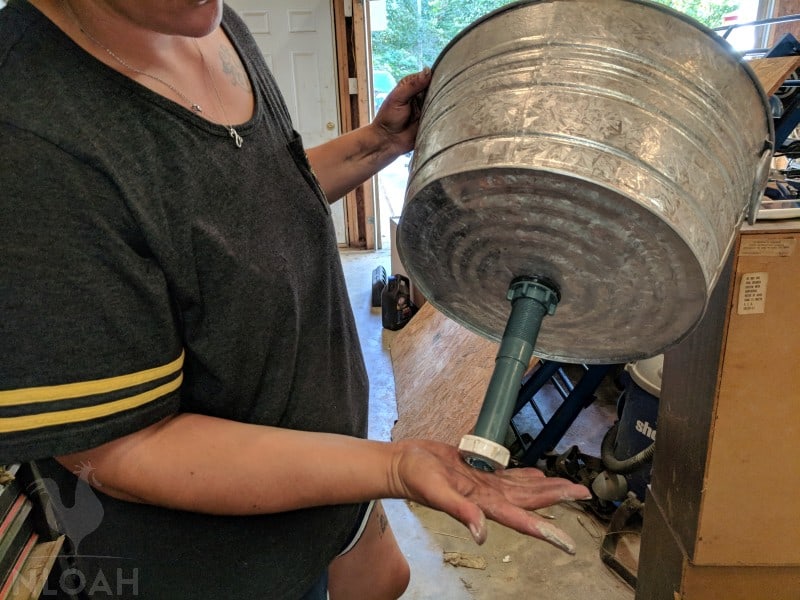
Step 3. Drill the hole in the base of your galvanized tub in the dimension needed to attach your drain kit:
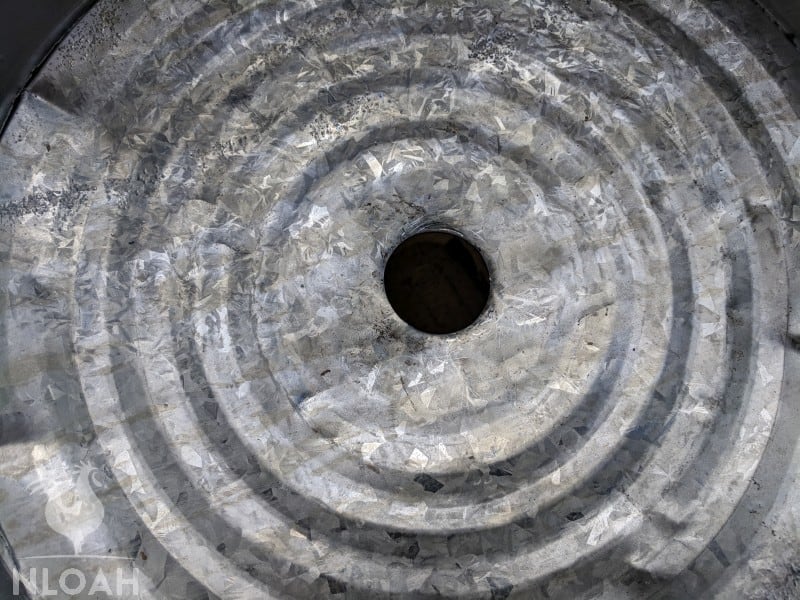
Step 4. After drilling the hole, I highly recommend placing a baseball or softball on top of the hole, covering it with a cloth, and then beating it lightly about five times with a hammer.
This will create an indentation that will allow the water to drain better in the galvanized tub sink so that it does not rest in the tub and cause rust.
Step 5. Mix up the adhesive and use it to attach the silver ring of the drain kit that goes on top of the drilled hole:
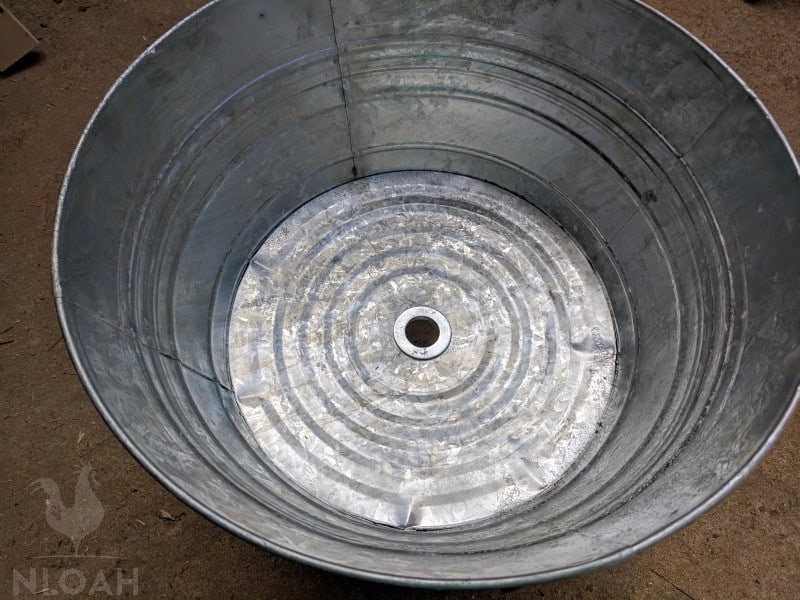
Step 6. If the galvanized tub separates even slightly during the ball pounding or just as an added measure of protection against rust, apply the adhesive around the area where the base of the tub meets the walls, as well.
Step 7. Next, attach the drain kit to the galvanized tub sink. If you purchased a drain kit there will be directions on how to do this on the package. We harvested the drain from our old sink to use on the new DIY barnwood vanity:
If you have never done this before, pay careful attention to how the pieces fit together. When taking it apart – take photos or a video, if necessary, to help you repeat the process when installing it on the new sink.
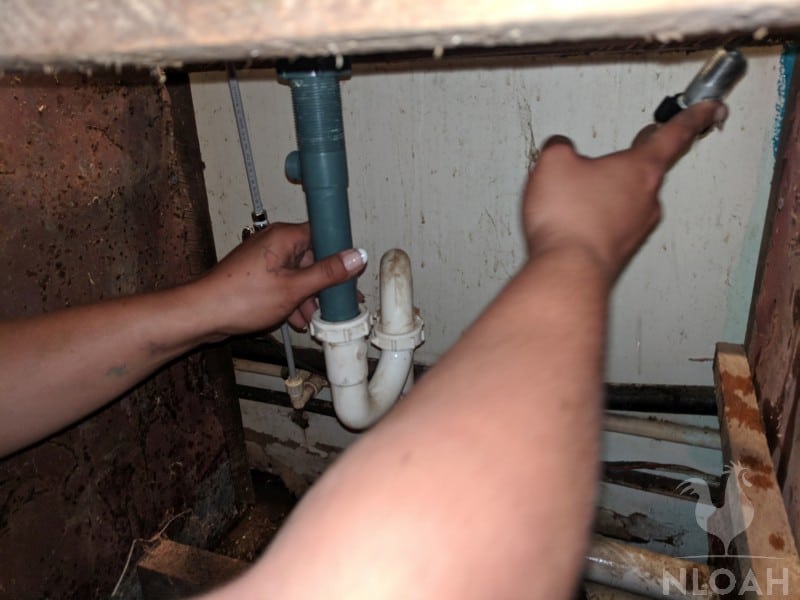
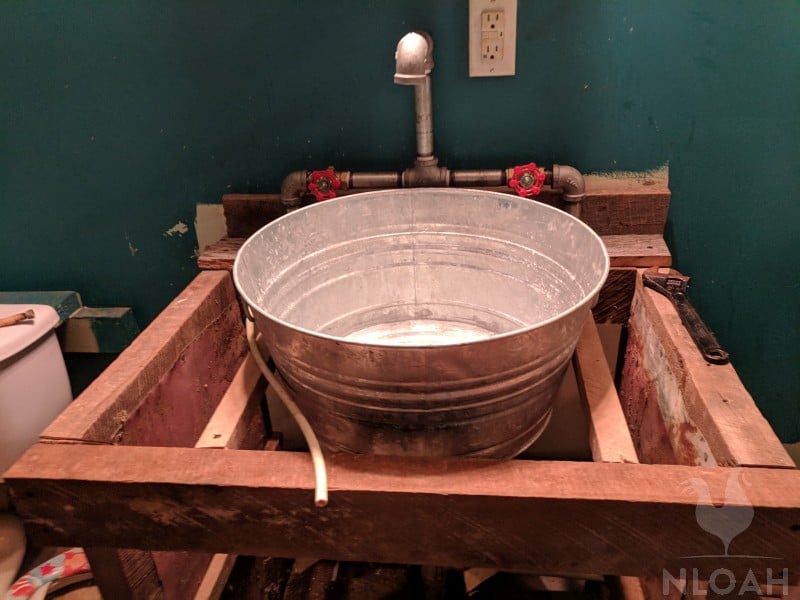
Step 8. Screw the pieces of pipe together in the desired design, then screw them onto the existing plumbing. We used pipe tape to help prevent any leaking whenever connecting male and female ends of the pipe.
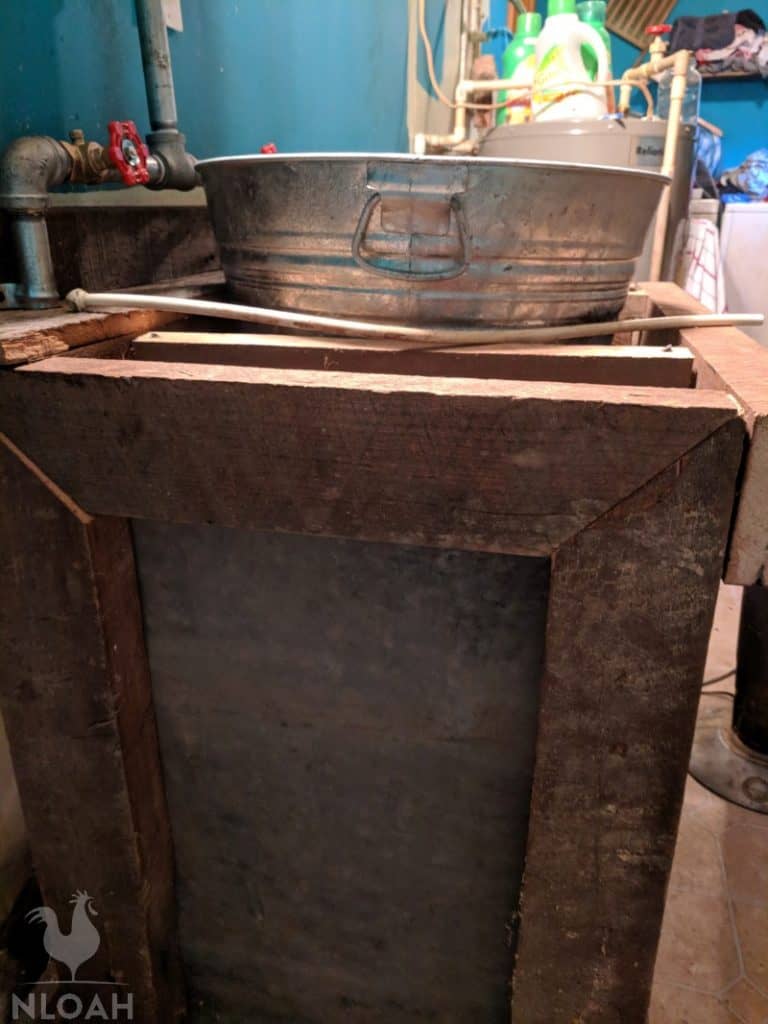
Step 9. There are several ways you can set the galvanized tub for use as a sink. Some folks prefer a vessel sink where the tub sits completely on top of the countertop.
This is the easiest way to use the tub as a sink because there will be no tricky cuts to make to go around a sunken or partially sunken tub.
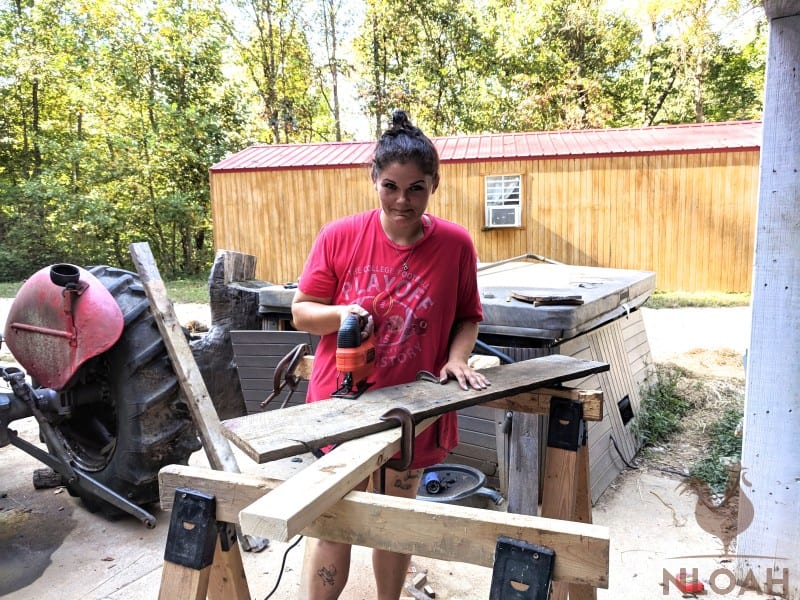
I wanted the tub to be sunken a little more than half its depth, so our survival tribe member, Hope, (who was building it for me) had to make angled and rounded cuts with the jigsaw when building the countertop around the tub.
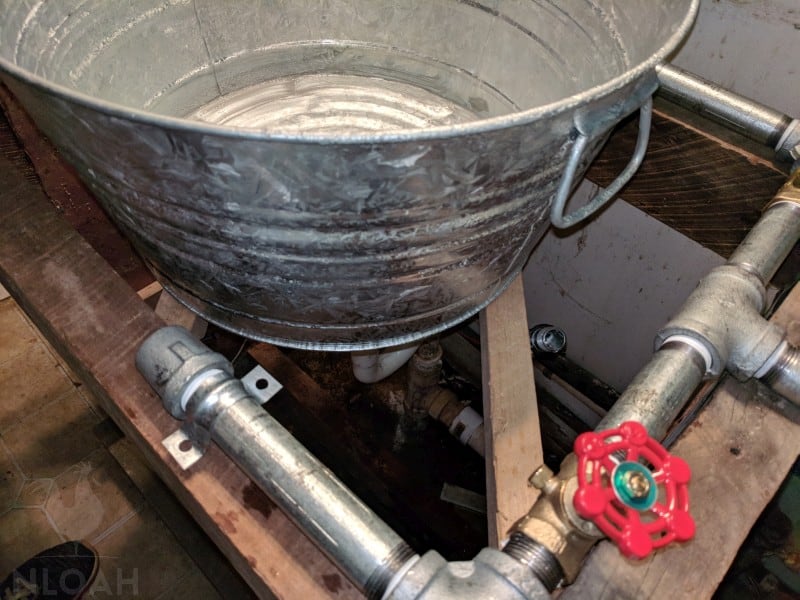
Step 10. We placed support boards both under and on each side of the galvanized tub to make it stable. The white tubing you see was for the stopper part of the old faucet kit.
Step 11. Now, the final step in the DIY bathroom vanity , installing the vanity countertop and backstop.
This project was completed in small parts over the course of several weekends – it was hay and firewood season so the DIY barnwood vanity was not a top priority.
If the project had been completed all at once by a person with at least average woodworking and plumbing skills, it would have taken roughly six hours from start to finish.


Tara lives on a 56 acres farm in the Appalachian Mountains, where she faces homesteading and farming challenges every single day, raising chickens, goats, horses, and tons of vegetables. She’s an expert in all sorts of homesteading skills such as hide tanning, doll making, tree tapping, and many more.