If you’re a homesteader and preserve foods, sooner or later you’re going to make pickles. When starting out with preserving foods, pickled cucumbers are often one of the first vegetables that people decide to can. Cucumbers are easy to grow en masse, and are inexpensive to purchase at grocery stores and farmers markets. And crunchy dill pickles are absolutely delicious.
There are literally hundreds of pickled cucumber recipes. Some of these pickles are sour, others are spicy, and still others are sweet.
Today we will look at how to make and preserve delicious crunchy dill pickles step by step. If you have all of the equipment and ingredients on hand to make these pickles, you can be enjoying them as an afternoon snack in just a few days. So let’s look at how to make these delicious pickles right now!
Gathering The Equipment
Pickles are prepared in a multitude of ways. Some are made to simply be refrigerated and eaten right away. Other pickles are fermented for several weeks prior to being ready. Still others are preserved in mason jars, or “canned.”
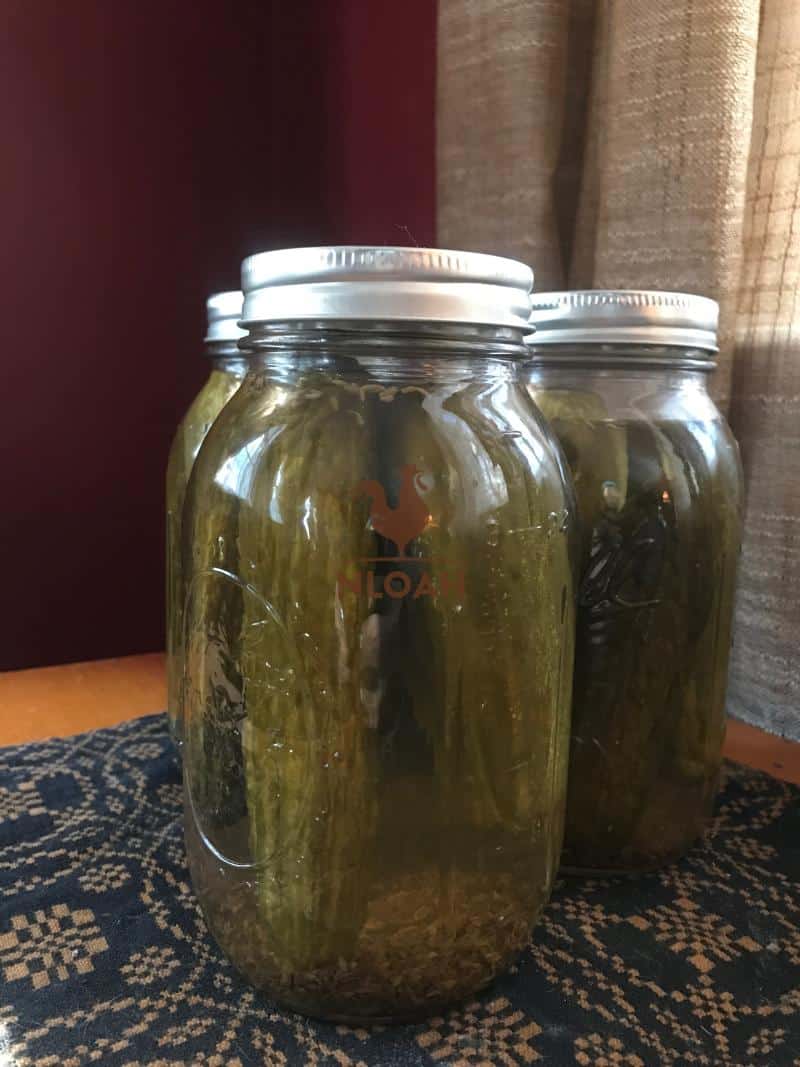
This is a two-day recipe intended to preserve your crunchy dill pickles; when it is complete, you’ll have seven 1-quart jars of dill pickles that can be stored at room temperature for up to one year.
Before you begin this recipe, let’s make sure you have all of the necessary equipment on hand to complete it.
Canning Equipment
Disclosure: if you visit an external link in this post and make a purchase, I may earn a commission. Read my full earnings disclosure here.
Here are the items that you’ll need to make this pickled garlic recipe:
- Boiling Water Canner. The boiling water canner is the large pot that you will use to sterilize your jars, and then heat process and preserve your crunchy dill pickles
- Canner Rack. A canner rack sits inside your water canner. It helps you easily insert and remove your canning jars when you are processing them.
- Seven 1-Quart Canning Jars, With Lids And Rings. You’ll preserve your dill pickles in these jars for later use. Try to get the wide mouth jars if they’re available at your local hardware store, or order them online; it will be easier to pack your cucumbers into the wide mouth jars.
- One Very Large Saucepan And One Small Pot. You will use the very large saucepan for preparing your salt solution and pickling juice. You will use the small pot to boil and sterilize your lids.
- Two Large Bowls. You will use the two bowls to cold soak your cucumbers in a brine solution prior to preserving them. Each of these bowls needs to be able to handle seven pounds of cucumbers packed with ice.
- One Colander Bowl. The colander will allow you to wash off your cucumbers prior to packing them into the 1-quart jars.
- You will use a small funnel to assist with packing the cucumbers, spices, and pickling juice into your canning jars.
- Cheesecloth And Piece Of String. You will use a small piece of cheesecloth as a spice bag, which you’ll pack with the pickling spice and let soak in the pickling juice as it simmers. You’ll use the piece of string to tie the spice pouch up.
- You will use a ladle to transfer the pickling juice from the saucepan to your jars.
- Large Spoon. The spoon will help stir your pickling mixture, and ensure that the salt and sugar dissolve.
- Large Towel. After you process your canning jars, you will place them in a quiet, draft-free corner, and cover them for 24 hours with this towel.
- Small Towel. You’ll use a small towel to wipe off your jars and lids; this will help ensure you get a good vacuum seal, and will be able to store the crunchy dill pickles at room temperature for up to a year.
- You will need something to help keep track of time (boiling times, canning processing times, etc.) while you make and preserve your pickles.
Optional Canning Equipment
There are additional items you might want to have on hand as well. While they are not essential, they can help make the entire canning process easier.
- Magnetic Lid Wand. A magnetic lid wand helps you grab hot jar lids and move them where you want them, all without contaminating them with your hands.
- Jar Lifters. A jar lifter is basically a set of wide pincers that enable you to grab hot canning jars and move them into and out of places that are too hot to touch. These are great to have when positioning jars in and out of the boiling water canner.
- Labels And Markers. If you can on a regular basis, it is a good idea to label your canning jars, and put a date on when you processed them. This will help ensure that you know exactly what is in each can. If you write the canning dates on them as well, you will know when a canned food is in danger of expiring.
- Outdoor Gas Cooker. If you plan to can foods on a regular basis, it is a good idea to invest in an outdoor gas cooker. These burners run on the same propane tanks you use with your outdoor grill. An outdoor gas cooker will enable you to bring the water in your boiling water canner to a rolling boil more rapidly than most indoor stoves can; it also helps cut down on the inevitable mess in your kitchen as well.
All of the essential and optional items are easy to find at hardware and home goods stores. You can also shop for them online as well. You will want to make certain all of your canning equipment is as clean as possible prior to using it. Use a good sanitizer, such as Star San, to clean all of your equipment prior to beginning the canning process.
Assembling The Ingredients
This recipe makes about seven 1-quart jars of crunchy dill pickles. Here’s what you’ll need to be enjoying pickles in a few short days:
- 14 Pounds Of Pickling Cucumbers. Try to find the smallest pickles available at a store or farmers market for this recipe, preferably 3-3.5 inches. Choose these cucumbers carefully. You want to have fresh, crisp pickles. Don’t pickle any cucumbers that have cuts, holes, or soft spots on them. Try to buy or pick your cucumbers the day you plan to prepare them; this will ensure you’re starting with fresh vegetables.
- 6 Pounds Of Ice. You’ll use the ice to help cold-soak your cucumbers.
- 12 Cups Of White Vinegar. Standard white vinegar that is sold in plastic gallon jugs will be fine for this recipe.
- 4 Tablespoons Of Pickling Spice. You can buy pickling spice in some grocery stores or online; however, if you plan to make pickles routinely, it is better to just make a jar of it, so you always have it on hand. We will discuss how to make pickling spice as the first step of this recipe.
- 21 Fresh Dill Heads, Or 14 Tablespoons Of Dill Seeds.
- 7 Teaspoons Of Mustard Seeds.
- 7 Garlic Cloves, Peeled.
- 2 ½ Cups Of Canning Or Pickling Salt.
- ½ Cup Of Granulated Sugar.
- 24 Cups Of Water. The water is used at two different points in the recipe.
If this is your first times canning, follow this ingredient list and preparation directions carefully. As you get more experienced and learn more about preserving foods, you can attempt to prepare pickles in different ways. It is also a good idea to find reliable sources to study different methods to preserve pickles and other foods.
Step 1: Preparing The Pickling Spice
As discussed earlier, you can simply buy your pickling spice. However, if you plan to make several batches of pickles this year, it is more economical to make your own, and have it on hand. Here is a recipe to make ½ cup of pickling spice.
Note: Prepare this pickling spice and have it on hand before you plan to make your pickles.
Pickling Spice Ingredient List
- 1 Cinnamon Stick. Break the cinnamon stick into tiny pieces.
- 5 Bay Leaves, Crushed.
- 2 Tablespoons Of Mustard Seeds.
- 1 Tablespoon Of Whole Allspice.
- 1 Tablespoon Of Coriander Seeds.
- 1 Tablespoon Of Whole Black Peppercorns.
- 1 Tablespoon Of Ground Ginger
- 1 Tablespoon Of Dill Seeds
- 2 Teaspoons Of Cardamom Seeds
- 1 Teaspoon Of Hot Pepper Flakes
- 1 Teaspoon Of Whole Cloves
Mix all of the pickling spice ingredients together thoroughly in a small bowl. Then store the pickling spice in an airtight container, such as a small jar.
Here is a video detailing the preparation of a large batch of pickling spice:
Step 2. Cold Soaking The Cucumbers
Wash and clean your cucumbers thoroughly under cool running water. Then, layer your cucumbers with the ice surrounding them in your two large bowls.
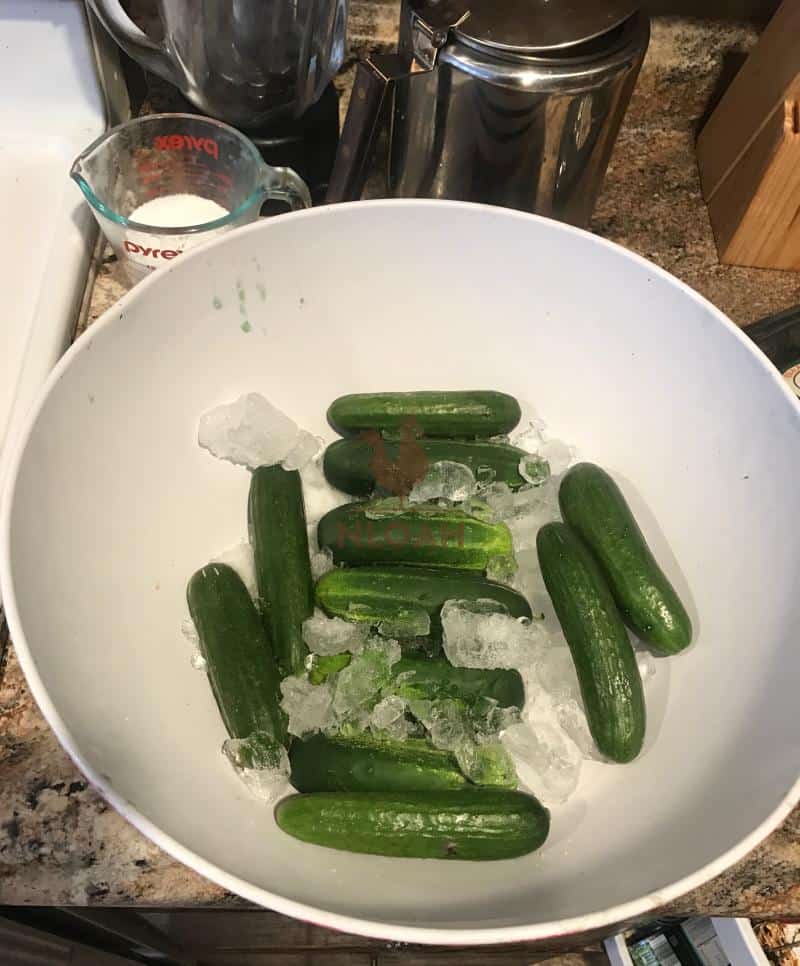
Once you’ve layered the cucumbers in your bowls, dissolve 1 cup of the pickling salt in 8 cups of water. Then pour this solution over the layered cucumbers in both bowls. Place a large plate on top of each of the bowls, weighing it down with something like a pot or jar of water. This will help your cucumbers absorb the brine. Once this is complete, place both bowls in your refrigerator.
Leave the cucumbers cold soaking in the brine solution for at least twelve hours, and no longer than eighteen. I prefer to cold soak my pickles in the evening, and then immediately complete the recipe the following morning.
Step 3. Sterilizing
Once your cucumbers have cold soaked for at least twelve hours you can move to canning them. But first, you’ll need to ensure all of your equipment is sanitary.
Fill your boiling water canner with water. Then, place your canning jars on the canning rack, and lower them into your boiling canner. Make sure the jars are completely submerged in the canner, and then boil them for at least ten minutes. Also, place your canning lids in the small pot, cover them in water, and boil them for at least ten minutes as well, turning the burner down to low heat when complete.
Remove your jars from the canner once they’ve been sterilized, and set them aside to dry out. Use caution when removing the canning jars; do not let a jar with scalding hot water tip and spill on your foot. You can leave the canning jar lids in the pot until you’re ready to use them.
Step 4. Preparing Your Spice Bag
Cut a 5-inch square of cheesecloth. Then place all four tablespoons of pickling spice on it, and carefully tie it into a spice bag. The intent is to be able to soak the spice bag in your pickling solution without any of it spilling out.
Step 5. Preparing The Pickling Solution
In the very large saucepan combine 16 cups of water, 12 cups of vinegar, 1½ cups of pickling or canning salt, ½ cup of sugar, and the spice bag. Bring the mixture to a boil, then reduce heat and let it simmer for 15 minutes, stirring occasionally. A gentle simmer will let the spices in your spice bag completely infuse the pickling solution.
Step 6. Transferring The Cucumbers
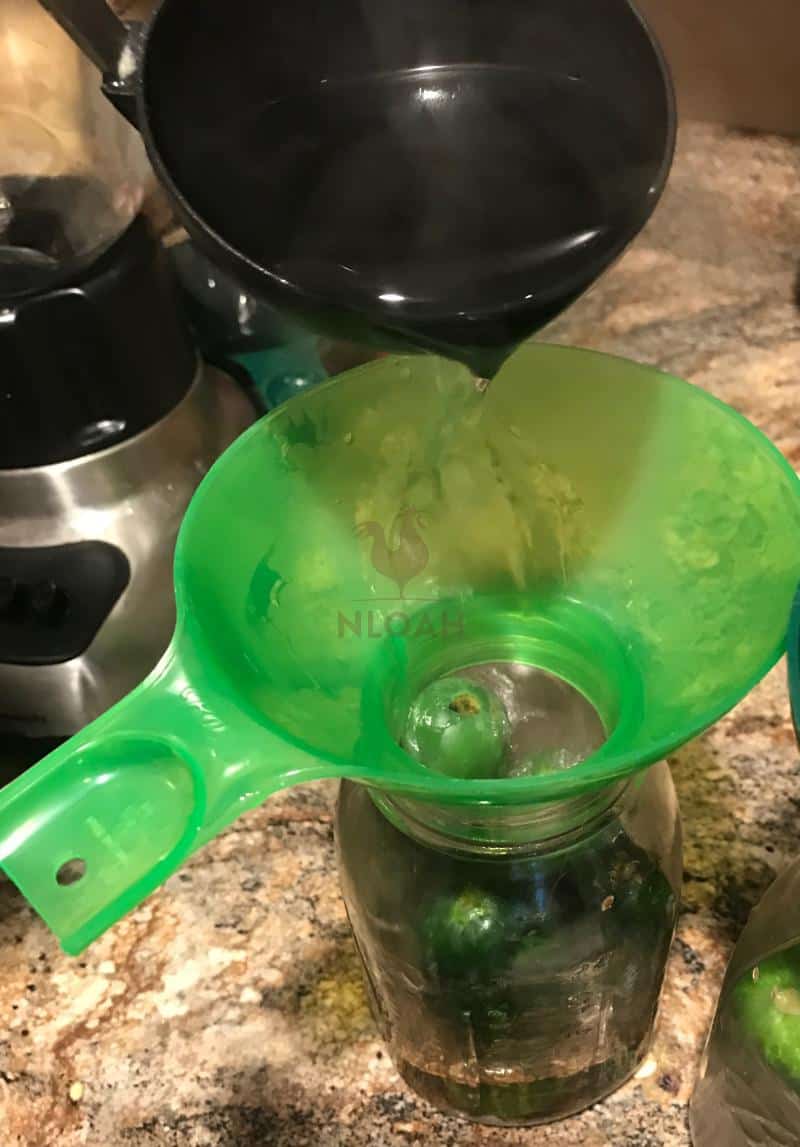
Place all of your 1-quart jars in a row on a table or countertop so that they are easy to work with. Remove the two bowls of cucumbers from the refrigerator. Fill your colander with a batch of cucumbers, and then rinse them thoroughly under cold running water. Pack the washed cucumbers tightly into the 1-quart canning jars, ensuring that there is ½ of headspace at the top of the jar. Repeat this process until all of your canning jars are packed. Place your funnel on each jar as you load the cucumbers and other ingredients in them.
Step 7. Packing And Closing The Jars
In each 1-quart jar, place 1 teaspoon of mustard seeds, 3 fresh dill heads or two tablespoons of dill seeds, and 1 garlic clove. Carefully remove the spice bag from the saucepan and discard it. Then, using your ladle, carefully fill each jar with the pickling solution, leaving ½ inch of headspace. Again, move your funnel from jar to jar as you add spices and pickling juice.
Once all of your jars are filled, use your small towel to wipe off the rims of your canning jars; ensure you remove any water, juice or other materials, since they can affect the sealing process later on. Use your magnetic wand to grab a sterilized lid, and place it center of mass on the top of our first jar. Grab a ring and screw it on carefully, until you meet a slight resistance. Make sure one last time that the lid is aligned properly on the top of the jar, and then screw the lid with your hands until it is “finger tight.” Repeat with each jar until all of them have lids.
You may wind up with more or less than 7 filled 1-quart jars, depending on the size of your cucumbers. However, only move on to the next step with jars that are completely filled with cucumbers and pickling juice. If you have any remaining juice or cucumbers that cannot fill an entire jar, refrigerate and use them like any other perishable vegetable.
Step 8: Processing the Jars
Once you have placed all of the lids on your filled jars, it is time to process them. Heat processing is a method of preserving otherwise perishable foods, so that you can consume them at a later date. There are two components to this when it comes to canning, both of which are accomplished by boiling your 1-quart glass jars: first, the boiling destroys any harmful microorganisms in the jars; next, boiling the jars, with their metal lids, help creates an airtight seal. After successful processing, your crunchy dill pickles can be stored in your cupboard or pantry fat room temperature for up to one year.
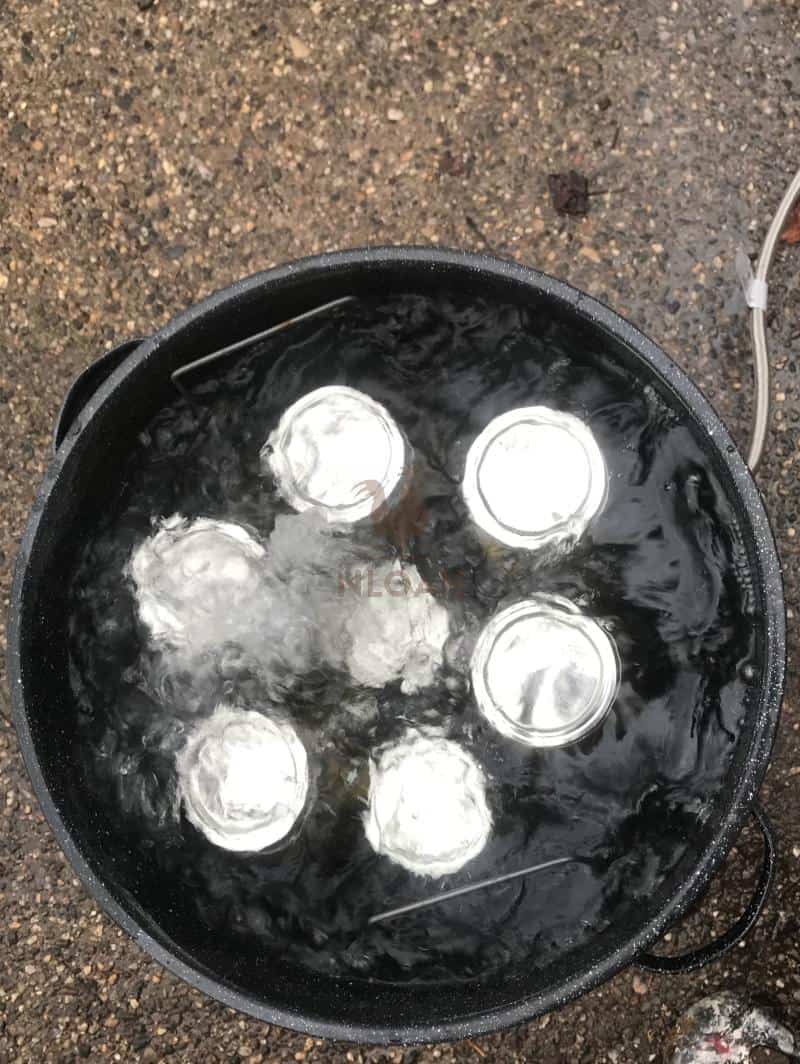
To process your jars, place all of them on your canner rack. Then, carefully place the rack back into your boiling water canner. Be careful, the water may still be very hot. Make sure that the jars are upright; use your jar lifter to set any jars straight that inadvertently tip over. Also, ensure that there is at least one inch of water covering all of the jars’ lids inside the canner; add additional water if there is not enough.
Once your canner is filled, set the heat to high. Bring the water inside to a rolling boil, and let it boil covered for ten minutes. After ten minutes, turn off the heat, remove the lid from the canner, and let everything sit for at least five minutes to cool down.
Step 9: Cooling and Inspecting the Jars
After the jars have cooled for five minutes, carefully remove the canning rack with the jars from the boiler. Using your jar lifter or small towel, move each jar to a cool dry place, away from any drafts. Place all of your jars together, and then cover with the large towel. Let the jars sit like this for at least twenty-four hours.
At this point, you will likely begin hearing loud “POPS” from some of the jars; this is a good sign, indicating that a lid has inverted downward and the jar has successfully sealed.
After twenty-four hours, remove the towel, and inspect each of the jars for a vacuum seal. A sealed lid will be concave (curving downward into the jar). To check further that each jar sealed, press lightly down on the center of the lid; it should have no “give” in it. Any jar that has not vacuum-sealed effectively will allow you to press it down significantly, like the “Home” button on a smartphone.
Here’s a great video showing how to check to ensure your canning jars have a good seal:
If you find a jar that has not sealed successfully, you can attempt to repeat the processing techniques described in Step 5. However, it is likely that you have a defective lid; it may be better to just refrigerate this particular jar, and consume it immediately.
All of the jars that vacuum-sealed successfully can be stored at room temperature in a cupboard or pantry for up to one year. Keep in mind that once you break a seal and open a jar, it must either be consumed immediately or refrigerated. You cannot seal the jar back up and store it at room temperature once it’s been opened.
Enjoying Your Crunchy Dill Pickles
There’s a reason why homesteaders make so many dill pickles: they’re delicious! If you make them, no doubt you’ll eat up one or two quarts of your pickles straight from the jar. But there’s lots of different ways you can use these pickles, too. Here are a few you might not have thought of.
Dill Pickle Hummus
You can use your dill pickles and pickle juice to make a delicious and unique dill pickle hummus! Like standard hummus, it is great to serve with crackers, vegetables and other snacks. Here’s a great step-by-step recipe you can follow to make this tasty treat.
Dill Pickle Salad Dressing
If you want to try a really unique salad dressing, put a half-eaten jar of your dill pickles to use! Combine 2 cups of your dill pickle juice, 1 dill pickle, and 1 avocado in your food processor. Run your processor until the mixture is smooth. Then, with the processor on its lowest setting, slowly add ¼ cup of extra virgin olive oil. Once it is completely blended together, it is ready to serve on any green salad.
Roast Beef And Pickle Bites
Your delicious dill pickles can serve as the base for this terrific hors d’oeuvre. Coat 3-4 of your pickles (or more, depending on the size of the party) with mayonnaise, then sprinkle them with salt, pepper and other spices according to your taste. Wrap each pickle with a slice of quality roast beef. Cut the wrapped pickles into bite-sized portions, sticking a toothpick in each one. Place them on a plate and you’re ready to serve these terrific appetizers to your guests.
Pickle Infused Vodka
If you enjoy a good Bloody Mary from time to time, try mixing one with some of your very own pickle infused vodka. In a large mason jar, combine ½ cup of your dill pickle juice, 1 dill pickle sliced lengthwise into spears, and 1 ½ cups of a quality vodka. Place the lid on the jar and seal it tightly and let it sit for five days in your refrigerator. Afterwards, your pickle infused vodka is ready to be combined with any of your favorite mixed drinks.
Closing Thoughts
Dill pickles are a terrific addition to any homesteader’s pantry. They are economical and easy to make, and can be used in an infinite number of ways. If you’re just starting out in canning, these are the perfect vegetables to preserve. And homemade crunchy dill pickles are almost certainly better than any commercial variety you’d buy in a grocery store. So what are you waiting for? Make some delicious crunchy dill pickles today!
When Tom Harkins is not busy doing emergency repairs to his 200 year-old New England home, he tries to send all of his time gardening, home brewing, foraging, and taking care of his ever-growing flock of chickens, turkey and geese.
Dan, You have so many interesting articles. Thank you for sharing them.
It’s our pleasure 🙂
Recipe title says pickled garlic.
Fixed
I’m going to try your way this year,I’ve never done whole pickles,I hope it’s alright to put the spice in the juice?
Going to try your way this year,I’ve never done whole