
Is there anything better than fresh produce? I think not. Whether you grew it yourself and are enjoying the literal fruits of your labor, or are hauling home a big bounty from the local farmer’s market, the flavor and quality make it worthwhile.

Likewise, there’s nothing worse than busting out your veggies a few days later to find out they’ve already started to wilt and spoil. Talk about a bummer! There’s definitely an art to storing fresh produce for any length of time, even long-lasting staples like potatoes or beets.
Do it right, and they will keep for months. Luckily, there are lots of things you can do to achieve it! Keep reading, and I’ll tell you all about how to overwinter your root veggies.
Toss Out Damaged Veggies
The first thing you need to do is elementary but very important. Go through your produce and toss out all of the damaged veggies.
Ones that are already rotten, severely misshapen, have split skins or cracks, dark spots, or other defects are total liabilities for our purposes. That’s because all of our produce will be stored together in very close quarters, and decay, once it gets started, spreads like wildfire.
You’ve heard the old saying before: one rotten apple can spoil the whole bunch. That’s true for a lot more than just apples! Also, you need to periodically inspect your stored veggies—be they potatoes, carrots, or anything else—throughout the winter to check for oncoming spoilage.
If you are diligent and a little lucky, you can catch them before they go too bad and ruin the whole batch. If you are severely averse to any food waste, you can prepare and use the bad ones, assuming they are still safe.
Always Cure Potatoes and Sweet Potatoes
This is a general piece of advice that is often overlooked. Potatoes and sweet potatoes should be “cured” prior to putting them into long-term storage. Curing is a fancy word, basically, for leaving them uncovered in warmer conditions so that their skins will thicken and harden, giving them better protection.
The process is simple: for potatoes, you want to leave them out on a sheet of newspaper or butcher paper in a dark, cool room that’s between 50° and 60° F (10°C and 15°C) with high humidity. Leave them there for at least 1 week, but 2 weeks is better.
For sweet potatoes, repeat the process but put them in a room that is around 80° F (26°C), also with high humidity. About a week and a half is sufficient.
Once the curing process is done, your tubers will store much longer after you move them to a cooler location. Check the following sections for more tips on how to store them properly.
Don’t Wash Them!
This is another big mistake commonly committed by greenhorns or the well-intentioned. Do not wash any root veggies, of any kind, prior to storage. The moisture and the abrasion of their skin will facilitate spoilage.
I know what you’re probably thinking: how can leaving dirt on them, with all of those germs, possibly be good for them? The simple answer is that the proof is in the pudding—washed veggies will spoil faster.
This isn’t to say you shouldn’t give them a once-over: gently brushing off the dirt with a dry, clean vegetable brush or another implement is beneficial, but you don’t need to go crazy trying to get the dirt out of every nook and cranny.
Save the proper washing for immediately before preparation and cooking.
Cut the Greens Off
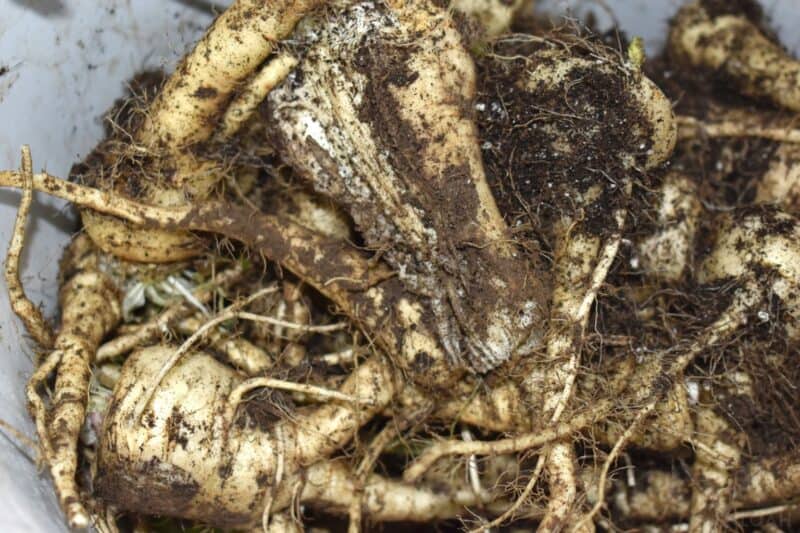
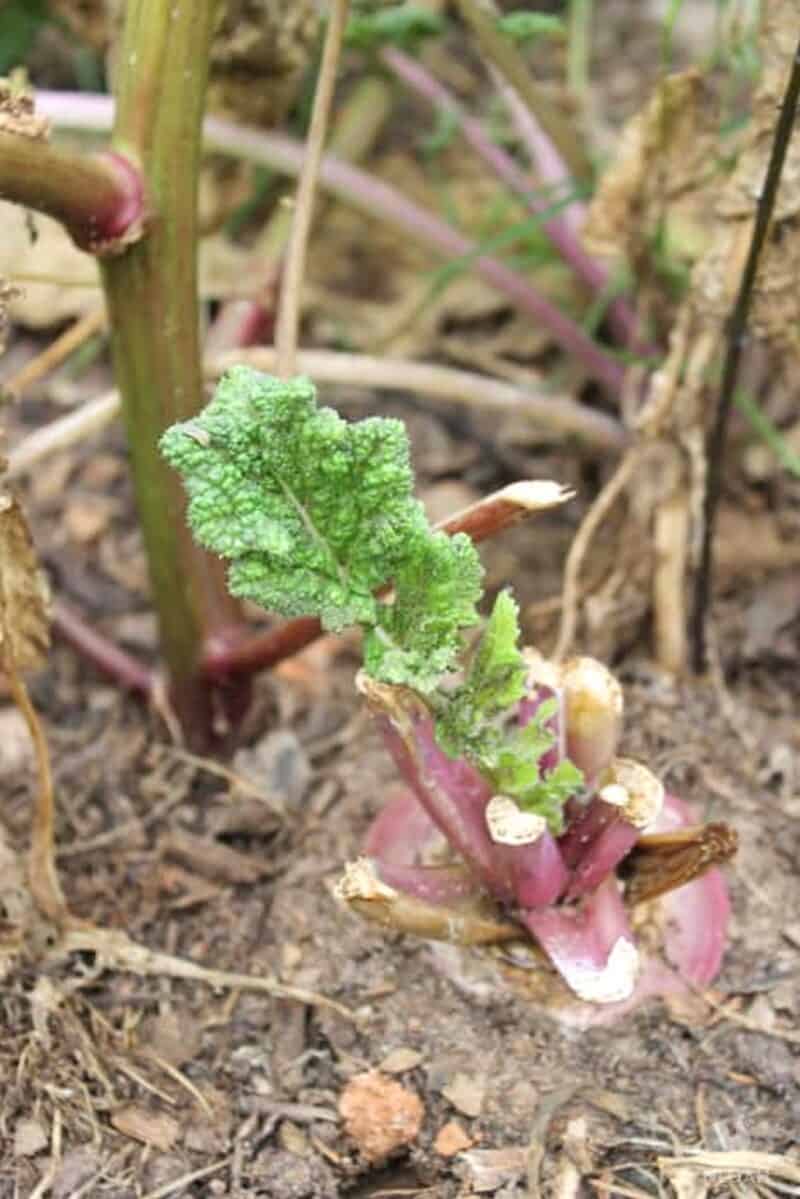
Any vegetables that have attached greens or crowns—think carrots, beets, parsnips, turnips, etc.—should have them trimmed off prior to placing them in long-term winter storage.
Though all of these plants rely on their greens to grow and develop, once they are harvested and stored, they work against us. If you leave the greens attached, they will serve to drain moisture from the veggies themselves, whether they are an actual root or a tuber.
This is bad: drying will invariably result in splitting and cracking, followed by total spoilage. As we learned above, when one spoils, it’s highly likely that all of the other veggies near it will also spoil and spread. Talk about a disaster!
You’ve got one good rule of thumb when it comes to pruning off the greens for storage: always cut them as cleanly and as close to the veggie as possible without damaging the skin at all.
Refrigerate Smaller Quantities – But Do It Properly!
One guideline that rarely fails when it comes to storing root vegetables is that they need to be kept quite cold and in humid conditions for optimum shelf life.
This trick won’t work if you’ve got a giant harvest to store, but if you have a smaller quantity or just extra refrigerator space, don’t hesitate to toss them in the crisper drawer.
Think about it: temperatures between 32° and 40° F (0° C and 4° C) are ideal and easily achievable by a good refrigerator. Likewise, humidity around 90% or higher is also doable. The only other element needed for maximum storage life is good air circulation.
You’ll have to make some adjustments depending on the type of veggie you’re keeping in the fridge, though:
Carrots, beets, parsnips, radishes, and turnips should all have their greens trimmed and be stored inside sealed containers wrapped in damp (but not wet) paper towels. This will keep them hydrated.
Potatoes and sweet potatoes can be stored loose, unwrapped, but will benefit from extra airflow. Consider keeping them out of the drawer and in a large bowl or stacked loosely on a shelf.
Pack Carrots, Parsnips, and Beets in Bins
Placing these veggies and similar ones in bins, crates, or other sturdy containers with damp filler material is an ideal way to keep them indoors, but without the benefit of refrigeration, like in a root cellar, for instance.
Basically, all you need is a sturdy container that won’t break down under the weight of sand, sawdust, ash, peat, or vermiculite. You want this substrate damp, barely so, not sopping wet. If it’s too wet, it will facilitate mold, and that will obviously ruin it.
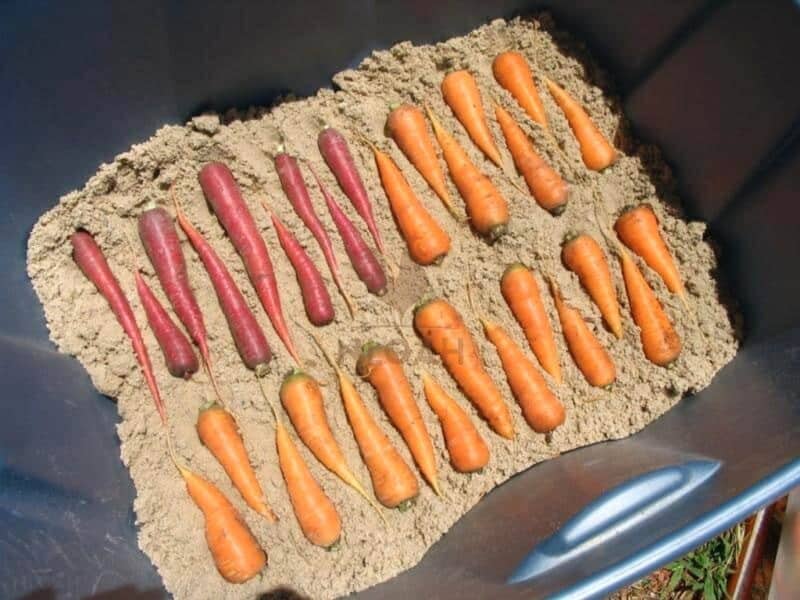
All you need to do is put a thin layer of this material on the bottom of the bin, layer your vegetables in orderly ranks, and then cover them with another layer of your substrate before repeating the process all the way to the top.
Plastic food-grade buckets or sturdy storage totes are ideal for this purpose, but you can use wooden crates if you want. Note if you are using sawdust that it cannot be from pressure-treated wood; those chemicals might leach out and contaminate your veggies.
This sort of storage environment will help the veggies stay moist and uncontaminated as long as they are kept in a cool, dark spot.
Keep Harmful “Neighbors” Away
I first learned this trick from my great-grandma and, for most of my life, brushed it off as an old wives’ tale. Turns out, it’s true! Joke’s on me, I guess.
Some fruits and veggies can actually accelerate the ripening, and eventually spoilage, of other veggies. This is the very last thing you want to happen when you’re trying to overwinter your roots and tubers!
Some of the most common offenders include apples, onions, garlic, bananas, tomatoes, peppers, and cabbage.
We won’t delve too deeply into the reasons why: suffice it to say that all of them release ethylene or other gases that cause problems, and the greater the quantity and closer the proximity, the more problematic they are.
Be especially careful about storing other long-lasting veggies like onions and garlic next to each other or near any other root veggies. Keep them separated!
Clamp Them
No, I’m not talking about crushing them with a framing clamp. This isn’t an interrogation! Jokes aside, clamping is an ancient outdoor storage technique for veggies, one that consists of burying them post-harvest in a mound made of straw, leaves, and soil.
It is a tested and workable option for people who don’t have a good root cellar and lack refrigeration. The short version is that you’ll first dig a shallow trench or depression and line it with very dry straw or leaves.
Next, you’ll place your vegetables, cover them with another layer of straw or leaves, and finally mound soil over the whole thing to seal it off.
This provides insulation and retains moisture but is best in places that have proper winters with cold, frosty weather; mild, wet winters can cause problems.
Leave Them in the Ground
Believe it or not, your best bet for winter storage might simply be leaving some veggies in the ground. Carrots and parsnips are especially good candidates for this treatment. All you’ll need to do is cover them with a thick layer of mulch, straw, or leaves to help insulate them and then keep an eye on them.
Before the weather gets too bad and prolonged hard freezes arrive, snip off the greens to prevent moisture loss. Also, you’ll have to keep an eye out for freeze-thaw action; repeated freezing of the soil can put too much pressure even on these sturdy veggies.
Depending on your conditions, this might let you delay the harvest until winter is well underway or leave your veggies in the ground until spring.
Do your homework on your veggies and their variety, though; some might turn too tough or even woody if you leave them in the ground too long.
Consider Preservation Methods
If all else fails and you just want to prevent spoilage, consider preserving your veggies by freezing, dehydrating, canning, or any number of other methods. You’ll have options for room-temperature or refrigerated storage.
Sure, they won’t technically be considered fresh anymore, but they will stay edible a lot longer and with a lot less risk of spoilage if you do it right. Plus, they’ll be ready to eat or use in recipes, one way or the other!


Get your gift and learn things like:
- how to make this really quick pest spray
- how to prevent egg waste
- two cheap automation devices that will make your life easier
Tom has lived and worked on farms and homesteads from the Carolinas to Kentucky and beyond. He is passionate about helping people prepare for tough times by embracing lifestyles of self-sufficiency.