I am incredibly excited to announce the launch of a new New Life on the Homestead series. This ongoing column is going to be solely devoted to the making of homemade toys and upcycled DIY toys, for the little loved ones in your life.
Is there a difference between homemade toys and DIY toys? Oh, definitely – and you do not need to possess any advanced artistic, sewing, or power tool skills, to make either.
We homesteaders know both the value of a dollar, know quality when we see it, and how to appreciate the simple and most important things in life. We want to pass all of those attributes onto your young loved ones. Spending time with them teaching them what we know and how to appreciate the world around them is something is one great way to accomplish that worthy goal, but teaching them through play, is another.
The toys and gifts I will be showing the New LIfe on the Homestead community how to make will help spark and grow the imagination of the children who receive them while teaching them both the value of homemade toys and the love that goes into making them.
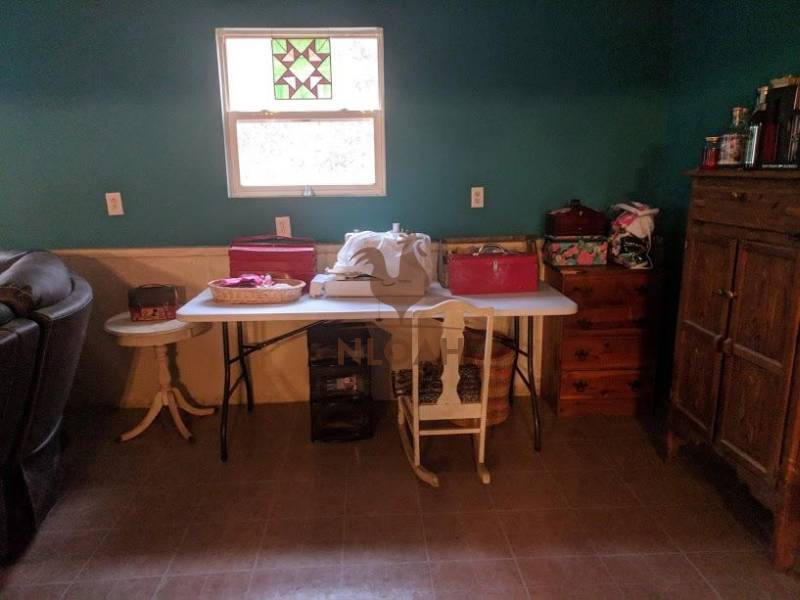
This is where the toy making magic happens on our homestead. It is not fancy, it is not private, but it gets the job done. There are only two things I miss from town living, unlimited live-streaming internet data and my crafting room. We drastically decreased our home size and up-sized our land mass.
On the homestead we frequently make do with what we have to start or complete projects and to build what we need. Teaching children from a young age that wonderfully fun toys and beautiful and useful presents can be created using those same principles is a gift that will last a lifetime.
Have you walked down a toy store aisle lately? Sure, it is filled with the same plastic junk the shelves have contained for years now, but something has drastically changed. Looking for a dollhouse for a little girl? Fisher Price, one of the leading toy manufacturers for decades, no longer even makes dollhouses!
How about a castle, farm, or cowboy fort for a boy or girl? They are not there folks. A grand total 99 percent of the plastic junk is merely licensed characters and add-on to licensed playsets designed to further market a television show or movie to children. Those type of toys do not encourage imaginative play, they merely urge children to act out scenes from the show or movie using dolls, animals, or action figures by acting out a depiction of a character someone else created for them.
Remember back when you were a child, all the great adventures you would go on in the backyard, woods, or even in your own bedroom with your favorite toys? No one had to script out how you were supposed to play with them. Our children and grandchildren deserve that same wondrous opportunity. Childhood keeps getting shorter and shorter, with even second graders now putting cell phones and electronic tablets at the top of their Christmas lists.
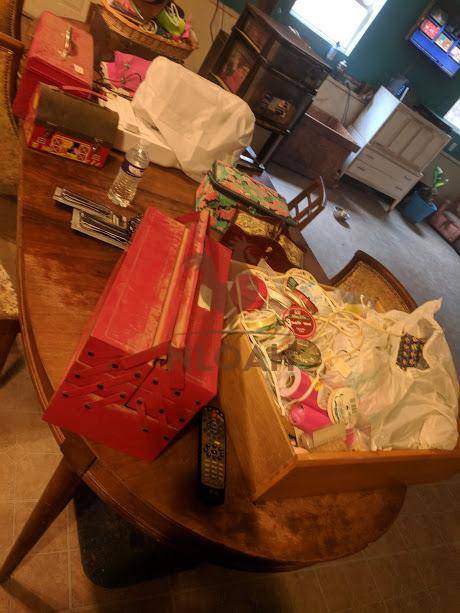
This is what it looks like around our homestead when I move all of my toy-making supplies to the kitchen table because I need more workspace. It is only the first of May, but I already have three amazingly special homemade toys made for Christmas – ones that will evoke cheers of joy from grandchildren.
Making presents all year long is exciting and I am continually surprised how doing so makes me happy and fills me with the Christmas spirit all year long. Of course, I have to hide the DIY toys from the kiddos for a long time and consistently make myself promise not to hand them out early.
The magic and wonder of childhood should not end so quickly nor should it be curtailed by mass marketers pushing their cheap plastic junk with pre-determined types of play. This homemade toys and DIY toys series will show you how to make some really cool and easy to create toys and gifts, but will also do two other extremely important things as well.
1. Reader Requests – New Life on a Homestead readers can use the comments section beneath each post in the asking not just for detailed help or suggestions on completing the project in each series segment, but also for guidance to come up with homemade toys for the babies to teenagers in their lives and/or and how to use the skills and supplies they have on hand to make a gift for a loved one.
2. Learning Toys – I will also show you how to make educational toys the children can play with on a daily basis and to use to teach specific academic and self-reliance concepts.
How To Make A Fairy House
The first projects is simple one that can be created in just a couple of hours with a pair of scissors, a hot glue gun, some scrap crafting supplies, and a $1 seen-its-better days yard sale dollhouse. I will make Waldorf style bendy dolls, and put wings and some other fairy type adornments on them, to live in the dollhouse designed to be part of a pixie fairyland village I am creating.
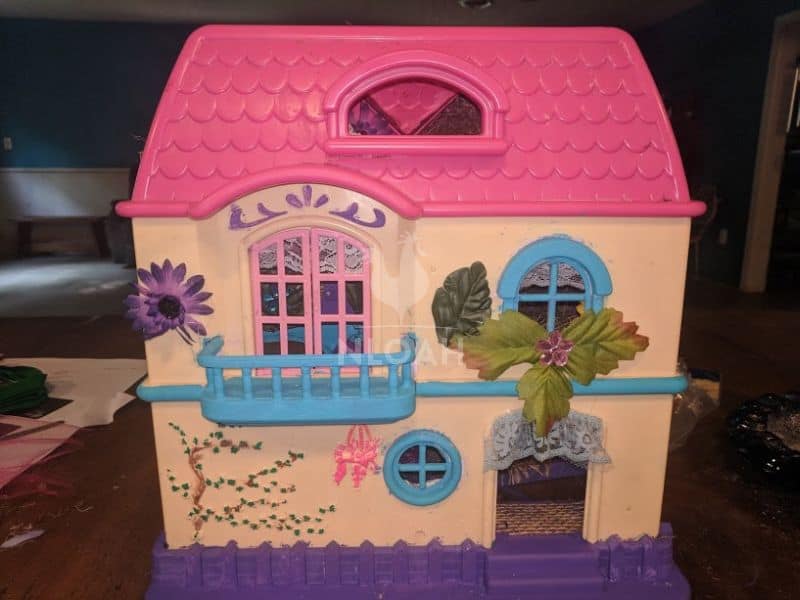
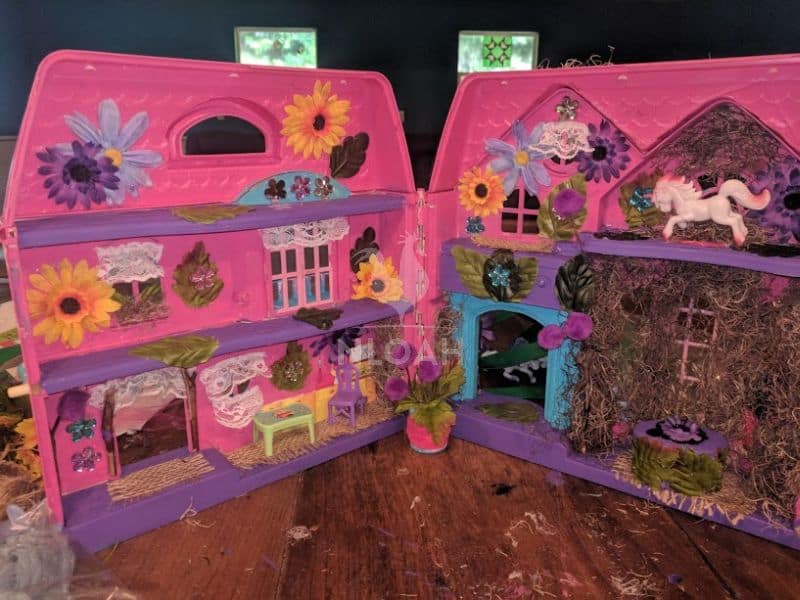
Fairy gardens are all the rage, with most them being designed to look adorable but not really be touched. I have a granddaughter who loves fairies and unicorns, so I decided to use the $1 dollhouse I bought at a yard sale last year as an outside toy, to make a completely “playable” fairy dollhouse for Audriella.
If you can’t score a cheap dollhouse yard sale find, make a simple wooden rectangular box shaped one or use a cardboard box. Start saving your cardboard boxes now, we will be using that material a lot in our DIY toy making. The folding cardboard fabric-covered dollhouses and hunting lodges I made this past Christmas have stood the test of time under intense toddler play, it is a far more durable material than many folks think.
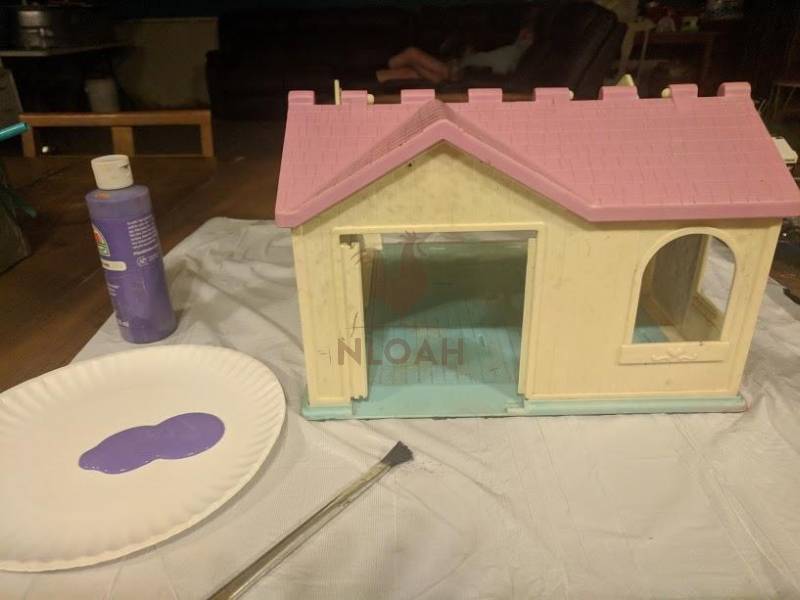
Before Photo:
Supplies
• House or house shaped box made of wood, cardboard, or plastic – like a storage tub
• Hot glue – I used a low temperature glue gun so I could manipulate the adornments without scorching my fingers
• Acrylic craft paint set
• Paint brushes
• Sand paper – optional
• Adornments – fake flowers, tulle, empty spools of thread, trinket boxes, cardboard jewelry boxes, lace, fabric, burlap, sticks, etc.
• Popsicle sticks and wood stain if you want to create the look of wood floors, paneling, or a log cabin – optional
• E6000 is my “go to” glue when crafting, and may come in exceptionally handy if you are doing fine detail work when creating accessories and embellishments.
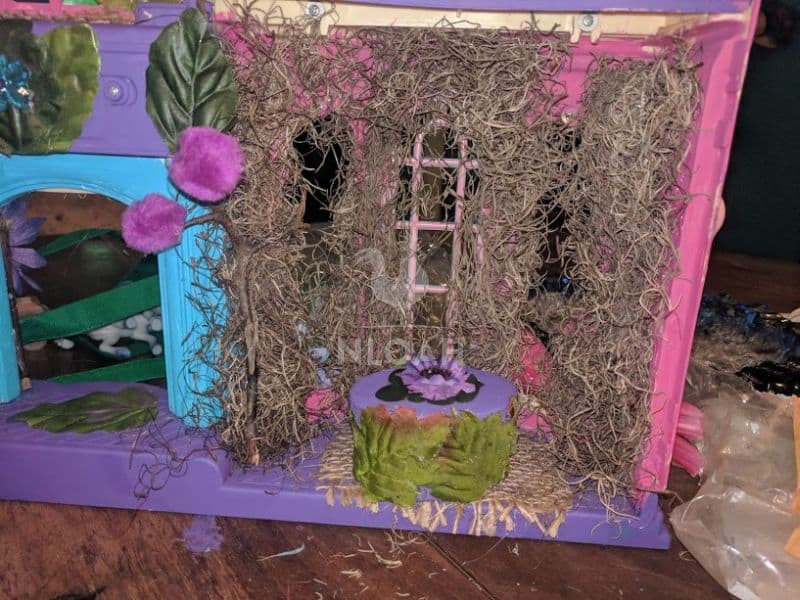
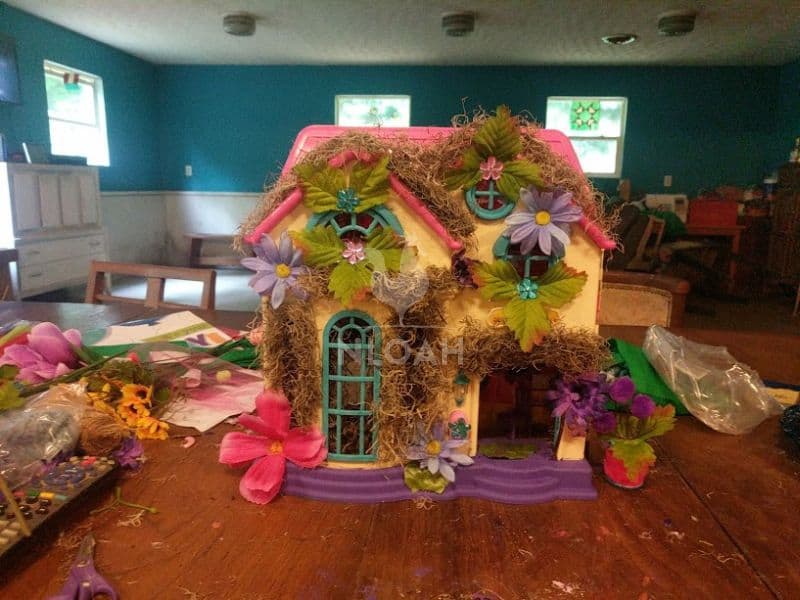
These were my fairy house inspiration pieces. If you are making the homemade fairly dollhouse for an older girl where choking and breakage are not an issue, these more delicate touches would likely and embellishments would likely be a huge hit:
Directions
Wash and dry the old plastic house, if necessary.
Use sandpaper to lightly scuff the finish of the plastic house so the paint will adhere a little better and dry more quickly. Dust the house off and using sandpaper. The dollhouse I used was fairly old and the gloss finish was long since gone, so I had no need to use sandpaper.
Paint the house in the gift recipient’s favorite colors or go for a natural woodland theme.
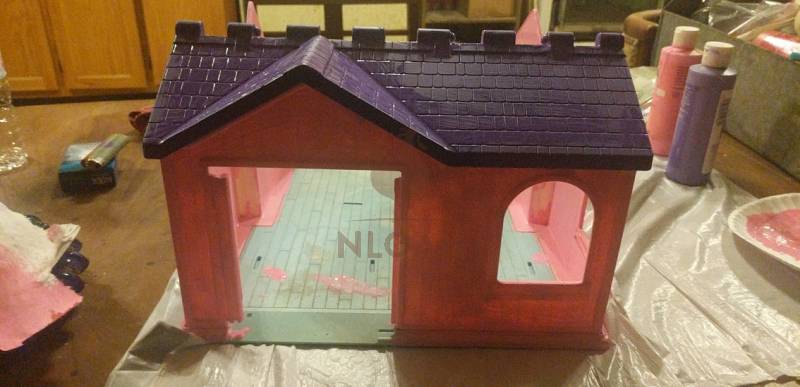
Paint the roof of the house first so any drips that happen can be covered can be wiped away and the stain covered when you paint the exterior and interior walls and the floor.
By painting the roof first that should also allow it time to completely dry by the time you are done painting the rest of the house. Once the roof is dry, you can adorn it with moss (real moss that has been dried or artificial) and/or make a garland of leaves and moss to drape from the roof over the interior walls.
Dried leaves can be glued as a decoration or strung by their stems onto string to hang them as a garland. I did not use either moss or leaves on this house because it is for a toddler, but when I create a similar one for an older niece, I will be creating a fairy home much like the ones in the Pinterest images above.
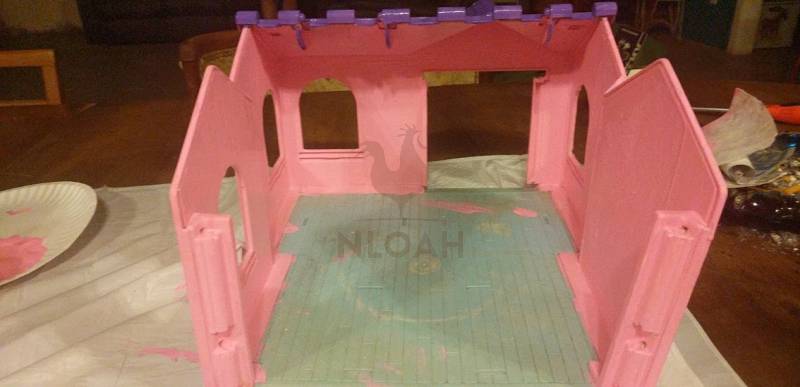
Paint the walls of the plastic dollhouse or house shaped structure next. It took me two coats to cover the plastic white walls with the pastel pink acrylic paint.
Once the walls dry, it is time to paint the floor or cover it in popsicle sticks, fabric, self-adhesive vinyl flooring, carpet remnants, or fabric. I was too impatience and created a smear, I knew better, but was excited to get the house all painted so I could start making furniture and decorating the inside. My lack of patience caused both extra work and time to be added to the project.
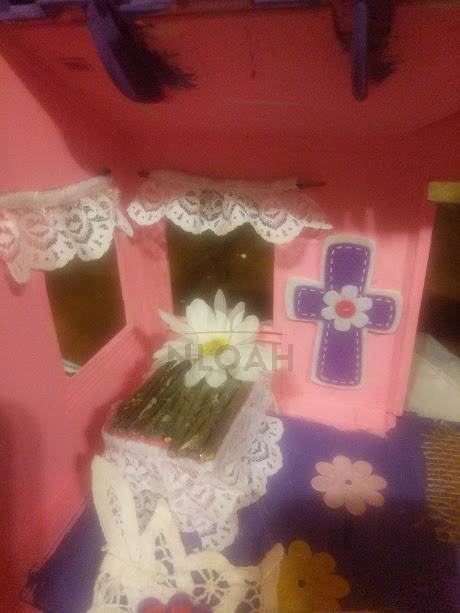
I made the little fairy bed out of a cardboard box a bracelet had come in. I painted the box pink, and hot glued some scrap lace to it once the paint had dried.
Next, I used some twigs I collected from the yard to make a “mattress” on top of the bed. The white artificial flower will serve as a pillow for the little fairy doll.
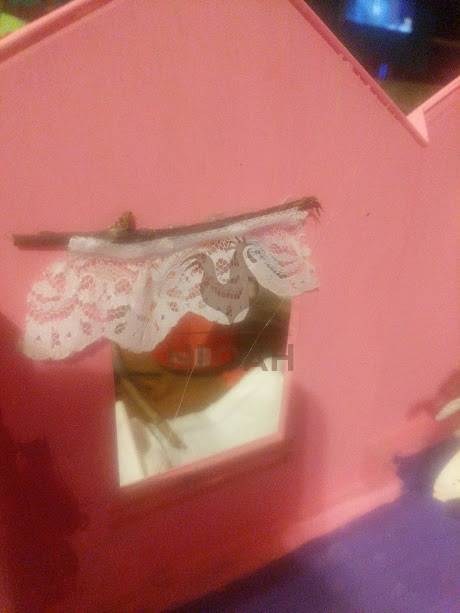
I used some more of the twigs to make curtain rods. Using hot glue, attach some lace or fabric to the twig and hold it firmly together for a few moments to make sure it dries without slipping out of place.
Then, put glue on the twig and not the wall – hot glue globs up and runs quickly. Press the twigs both firmly and evenly into place and hold it there for about one minute before letting go. All of my twigs and lace stayed firmly in place using low temperature and did not slip.
Repeat this process for all of the windows.

Now it is time to decorate more of the interior walls and to make additional furniture. I used a round cardboard trinket box from my craft bin stash. When purchased new it cost $.49 at Walmart.
All of the adornments you see in the photo came from my craft bin of scrap materials. I used some burlap for a welcome mat in the doorway. The $1 yard sale dollhouse did not have a door, but I doubt the fairies that will inhabit it will mind at all.
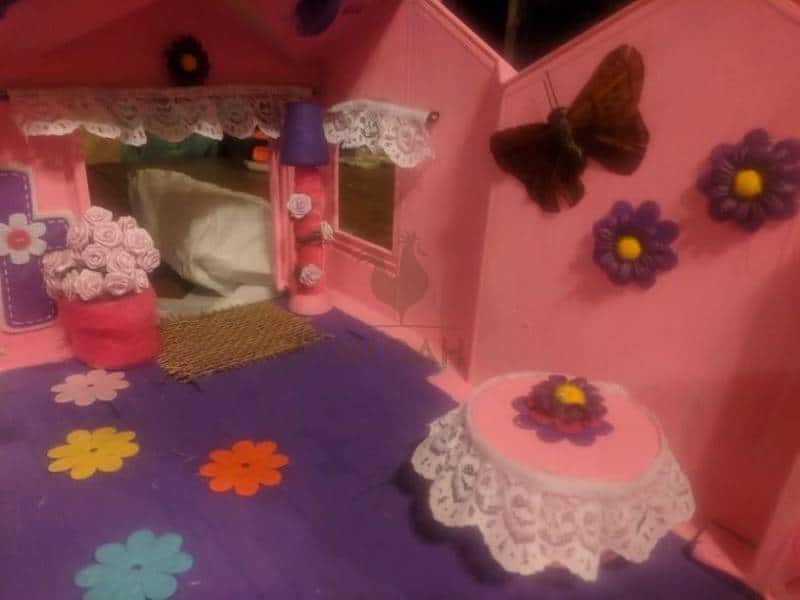
To make the flower “pot” is used an empty thread spool. I put hot glue on the spool and wrapped some tulle left over from a tutu project around it to create a bit more girly-ness to the fairy house – as if this house could be mistaken for not being girly already, right?!
The lamp was a wood lamp from another toy set that I found in the playroom. I painted it several different ways and finally liked how it turned out but then I decided to touch up the purple lampshade and dropped paint on the embroidered flower I had glued to it. I managed to pull the flower off and painted it purple to cover the smear and then repainted the lampshade pink.
But, I really didn’t care for it that way, it blended in too much with the wall. So, the lampshade was painted purple again and decided to cover it in tulle and wrap some of the flowers that matched the ones in the pot, around it.
The felt flower shapes were glued onto the floor to serve as a throw rugs.
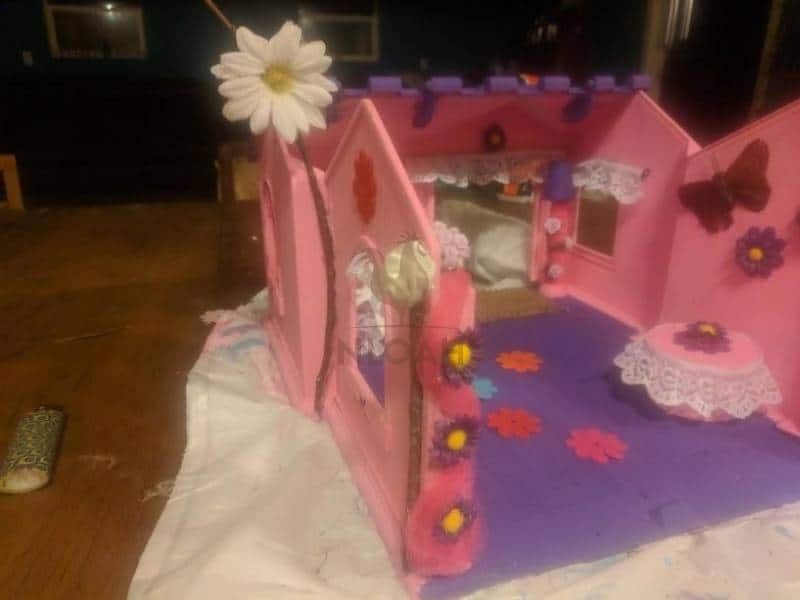
To create an entryway that all of the other fairies in the pixie village would admire, I wrapped some more tulle around a piece of plastic that likely once held a back on the dollhouse. I glued some flowers that matched the ones on the interior wall and the table decoration into place and then used the low temperature hot glue gun again to affix the tulle.
Some more sticks and flower were added to the exterior walls to continue the fairy cottage look there as well. I used markers to color the raised hearts and flourishes on either side of this that were imprinted on the old dollhouse.

The “quilt” on the fair bed is a little doily I had in my craft bind with a purple felt flower glued on the top. Any scrap of fabric or felt could easily be turned into a little bedspread and a pillow, If you do not sew or simply do not want to drag out a needle and thread or your machine for a little pillow, just cut the desired pillow shape, put a little stuffing (a pulled apart cotton ball will work) in between your pieces and hot glue.
If using fabric, make sure to turn the unfinished edges inside before gluing, unless you think having a raw edge look will enhance the woodland look of the fairy house.
I am going to go to the local Dollar Tree store and buy some dollhouse furniture to finish off the fairy house. They regularly have unfinished wood dollhouse furniture such as beds, tables, chairs, and dressers. They also sell plastic room sets, if you want to or have to go that route. Those sets usually come in pink or purple but could be painted to match your color choices.
If I had to buy all of the adornments and supplies I used to make this cute little fairy house instead of raiding my craft bin, it would have cost approximately $7, at the very most to create.
Making a fairy house or fairy village and need some extra help or need an idea about a homemade from the homestead gift to make for a toddler girl? Leave a note in the comments sections and I will do my very best to help you create a one-of-a-kind handmade DIY toy for a child you love.

Tara lives on a 56 acres farm in the Appalachian Mountains, where she faces homesteading and farming challenges every single day, raising chickens, goats, horses, and tons of vegetables. She’s an expert in all sorts of homesteading skills such as hide tanning, doll making, tree tapping, and many more.
Love you! This is adorable! I can’t wait to make one with my granddaughter!
Jane,
Thank you so very much, how sweet your are! I hope you and your granddaughter have as much fun with this project as I did. Please share a photo of what you two create on our Facebook page, I would love to see it!