I started my tomato seeds today. I decided to just plant one variety this year to be easier on myself, since this is the first time I’ve ever gardened. So, I planted my Brandywine Pink Heirlooms.
Luckily, if you’re new to growing tomatoes – or starting seeds indoors at all – it’s not a difficult endeavor at all. There are a few things you need to be aware of, but with a little bit of practice, you’ll be able to start and grow a bumper crop of tomatoes for your garden this year.
Why You Should Start Tomato Seeds Indoors
While other vegetables can certainly be started indoors – I start almost all of my seeds that transplant well inside a few weeks before the last frost – tomatoes are some that you absolutely need to start inside.
This is because they take so long to mature. Plus, they like the heat. Tomatoes need temperatures of at least 60 degrees F (15 C), and ideally 80 degrees F (26 C), for the seeds to germinate.
In some places, it could be the middle of summer before the soil gets that warm, which doesn’t leave you much time to harvest a crop.
Starting tomato seeds indoors lets you get a jumpstart on the growing season. Even if you live in a warmer area, where soil temperatures aren’t as much of a concern, starting indoors will allow you to potentially get a second round of crops in before the winter arrives.
Plus, buying seeds is much cheaper than buying packs of seedlings at the nursery. When you start your seeds indoors, you’ll also have more control over the quality of your seedlings.
You can generally choose to start more varieties of tomatoes, too, letting you add fun heirloom tomatoes to your gardening roundup when these are normally quite challenging to find at nurseries.
When you’re figuring out what to start indoors, consider going through seed catalogs from various companies.
Compare their prices and offerings. Make a list of what you’d like to grow and remember to be realistic about how many plants your garden can actually handle.
Plan for some losses, too – some seeds won’t germinate or might die, seemingly for no reason, later on.
When to Start Tomato Seeds Indoors
Ideally, you should start your seeds indoors about six to eight weeks before the last expected spring frost date. Your seedlings can outside roughly two weeks after that date.
Don’t be a slave to the calendar and calculators you’ll find for this, though – you’re better off just to consider the weather when you are ready to plant.
To estimate the date, there are plenty of online tool and calculators, along with the Old Farmer’ Almanac. There are some people who even consider things like the moon phase and stars to figure out when to start their tomatoes!
Equipment Needed
Seeds
Ah, the most important part of starting tomato seeds indoors – the seeds themselves! There are hundreds of choices and finding the right one can be tricky.
Consider what kind of tomatoes you want. Do you like having cherry tomatoes on your salads? What about slicers? Would you rather be able to make a ton of tomato sauce? You will also have a choice of determinate versus indeterminate tomatoes.
Determinate tomatoes are those that grow to about three feet tall and put out a crop all at once. Indeterminate tomatoes produce all season and can grow up to six feet tall.
Seed Starting Mix: Also referred to as potting soil, seed starting mix is one of the best mediums you can use when you are starting tomato seeds indoors.
Your best option will be a sterile, soilless mix that is labeled specifically for seed starting. It’s important that you don’t try to reuse soil from your garden, as it can harbor dangerous pathogens that will kill your plants.
Peat Mos
This one is optional, but I like to have some peat moss on hand when starting seedlings. I use it to cover my plants instead of soil – it helps the seeds germinate more quickly.
Containers
You can use anything at all to start your seedlings, but I would advise against “upcycled” containers if you can help it.
Lots of people start tomato seeds in things like egg cartons or yogurt containers. The problem is that these containers are very shallow and don’t drain well (even if you poke holes in the bottom).
I recommend purchasing separate pots and individual seed-starting trays for good drainage and the best germination. No matter what kind of container you use, make sure it is clean if you are reusing it from another year.
Light and Heat
You can start your seeds in front of a window, but I have had better luck germinating seedlings with the warmer temperatures provided with a heat mat and LED grow lights.
The sunlight from early spring and late winter simply aren’t as strong as summer lighting, and there aren’t as many hours of daylight, either.
Starting seeds and simply relying on natural light can cause your seedlings to be weak and spindly.
Now, you may be thinking that these lights will add up a cost that will outweigh the yields you’d otherwise be getting. But really, the initial fixed cost means you’ll use these for years on end, while the energy consumption is really low. SO many gardeners use them, you cannot go wrong with them.
Maybe have 20,000, 30,000 or even 50,000 hours of running, and keep in mind these have auto on/off functions to simulate natural sunlight. So they won’t run continuously.
Best Seeds to Start Indoors
Any kind of seed can be started indoors. Here are some options:
- Cherry tomatoes: Some of the most popular cherry tomato varieties include Sun Gold, Pear Drops, and Napa Grape. Cherry tomatoes tend to mature the fastest.
- Sauce tomatoes: Romas, Big Mamas, and Amish Paste are the most popular. These have less water and a richer flavor, overall, than other varieties.
- Beefsteak tomatoes: If you like to can tomatoes or eat tomatoes in sandwiches, beefsteaks are your best bet. Options include Mortgage Lifters, Brandywines, and Cherokee Purples.
The Steps
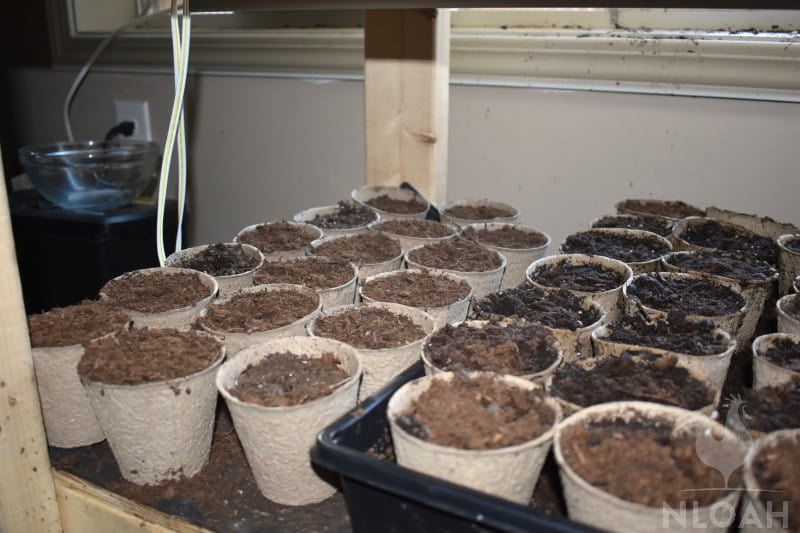
First, start by setting out a container of moist potting soil. You have a couple of options. You can use one large tray filled with soil and scatter your seedlings loosely, or you can plant just a couple of seeds in individual containers, like peat pots.
The advantage to using peat pots is that there will be no indoor transplanting required (which I’ll talk about in a moment).
The disadvantage is that it can be harder to evenly disperse your seeds and you might end up with a few empty pots. I’ve done it both ways, though, and find that both work well.
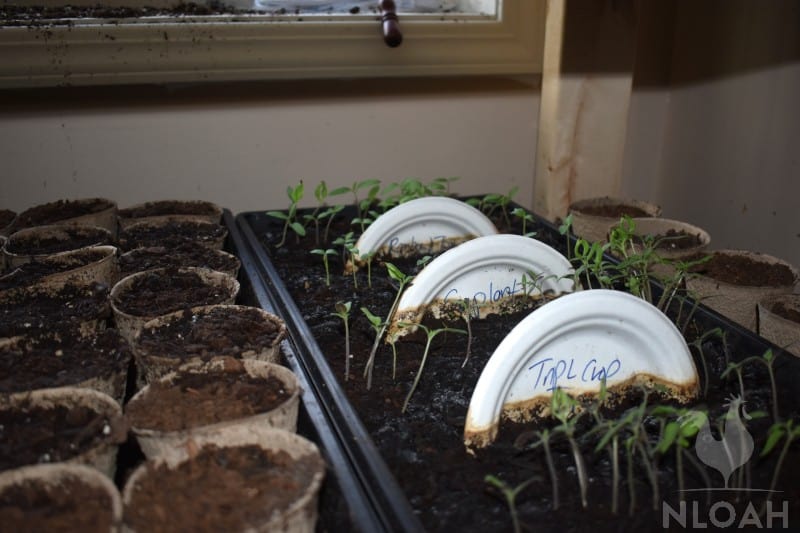
If you want to start in a tray, you will fill your seed starting tray with moist, sterile seed starting mix. Sow your seeds by scattering them thinly on the surface of the soil. Then, cover them with a thin layer of peat moss.
The peat moss is ideal because it is just enough covering to prevent the seeds from scattering when you water but not so thick that it takes forever for your seedlings to germinate:
If you start in peat pots, you’ll follow the same process, except instead of scattering your seeds evenly, you’ll just plant two to three seedlings per peat pot.
Either way, make sure you label your seeds carefully. You will want to know which of your tomatoes are beefsteaks and which are Romas!
Once you’re done planting, you will put your seeds in a warm place. I use a heat mat, which helps speed up germination (particularly when it’s already a bit cold in the house in the late winter).
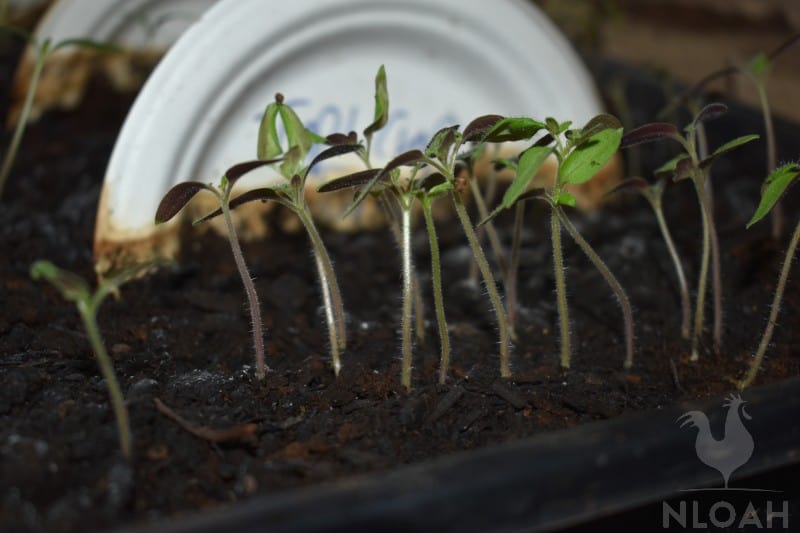
Light isn’t important when the seeds are first germinating, but as soon as you see those first seedlings appear, it’s time to get them under some light.
You can use a sunny window to provide the light, but I’ve always had more success in using LED grow lights. These are designed specifically for starting seeds indoors and speed up germination and plant growth quite considerably.
My plants germinate in three days, on average, compared to the seven to fourteen usually required when just placing seeds in front of a sunny windowsill:
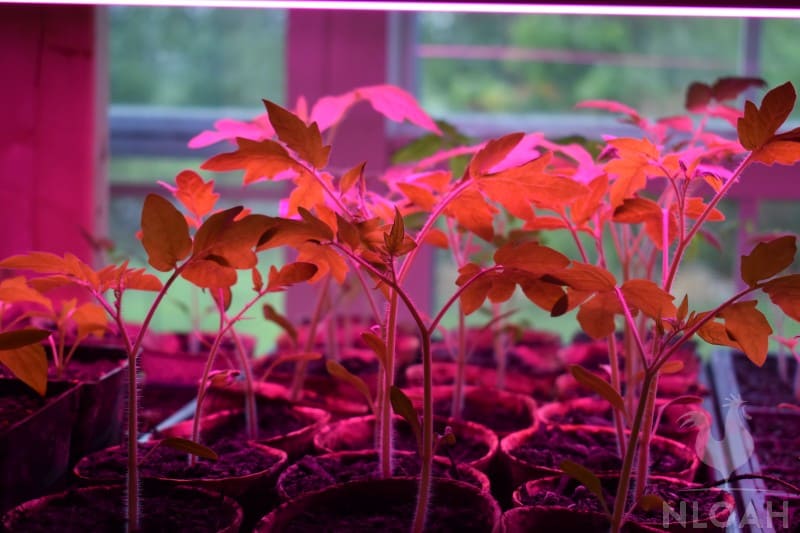
Plus, using an LED grow light provides the advantage of not allowing your plants to get “leggy.”
Leggy plants are those that stretch towards the window in search of light. They don’t develop strong, even roots, and transplant poorly.
Leggy seedlings can often be the kiss of death for your indoor seed starting project! LED lights are expensive, but I think they’re definitely worth the investment if you start a lot of seeds indoors.
Once your seedlings emerge, you will want to begin racking their progress. Depending on whether you used a heat mat and grow light to start your seeds or just good ol’fashioned windowsill lighting, the timing on your seeds’ progress will vary.
If you start in front of a window, it can take up to 30 days for the first true set of tomato leaves to appear. These will appear above the baby cotyledon leaves.
Once your true leaves appear, you can transplant your tomatoes to larger individual containers. This will give them room to properly develop.
Keep in mind that you can skip this step if you already planted in individual pots. If you didn’t, you will need to “prick out” your seedlings and transplant them to individual containers.
To do this, lift the seedlings from below, holding each plant gently by its baby cotyledon leaves. Remove the entire root ball. If the roots from multiple plants have grown together in a clump, tease the two apart.
If you can’t get them to separate, you can plant both together, but then pinch one off above the soil line immediately after planting.
Each seedling should go into its own container – at least three or four inches in diameter – with plenty of moist potting mix.
The plants will grow new roots and you can transplant them as soon as the weather is prime for planting.
If you grew in peat pots, you won’t need to do this step. However, you will need to thin your plants. To do this, remove seedlings so that there is only one per cell or pot. Use a pair of scissors to cut the weaker seedlings off where they meet the soil.
It may seem cruel to do this (I always have a hard time letting go of healthy seedlings!) but it’s necessary. You can always try to transplant the extras into another container, but it could kill both plants – it’s not worth it, in my experience.
Caring for Tomato Seedlings
Keep your tomato plants at temperatures of 65 to 70 degrees until they have true leaves. Plants that are kept at cooler temperatures than this will suffer from cold stress and may begin to wither back and die.
Make sure your soil stays moist, but not overly saturated. Dry mix will be lighter in color than moist mix, which is a good sign that you need to water your plants.
You can run a fan in the room, too, if you’re concerned about it not having good enough air circulation. Air circulation is essential, as too little can cause diseases like damping off.
If you grow your plants on a windowsill and not beneath an LED grow light, consider rotating them daily. Just turn the pots so they are facing the other direction. This will help prevent them from leaning toward the light and becoming leggy.
Once the second set of leaves appear, you can go ahead and give your plants some fertilizer. Compost tea works wonders, as does any other water-soluble fertilizer.
Transplanting Your Tomato Seedlings
Your tomato transplants are ready to go outside when the weather has warmed up. Nighttime temperatures should regularly be in the 55 degree F (12 C) range.
Don’t rush to transplant your seedlings as soon as the weather shifts, though! You need to harden them off first.
Hardening off is the process of acclimating tomato plants to outdoor conditions. Start by moving them into the sun for a few hours at a time.
Gradually increase the amount of time you keep your tomato plants outdoors until they are in full sun all day.
This process is essential, not only for acclimating tomatoes to the more sever outdoor temperatures but also for getting them used to other climactic conditions, like wind.
It can help prevent transplant shock, which can cause your plants to either die or be severely stunted in their growth.
When you’ve adequately hardened off your plants (it can take a week or more to do this), you can go ahead and transplant.
If your plants are more than six inches tall, you can remove the bottom branches before you plant. New roots will appear along the buried stem.
Plant your tomato seedlings in prepared soil (it should be warm, fertile, and loose with adequate drainage). Tip out your plant by overturning your planting pot. Gently tap out the entire root ball.
Settle your seedling into the hole. The entire stem will be covered. Backfill the soil around the plant and firm it down.
Here’s a quick video that will give you more information on how to transplant tomatoes:
You’re not done yet, though! Water gently and set up your tomato supports. Many people wait until their plants have fully developed to set up trellises, cages, or stakes, but this is a mistake.
Your plants are going to grow large and heavy very quickly – they need a lot of support!
I planted my tomato seedlings today because it takes 5-7 weeks before you can plant them outdoors. According to the Farmer’s Almanac May is a good month (in my area anyways) for planting tomatoes, so the timing should be just right.
If you are an experienced grower of tomatoes, and have any advice, let us know in the comments section below!

A city girl learning to homestead on an acre of land in the country. Wife and homeschooling mother of four. Enjoying life, and everything that has to do with self sufficient living.
Thanks for sharing! Hope they all do well. I’m still waiting for my seeds to arrive…guess I should look into that since I ordered a few weeks ago.
This is my first year growing from seed, so I don’t have much experience. I do know that if you have more than one kind, label them with something besides a mark on the side of the container (oops). I now have cherry and regular sized tomatoes in two colors, and I don’t have a clue which is which.
Oh, and once they get the second set of leaves, you should put a fan on them or brush your hands over them to en courage root and stem growth. Mine are about 3-4 inches tall and just waiting for the first week of May (I started them a little early because of spring fever).
My tomato seeds did really well last year. This year, jury is still out. One thing I do is drape a dark cloth over the greenhouse for a few days as the seeds germinate. I think I must have read that somewhere! Then, after they start to sprout, I remove the cloth but leave the plastic on until they’ve all sprouted (or until they get too tall!)
Looking forward to seeing how yours do. We tried planting tomatoes last year & they died, lol. But we really didn’t know what we were doing and didn’t do enough research. I’m thinking of getting started on some more, this coming week.