Last night, I was searching the web for some inexpensive baskets to stuff with homemade goodies for Christmas gifts this year, but I couldn’t find anything cheap enough! (I should have been keeping an eye out for them at yard sales throughout the year!)
My search then shifted to how to make a basket out of recycled materials. I was excited when I came across a great way to make a newspaper basket! And since I have access to stacks of newspapers, I knew this was definitely for me.
Can You Make a Basket From a Newspaper?
Making a basket out of newspaper is one of the best craft ideas I’ve seen in a while!
You can make it out of newspaper that is the color of your choice, and it can be any size. You can make a large or small newspaper basket and use it to store all kinds of material.
In addition to the various ways you can use newspaper baskets for the holidays, as I mentioned earlier, you can also make different designs for things like an Easter basket for storing Easter eggs and countless other ideas. You could even put holiday cookies in them for gifting!
This is a fun project that doesn’t take much time, money, or special skills. The beauty of basket making with newspaper is that it doesn’t require any special kind of weaving skills or tools!
What Are the Materials Used in Making Newspaper Baskets?
Honestly, you don’t need much to make your own newspaper basket besides the following items:
- Newspaper
- Stapler
- Optional: Ribbon and glue; Spray Sealant (I used Acrylic Sealant)
I found that I didn’t even need scissors, except to do some trimming around the top corner edge at the very end. I simply tore the newspaper right down to seem to separate the pages. I used 28 of these half sheets for my project.
That’s really all you need!
If you want, you could substitute other materials, like cardboard, construction papers, wrapping paper, or even toilet paper tubes, to make this. A long tube, like a paper towel tube or dowel, will give you plenty of cardboard to use as well. All you need, if you use cardboard like this, is just a couple of paper tubes.
You can use a heavy book to flatten out the cardboard or use pins to secure the strips in place while you’re getting the basket put together (or you could use something like a bulldog clip to do this – the end of a tube from a paper towel holder tends to be quite springy and twisty).
The strips should form to the shape over time – but this will help prevent the strips from bouncing back while you’re trying to work with them.
It’s also not a bad idea to have some sort of a template on hand, like any solid circle shape, to make the base of your basket (or the foundation). Just make sure it’s the right size so you don’t have to do any guesswork.
You could also add extra materials for decorating the basket later on. Things like ribbon, extra fabric, burlap, etc are all great options. The best glue for this kind of project is hot glue.
Finally, although this isn’t one of the most messy projects you’ll ever do, you may want to wear “craft clothes” to protect from the occasional smear of glue or sealant.
How Do You Make a Paper Basket Weave Step by Step
Ready to make your first basket out of newspaper? This is a craft that’s surprisingly easy to DIY and it’s a great project for kids! Here’s how to make it…
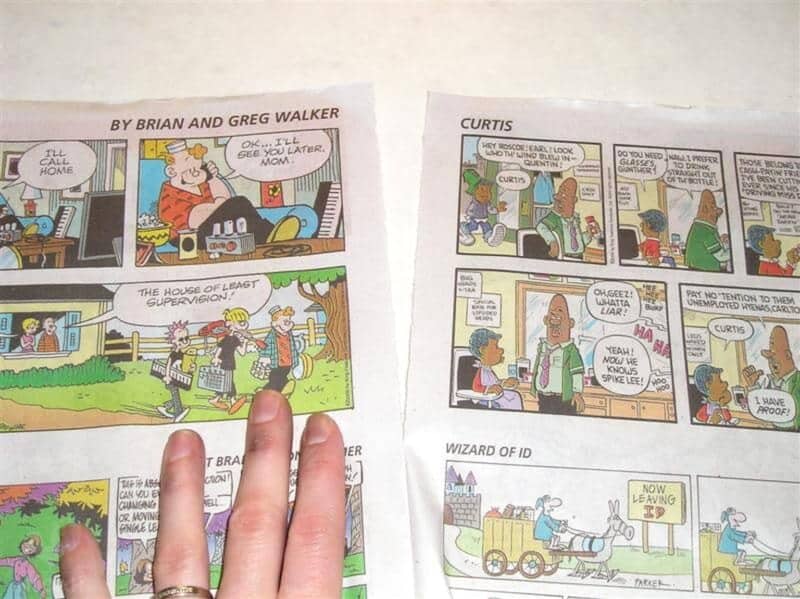
Step 1: Fold and Cut
First, fold a newspaper in half. You can do a few sheets at a time. Make sure the sheet is about half its original width after folding. This will help prepare them to be cut and will save you time, since you can cut multiple newspaper strips at once. You can also use a rotary cutter to make this process go faster.
Cut eight strips of newspaper that are each about 12 inches long and 2 inches wide. These will be the spokes of your basket.
In general, you will need around 40 paper strips to make a basket, depending on the size. You can always cut more later if you need to – and don’t worry about making each cut perfect. For the most part, you won’t be able to see the exact measurements once your basket is complete.
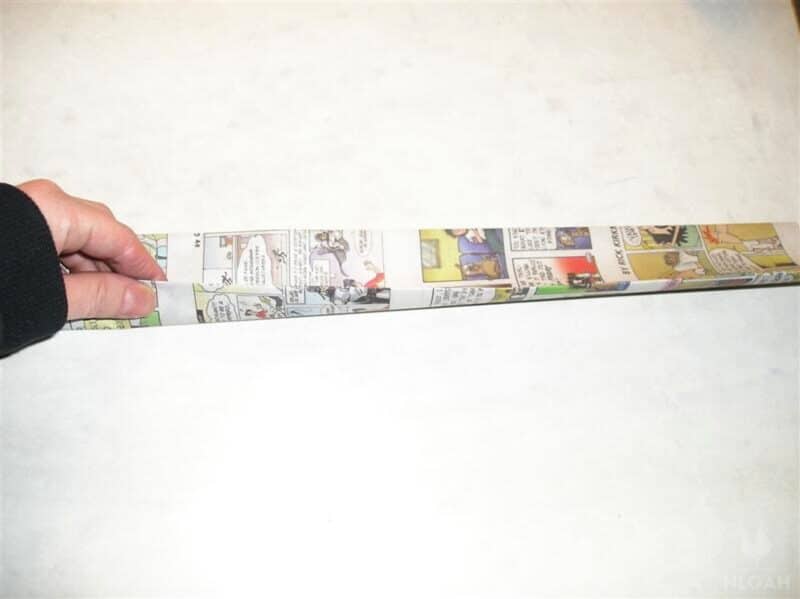
Step 2: Fold Again
Fold each horizontal strip in half lengthwise and then accordion fold it by folding it back and forth in half-inch increments. This will make each strip more sturdy.
If you prefer, you can also roll long strips of newspaper around a pencil instead. These paper strips will give the basket a more rounded design and work the same, but give the final basket more of a bowl shape than the folded loops described above. It’s totally up to you!
Step 3: Make the Bottom
Next, you’ll make the bottom of your basket. You can freehand this or use a round shape, like a plastic Tupperware lid, and trace around it. Cut it out. If you want a lid, you can do this process twice.
Step 4: Attach the Strips to Each Other
Take two of the strips, and tie them together at one end using a piece of twine or ribbon. Repeat this step with the remaining six strips so that you have two sets of four strips each.
Essentially, you’ll just be weaving the strips back and forth. Staple them once you get them in place. You may find that you have to staple a lot more around the edges to keep the strips tight.
Arrange the eight strips so that they form a star shape, with each strip intersecting in the middle of the foundation.
Once you’re happy with the arrangement, tie the strips together at the intersections. You’ll keep on with this weave and twist pattern until your own paper weave basket has reached the desired height for your project.
If you find that the rectangular pieces of cardboard or newspaper just aren’t holding together the way you want, you can add some rows of double-sided tape within the weave twist of the newspaper. This will help add an extra level of security. Again, the stapling will help, too.
Step 5: Make the Handle
To finish, take another strip of newspaper (about 18 inches long) and roll it into a coil. This will be the handle for your basket. Tie it to the top of two adjacent spokes using yet more twine or ribbon. And that’s it—you’re done!
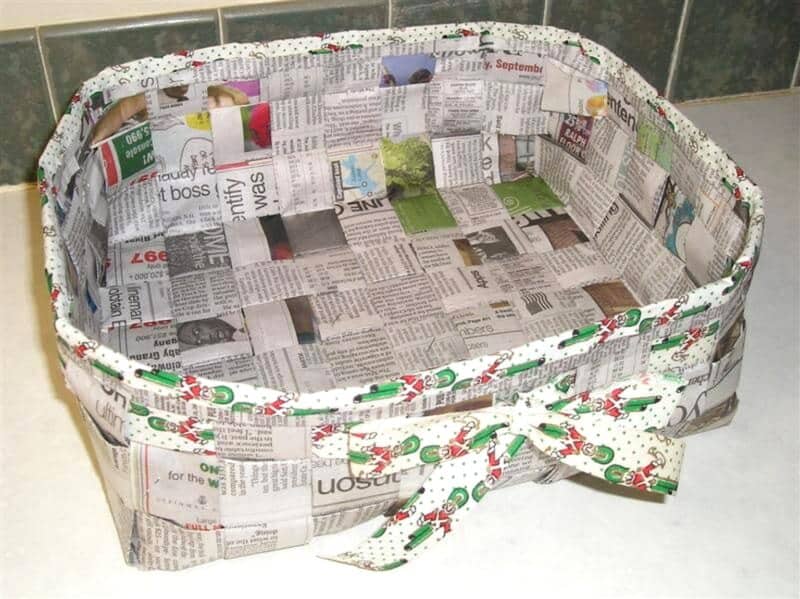
Step 6: Seal (Optional)
If you’re worried about anything coming undone, go back through with the stapler and secure the pieces. You can also apply a small amount of glue if desired.
I recommend spraying the basket with an acrylic sealant or a few coats of Rust-Oleum polyurethane spray. This will keep the ink from bleeding. YOu can decorate with ribbon or other ornamentations as well.
Is Making a Newspaper Basket Worth It?
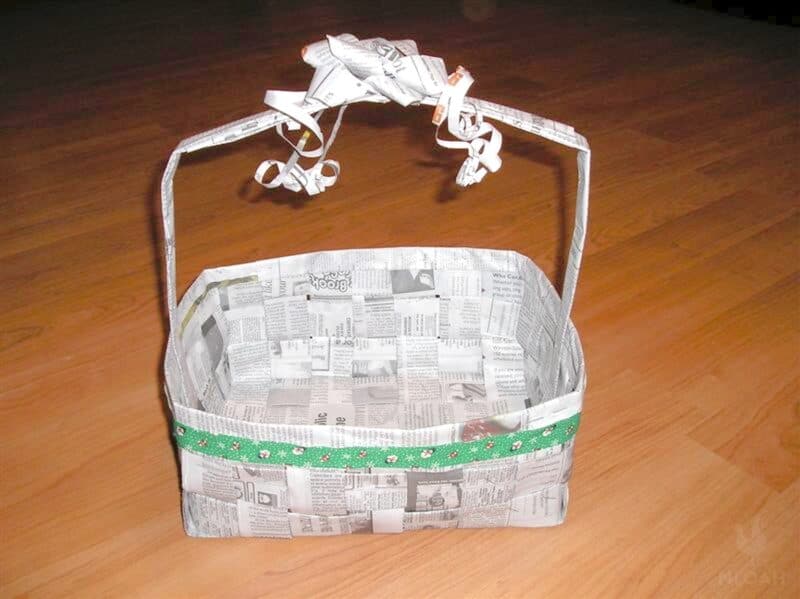
In all, it took me about 2 1/2 hours to make. Seeing as I have more time than money, it’s worth it for me! The first one always takes longer, and isn’t exactly perfect looking, but I’m sure I’ll get better at it as I go.
My first attempt wasn’t perfect but hey! It worked…
The beauty of making a newspaper basket is that it can be truly any kind of design you want. You could make a single upright rectangular basket or a basket with a long side on one end and a short side on the other.
You could even spray paint the basket or decorate it with pens when you’re done if you don’t want it to look like newspaper! You can make baskets in any size or shades you want.
Who knew that those old newspapers could be turned into something so beautiful and practical?
With just a little bit of time and effort, you can have a basket that’s perfect for storing all sorts of things around your home. Plus, it gets rid of all those scrap papers!
I’m excited about how cute these newspaper baskets will look once filled with home baked goodies! What do you think?

A city girl learning to homestead on an acre of land in the country. Wife and homeschooling mother of four. Enjoying life, and everything that has to do with self sufficient living.
I made several visits to our local thrift store and bought baskets from $0.39 for small ones all the way up to $2.99 for huge baskets for fireside use. I kept them in garbage bags in the garage until November. I filled them with handmade soaps and jellies/preserves sitting in nests of paper shreds (from my shredder) and decorated for Christmas for teachers, neighbors, church folk, family and friends. It was WONDERFUL!!
Kendra,
Very cute idea! Is the basket strong enough to hold the jars and pass them out to your family members?
Brook,
Good question! I forgot to mention that I reinforced the bottom of the baskets with cardboard cut to size. I warned everyone not to carry them by the handles 🙂 Just in case.
I love, love, love this basket! I am giving “gifts in a jar” this year, and I was wondering what on earth I could put them in (I, too, have more time than money!). These baskets are perfect!
I wonder what the result would be to spray paint the basket with colored paint (before adding the ribbon, of course). If anyone tries this project and spray paints, please share your results!
As always, Kendra, another fabulous post.
Pretty, but oooh, the inky fingers…!! And towels, and depending on what you put in it, goods…
anna-
Yes! Definitely black fingers. BUT, if you spray it like I did, it won’t bleed onto whatever you put into it 🙂
Looks like a great thing for a older kid to work on! BEAN
This is so cute! What a great way to save money…and reuse…wrap goodies in colorful papers and you’re good to go! I may have to try one…lately I have no money AND NO TIME!