Last summer I found a hand-crank ice cream maker at a yard sale for $30. I was super excited at the deal I’d gotten, but I really wasn’t sure if the unit even worked. It looked pretty old, but all of the parts appeared to be there and the handle turned smoothly.
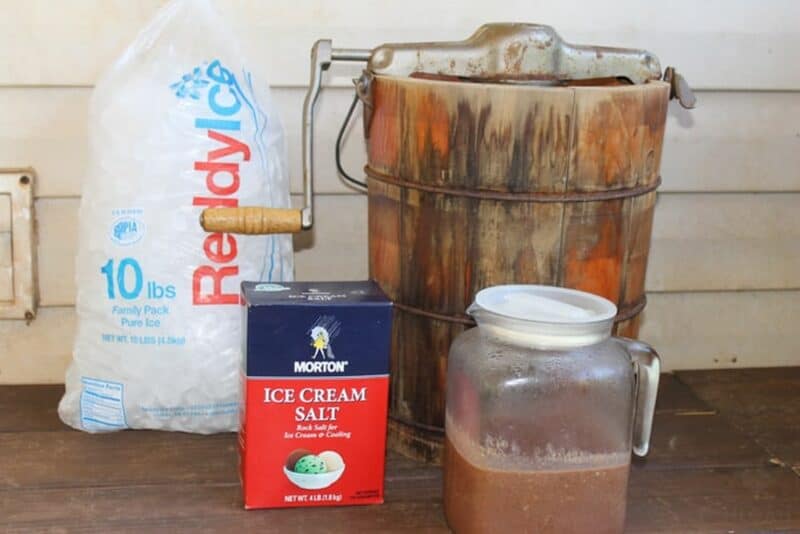
We do have an electric ice cream maker, though I wanted to have a non-electric backup for off-grid situations. So, I sprung for it!
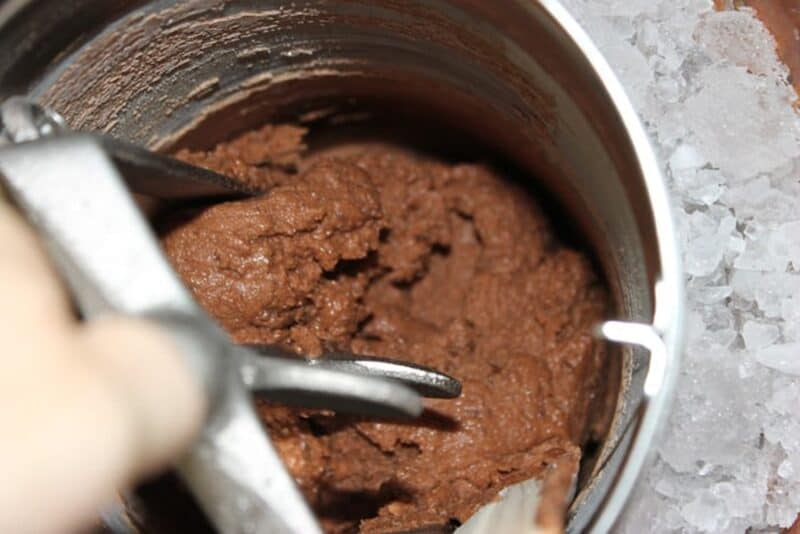
When it came time to test the new machine the kids were eager to help! Making homemade ice cream is a great summertime activity to enjoy with family and friends.
How To Use a Hand Crank Ice Cream Maker (Non-Electric)
Here’s how to use an old fashioned hand crank ice cream maker. I’m assuming you’ve already found an ice cream recipe that you want to use, and have pre-cooked and cooled it before preparing to put it into the ice cream maker.
Also, make sure you are starting out with a clean bucket. Since you’ll be using ice and salt, you’ll always have a briny mixture left over when you are done.
Make it a point to keep your bucket clean, since you don’t want any of this residue to build up and potentially find its way into the canister with your ice cream. Aside from not tasting very good, it is unsanitary!
Once you have a clean ice cream maker, you’re ready to get started.
Step One: Pre-Chill (Optional)
Step one is technically optional, but if you have the time and the capability it really does make a difference in the finished product.
Pre chill your canister (the part that holds the ice cream mix) in your refrigerator or freezer, preferably, for at least 24 hours.
This way it will start out cold and stay that way once you fill up your bucket with ice and salt in the following steps. A super chilled canister produces ice cream with a firm but velvety texture that you and your family are sure to love.
If you don’t want to mess with this step, don’t worry, as it will still work just fine with ice and salt alone, though the texture will be more like soft serve ice cream.
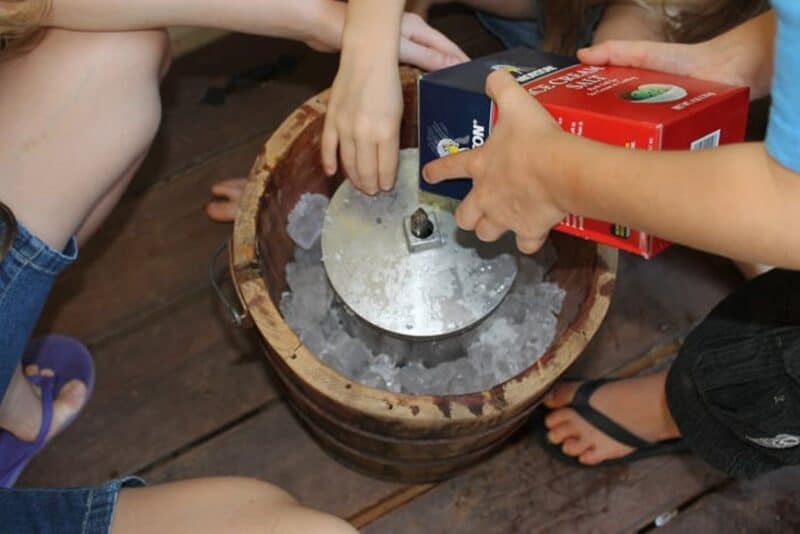
Step Two: Assemble Canister
Take your preferably pre-chilled canister and lock it in place in the bucket. Make sure it is secure.
Step Three: Add Ice and Rock Salt to Bucket
Now it is time to fill up the bucket with layers of ice and plenty of salt, preferably rock salt. Note that you only want to add the ice to the bucket between the walls of the bucket and the canister. Don’t let any ice or salt get inside the canister.
The ideal is to lay down a solid, densely packed layer of ice cubes before pouring a copious amount of salt over it and then adding another layer of ice cubes. Repeat this process until the ice is very near the top of the canister, but not overflowing.
Step Three: Pour in Ice Cream Mix
Now take your ice cream mix and pour it into your canister:
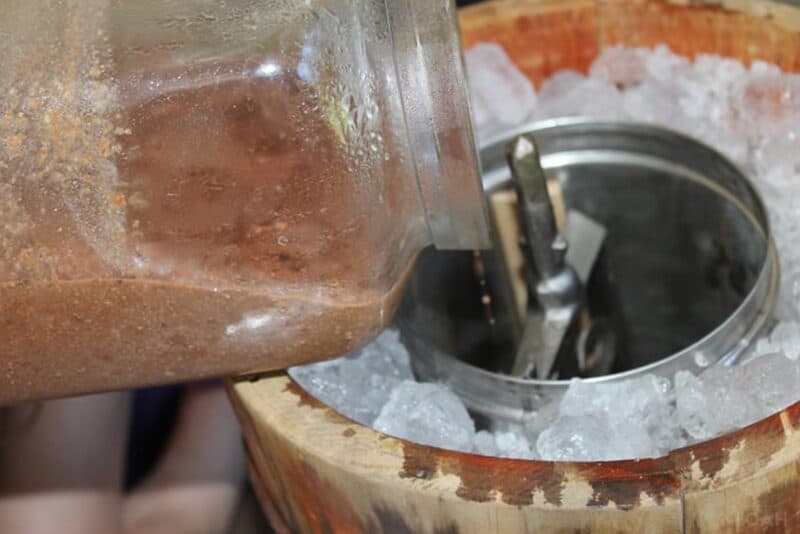
As mentioned, your mix should be pre-cooked and cool. Don’t pour in hot mix or you’re just going to have a mess on your hands! Making ice cream the old fashioned way involves a lot of patience, doesn’t it?
Take care not to get any mix on your ice, and be especially careful that you don’t let any ice, salt or briny water get inside the canister if your ice has started to melt.
Also, don’t overfill the canister because you need some room left over for displacement when you insert the dasher in the next step. If you pour in too much mix, it will overflow and you’ll have a real mess on your hands!
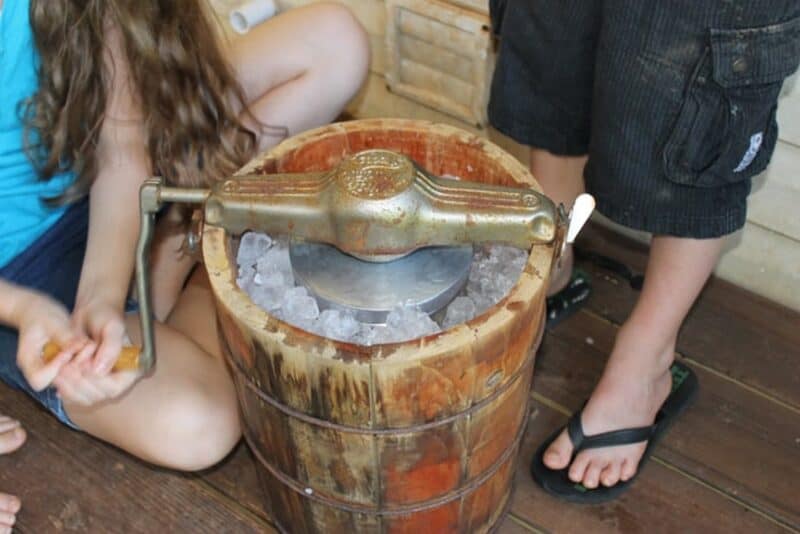
Step Five: Attach Dasher
The dasher is the paddle or stirrer assembly that actually mixes, smoothest, and aerates your ice cream mixture in the canister.
Depending upon your ice cream machine, this might be something equivalent to a mixer attachment that you’ll fix to the crank assembly, or you might need to put the entire mechanism in place to close it up and get ready for cranking.
If you have a separate crank handle, attach it after the dasher is in place. Once everything is in place and securely latched you are ready to start making ice cream!
Step Six: Turn, turn, turn!
Now for the fun part, depending on what your definition of fun is. Start cranking, and be prepared to spend at least half an hour doing so continuously.
Now, any sort of cranking will get the job done and turn out some tasty ice cream in pretty short order. But, there is more to it than that if you want some truly premium ice cream at the end.
Homemade ice cream will invariably turn out best if it is cranked more slowly at first and then cranked quickly near the end. Think of it like gradually increasing the speed of the mixer over time.
Now, this can be challenging because the ice cream gets harder and harder to crank as it firms up. But, stick with it to the very end, and once it is just too hard to crank anymore it is ready.
Also, periodically reverse the direction you are cranking for a few revolutions. This will help get the firmest ice cream that is stuck on the walls of the canister off, exposing the softer cream to the colder metal while simultaneously ensuring that plenty of air is getting whipped into your mixture.
These two techniques are the secrets to truly delicious homemade ice cream!
Step Seven: Finished!
That’s it. Now you can detach the dasher and remove the canister of ice cream. Serve immediately and eat while very cold, or else transfer it to your freezer for storage.
You’ve done it! Now that you know how you and your family will always be able to enjoy ice cream the old fashioned way.
How much ice cream can you get from an old fashioned maker?
Depending on the size of your ice cream maker, you can generally expect it to make between 4 and 6 quarts.
Depending on your recipe, the temperature of the canister and how diligently you can turn the crank this will often take about half an hour to 45 minutes of continuous cranking. It will feel like longer, but the results are so worth it, I promise.
Of course it is possible to make smaller quantities in any given machine, and do so in correspondingly less time. If you only want to whip up one or two quarts it might take as little as 15 minutes, cranked quickly, for softer ice cream.
With my kids taking turns helping to crank the handle around and around it took about 25 minutes until the ice cream was frozen enough to eat. You may have to add more ice and salt if it melts down while you’re cranking.
As a side note, you might want to do this outdoors. We had water leaking out from the ice cream maker as the ice melted. This may be because our unit was older and the wooden slats had come a little loose. Just something for you to keep in mind.
It’s good to know our off grid ice cream maker works like a charm! Nothing beats a good homemade soft serve ice cream.

A city girl learning to homestead on an acre of land in the country. Wife and homeschooling mother of four. Enjoying life, and everything that has to do with self sufficient living.
Yup,used to pick fresh apricots from the tree in my grandparents back yard who raised me. Grandpa and I would make hand crank home made ice cream (apricot of course). I moved to North Dakota and was shopping in a thrift store and lo and behold,I found an old hand crank wood barrel ice cream maker excelent condition for 4 dollars. Took me way back to the times. Haven’t used it as of yet,but plan to and with my nephew and his three kids who I suppose as many youth of this time haven’t the first clue.
we had a White Mountain for years at home on the farm. to make the ice ream freeze faster we would turn it ever so slowly several times forward and then every so often reverse and crank backwards a few cranks just enough for wooden paddles to pull way the harder frozen mixture from side of can. back and forth several times. freezes in half the time. we used a lot of rock salt each time. then when you couldn’t crank no more it was done so at that time we would take part of ice out and pull out paddle piece being careful not to let any salt or brine get in cream can. whoever done most of the cranking got to lick the paddles. then we put a piece of wax paper on can and put a cork in hole on lid and then repacked with more salt and ice and covered the freezer with a wet old heavy burlap bag. NOTE always make sure the brine flow hole is cleared of any big chunks or rock salt and ice. you don’t want the brine level getting higher than the lid. the folks said it needed to ripen for at least an hour or so if you could wait that long. we never had a failure it was always so good since we had our own milk and cream. mom always used the Junket (rennet) and made it using the heating recipe which required to cook the eggs in the milk mixture. the junket went in after the mixture had been poured in the can and cooled a bit. then when the mixture just started to slightly clabber it was ready to set in the White Mountain and layer in the ice and rock salt. to get it going a little quicker mom always poured in about a quart of cold water to get the action going. gee I haven’t made it for years but I remember the process step by step.
I think its time I bought a new one. going to cost four times what it did in mid 1950’s. but it’s worth it and a memory maker of summer.
Thanks so much for sharing these tips! It’s always wonderful to glean advice from someone who’s been there and done that. 😉
Take Care of your White Mountain freezer. If you want the freezer to last you have to keep up maintenance on it. They are to pricey to replace when all it takes is a little extra care.
first of all always rinse the handle assembly and moving parts with plenty of fresh water to flush salt residue. let it air dry and then oil moving parts with a lite grade oil such as 3n1 oil or a lite spray of WD40. turn it over with moving parts downward so any excess oil can drain out. as for the wooden bucket rinse it real good and use a medium brush around the metal wire bands to remove salt residue. otherwise it will eventually rust and break and staves will fall apart. always clean and grease (Vaseline will work) the can spindle in bottom of bucket. don’t forget to rinse, clean, and oil the latch lock. after you have cleaned the bucket always keep at least an inch or two of clean fresh water in bottom of wood bucket if you won’t be using it for awhile. otherwise without some moisture to keep wood hydrated the bucket will collapse and fall apart if it becomes to dry. salt is corrosive on metal parts and will suck needed moisture from wood staves. these tips will add years to the life of your White Mountain.
Wow, I hadn’t even considered the maintenance part of using a hand crank ice cream maker. Thanks so much for these additional tips!!
You can set your icecream maker inside a large, shallow pan or bowl to catch any leaks or condensation. The best homemade ice cream I have had was churned in a giant ice cream maker by a pony walking in circles, led by amish children. It was a fund raiser. Yum!
How awesome, Diane!
After cranking, we would throw an old quilt (doubled) over the entire ice cream freezer and let it sit (what felt like forever) and harden up, THEN we could finally eat it.
That’s a really great idea, fluffy. Thanks!
like your bush
Boy, does that bring back fond family memories of the grandparents’ side-by-side farms! Thanks for sharing!!!
When I was a kid my step-grandfather would always “force” us to make homemade ice cream when my cousins, siblings and I would come over for our grandmother’s birthday. Oh, how we hated having to do so much work when somebody could just buy a bucket from the store (my grandparents were quite wealthy) and be done with it!
Now I absolutely cherish those memories of working for our dessert and we will be buying a hand-crank ice cream maker in the near future so our kids can experience the wonder of making their own ice cream too.
It’s funny how our perspective changes with time. 🙂