Fermenting your chicken food comes with a lot of possible benefits and little risk if you do it wrong. Luckily, this guide is going to show you how, and why you should be fermenting your chicken feed.
Following the process is easy and rewarding for your chickens and your wallet.
Why Ferment My Chicken Feed?
Fermentation is a naturally occurring process that involves good bacteria partially digesting food content. In return, the consumer ends up with food that is more nutritious, and easier to digest.
You see, a lot of foods, and specifically grains, have anti-nutrients. These anti-nutrients bind to macronutrients like protein and micronutrients like vitamins and minerals. When anti-nutrients are absent, the given food has more digestible protein content, and a higher vitamin and mineral level.
Lacto-fermenting, which is the type of fermentation we will be using on our chicken feed, breaks down anti-nutrient content better than most other processing methods like sprouting or cooking.
In addition to the fermentation process adding more nutritional value to the food, it also is known to raise feed intake for meat chickens. Increased food intake along with more nutrition in the food itself means that your poultry can grow quickly to maturity.
A quicker path to maturity means less time before butchering and less money spent on food overall.
Last but not least, the beneficial bacteria that do the fermentation process act as probiotics for the chickens. Just like probiotics are good for use, they are a healthful addition to the diet of a chicken. They can ward off sickness, and improve the digestion of other foods as well.
Kinds Of Feed To Ferment
Any food that is suitable to feed a chicken is an option for fermenting. You can ferment:
- ✅ commercial feed,
- ✅ DIY feed mixes,
- ✅ or just fruits and vegetables that you get from your garden.
In this guide, I am using a commercial feed that is Certified Organic, Non-Corn, and Non-Soy Layer feed. The process is the same for any kind of feed that you have.
The benefits also extend to any kind of feed that you use. Increased nutrient utilization, a healthy dose of probiotics, and more vitamins and minerals are the result of fermenting any kind of feed for your flock.
You can ferment chick starter, layer feed, broiler feed, crumbles, pellets, and everything in-between!
Step By Step DIY Fermented Chicken Feed
While this process may be foreign to you, it’s not hard at all. Controlling the environment is the main way to ensure success. The work itself is really easy. Here is all that you need to do:
- Pour a daily ration of feed into a jar or bucket.
- Cover the feed with water and then cover the container.
- Let it sit for at least 48 hours. 72 hours is more beneficial. Make sure the water line never drops below the feed.
- Strain the feed after 72 hours, and feed it to your flock.
That’s the entire process. Some nuances make the process more involved, which I’ll discuss in each step.
Step 1 – Pour Feed Into Container
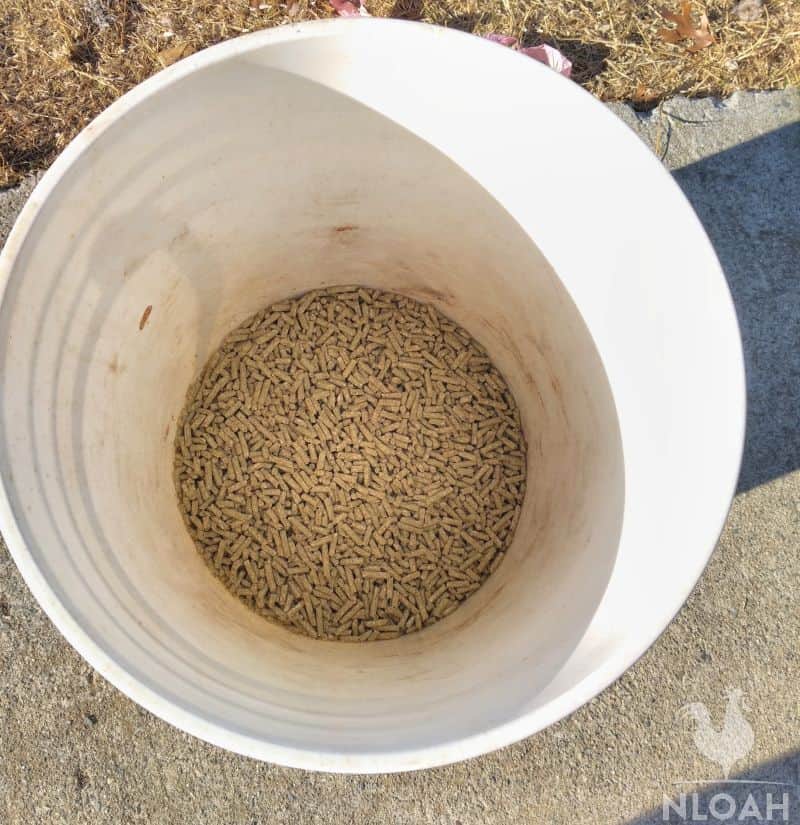
While you can make more than a day’s worth of food at a time, it’s best to just do one day of food at a time until you master this process.
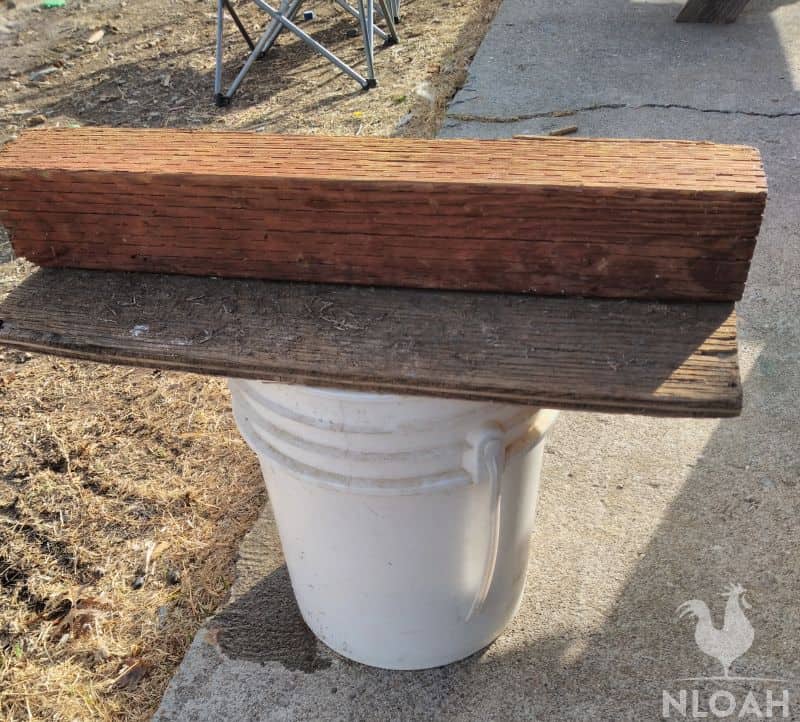
As you can see, I chose a simple 5-gallon bucket. I have a flock of 18 chickens. If your flock is smaller, you can get away with something as small as a large Mason jar.
There are two things to worry about when it comes to the container of your choosing:
- ❌ light,
- ❌ air exposure.
Too much light exposure will spoil the fermented feed from excess UV rays. I chose a white bucket that is shaded for about half of the day.
I don’t have problems with this setup. However, if you are using something clear like a Mason jar, it’s important to keep your ferment away from direct sunlight.
Air exposure is something that can also spoil your feed. The best container is one that will hold the requisite feed, and have enough room for about 3-4 inches of water above it. There should be minimal air space in the container after the water is poured in.
As you can see, I did not follow this rule, which is why I ensure that the water line always stays above my feed, discussed in the next step.
Step 2 – Cover Feed With Water
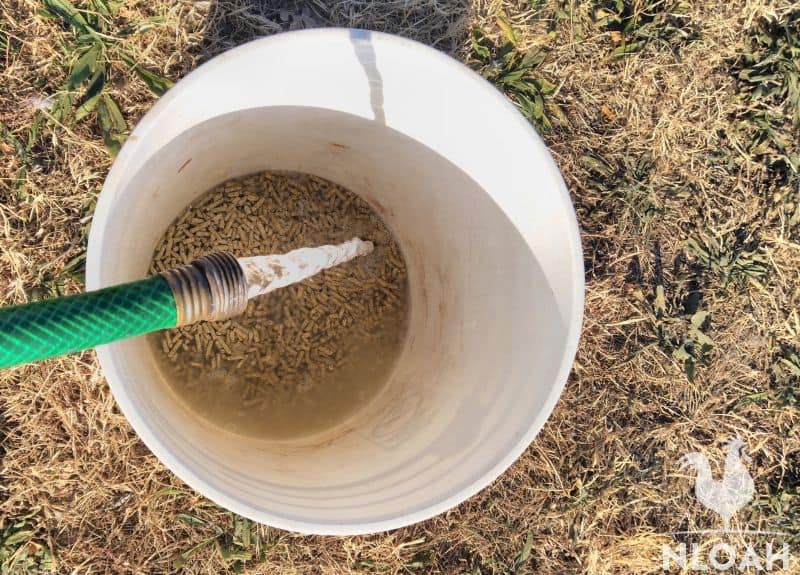
I just used my garden hose to fill up the bucket with water until I had about 2-3 inches of water above my feed. You don’t want to have so much water that the ferment takes longer to mature. But, you need to ensure that your water line never drops below the feed line.
The first day, your feed will absorb a ton of that initial water, so you may need to replenish the water later in the same day.
Keeping that water line above the feed allows for a little mold growth on top of the ferment to develop, and be scraped off without ever exposing the mold to the feed itself.
Mold growth on the top of a ferment happens a lot. It didn’t happen with mine, but it’s not an immediate cause for concern if it happens to yours. If you see mold anywhere close to the feed, however, it’s best to just toss that batch and not risk getting your whole flock sick.
That’s why it’s a good idea to only ferment one day’s worth of food at a time. Fermenting a week’s worth of food at once sounds like a lot less work, but a moldy batch makes you throw away an entire week’s worth of food!
To cover your container, you can use anything. It doesn’t have to be airtight, but that wouldn’t hurt. I simply put a piece of wood on top to keep any critters away from it.
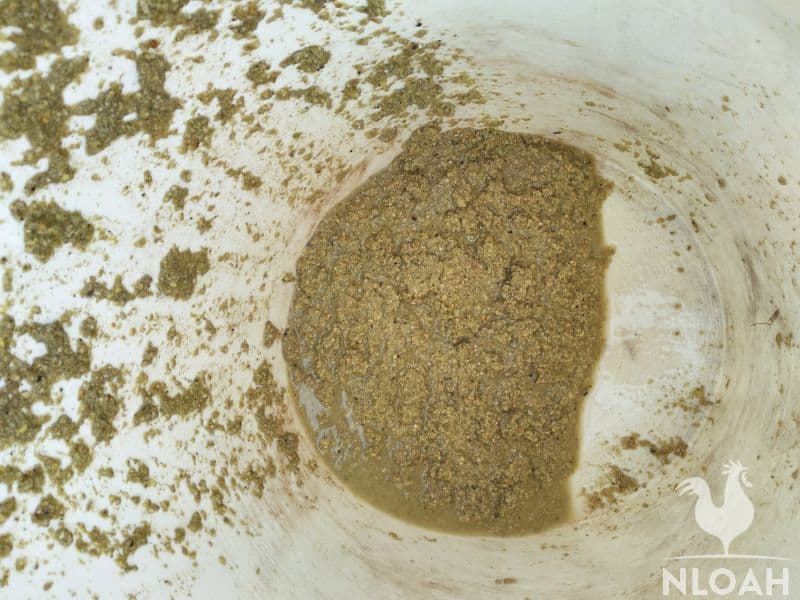
Step 3 – Let The Feed Ferment For 72 Hours
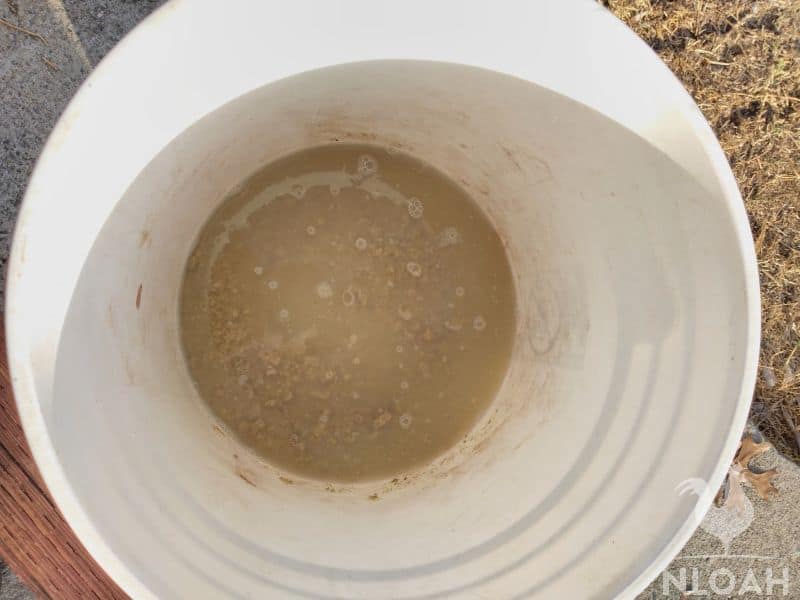
Depending on the ambient temperature, your feed may start to ferment on the first day. However, most ferments need around 72 hours to take hold, and to be able to deliver all of the benefits of fermentation.
I fermented my feed for 72 hours and this is what it looks like when I opened the bucket. Again, you see that the feed is always submerged in water.
You can let it ferment longer than this and it can develop more bacteria that may benefit your chickens. But, the longer you ferment, the more work you have to put in and the more risk for mold growth you have. It’s best to stay efficient and feed it to your chickens after 72 hours.
Step 4 – Strain And Serve
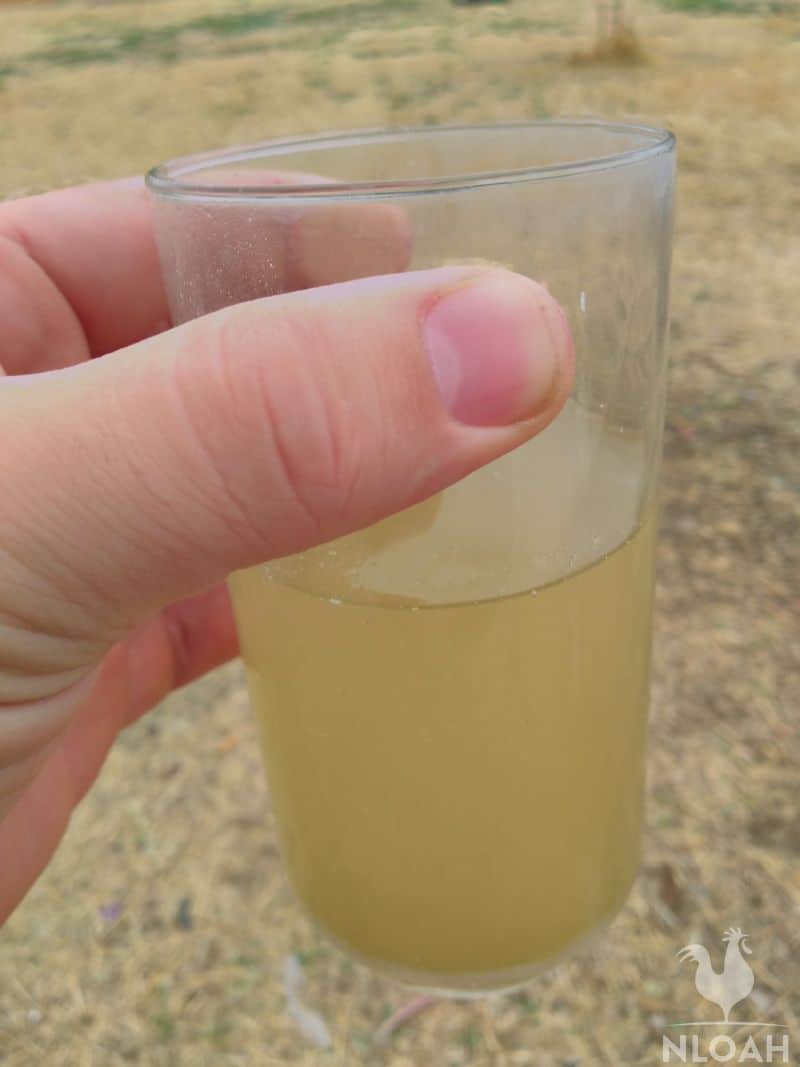
Straining your feed can be as easy as pouring the excess water into another bucket. This water is useful as a starter culture for another fresh batch of feed you want to ferment. It will jumpstart the process and create a more mature ferment after 72 hours.
This process can be repeated indefinitely as long as you don’t have to dispose of a batch due to mold growth.
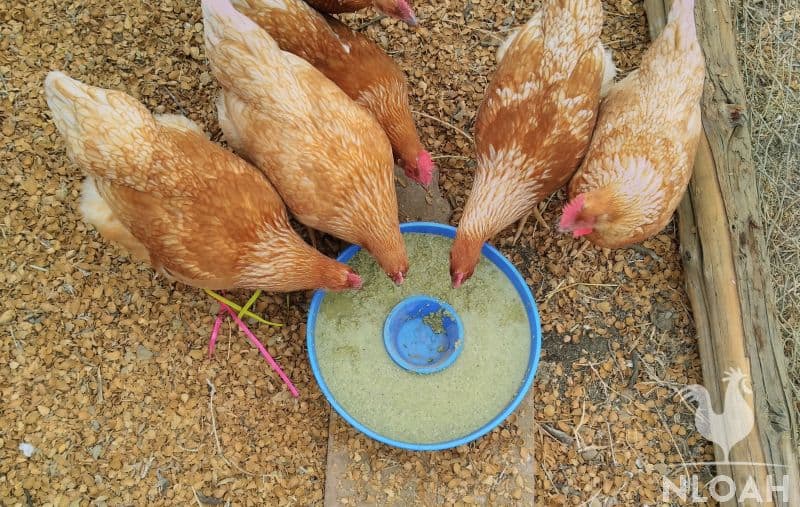
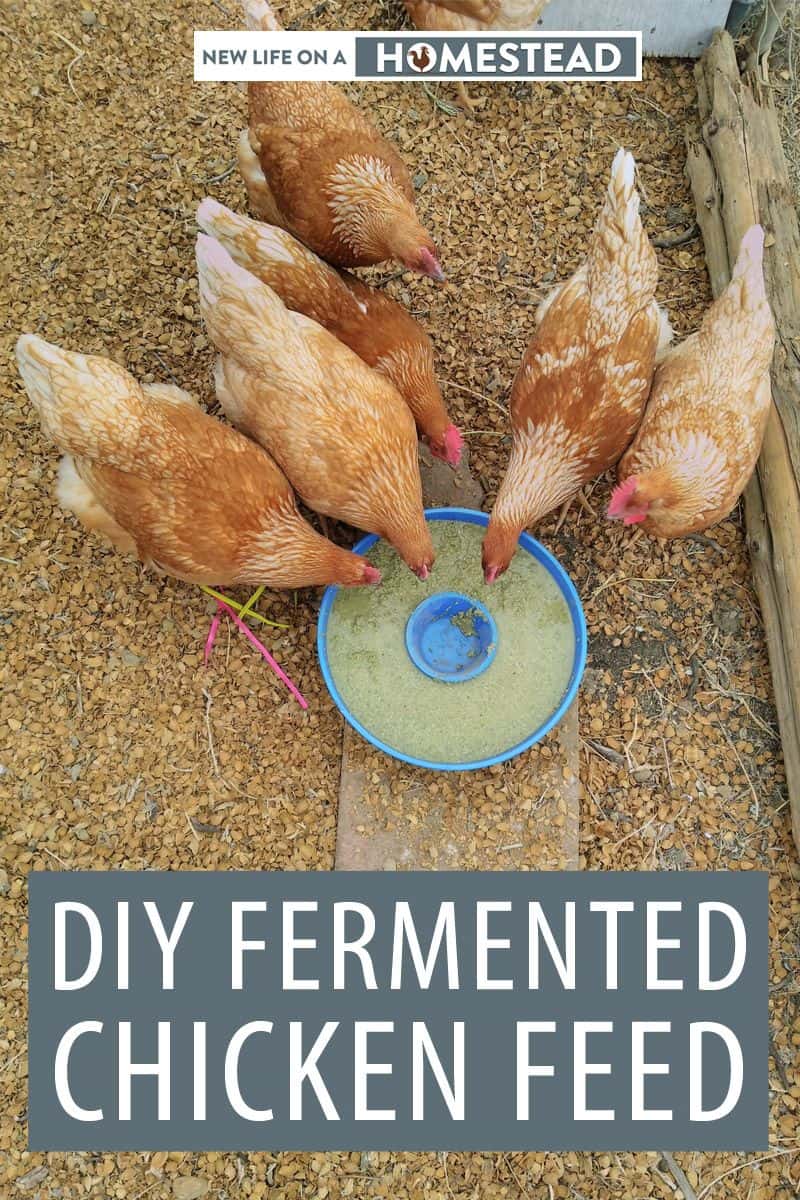
Once you have strained your feed, go ahead and feed it to your flock. For a fermented chicken feed feeder, I just use an elevated surface that holds an old, upcycled Chip And Dip bowl (yes, you read that correctly).
Fermented feed sticks together well, and doesn’t go flying out the feeder as dry feed does. Keeping it elevated ensures they don’t scratch at it as well.
Make sure that you only feed a ration that will last a day as the exposed fermented feed can spoil since it’s no longer submerged in water.
If you fermented more than you can feed in a day, leave it in the water where you initially fermented it. Don’t expose it to oxygen until your chickens are ready to eat!
The Scent Of Fermented Feed
Sometimes, a ferment can go bad. You’ll know this by the smell. A healthy ferment typically smells like vinegar or just really tangy in general.
When fermented, chicken feed smells like vomit, it’s best to throw that batch away. Trust me, you won’t be able to take a whiff of a bad ferment without gagging. Anything else is just the natural smell of the fermenting process.
How Much Fermented Feed To Give To Chickens
Knowing how much fermented feed per chicken per day is imperative to wasting less food. The entire daily ration that your feed to your chickens can be fermented. This works whether they free range and forage a lot, or if they are in a small pen and only get the food you give them.
That being said, you can start slow with just 1/4 cup of fermented feed per chicken, then move to 1/2 a cup. But chickens need a variety of micronutrients and fermented feed can’t possibly have all of them – so aim for a balanced and varied diet.
You may find that they eat more or less than dry feed. While fermented feed tends to raise food intake in meat birds, laying hens and chicks may need to eat less because the food is more nutritious by volume.
Fermented feed for broilers has also been known to keep the same daily requirements of feed instead of making them eat more. However, they end up gaining more weight from that feed intake, making your broiler chickens more efficient, and saving you money in the long run.
How To Store Fermented Chicken Feed
As mentioned earlier, fermented chicken feed is best stored in the original container that you fermented it in. Removing it from that environment will expose it to oxygen and make it susceptible to mold growth that will ruin it.
If you are fermenting more than a day’s worth of feed, scoop and strain enough for one day, and leave the rest of it unbothered in the fermenting container.
If you have excess refrigerator room, you can store fermented feed in there to slow down the fermentation and prolong the shelf life. Fermented foods will last months, if not years, in the right conditions.
I don’t see a reason that you would be fermenting more than a week of food at a time, but it is possible to store it safely if you happened to do so.
Fermented Feed Vs Probiotics
There are expensive probiotic supplements for chickens at most feed stores. They promise better health, growth in meat birds, and egg production from layers with regular use.
Instead of spending the extra money to throw some supplement in their food or water, you can simply ferment your feed.
Fermenting your feed is free, and will provide ample probiotics to your flock. It provides more than probiotics as well. Spend a little time fermenting your feed, and you won’t be spending money on probiotics.
Fermented Feed Vs Apple Cider Vinegar
Apple Cider Vinegar is a staple for many chicken farmers. There are claims that it is a miracle and all it takes for an optimal flock is a little in the waterers.
While it is true that Apple Cider Vinegar can reduce the risk for sickness due to acidifying the digestive tracts and killing pathogens, it doesn’t do much more than that. Also, research has shown that water with Apple Cider Vinegar lowers the growth rate in broilers.
Instead, you can use fermented feed. The fermented feed provides probiotics that will crowd out pathogens in the gut and provide essentially the same benefits of Apple Cider Vinegar. Beyond that, it won’t do anything to reduce growth rates in broilers, and will make your feed more nutritious.
More nutrition in the feed for the chickens means healthier meat and eggs for your homestead!
Do I Need A Starter Culture?
If you are familiar with fermented foods, you’ve heard of starter cultures. They have established colonies of beneficial bacteria that get to work fermented whatever food they come into contact with.
Luckily, lacto-fermentation relies on bacteria that are already present in the food itself. This bacteria multiplies, and strengthens in the water you pour over the food. This reduces all need for a starter culture.
Initially, this may take the fermentation process longer. However, once you have finished one batch, you can take excess water from that batch and put it in a new batch of feed. That water is full of microorganisms, and acts as a healthy starter culture that is already optimized for fermenting the same type of feed.
This can speed up the process of fermenting and lead to healthier food in the long run for the chickens. Just make sure that you don’t save moldy starters. It’s best to just start fresh so you don’t contaminate large amounts of chicken feed.

Milo Martinovich was born and raised in a small town in Northern California. Throughout his life, he has been involved in agriculture and now lives on a 7-acre homestead raising livestock and growing food for his family. Self-sufficiency is his ultimate goal.
How do you ferment layer pellets and do black oil sunflower seeds ferment…do I need corn or wheat?
Thank you for this article, very clear and well thought out. I make sourdough and have fed them discard occasionally but it did not occur to me to ferment the grain itself. I already do sprouts for them but this should add even more nutrients.