I like a spicy life and some of my food choices reflect that attitude. I love hot wings, Mexican food, and occasionally spice up every day fare such as scrambled eggs.
This extends to include the wonderful world of horseradish. While not unlike hot peppers, horseradish has a much more aromatic effect that hits the sinuses as much as it hits the tongue.
The biggest challenge with horseradish is that it is harvestable for only a few scant months throughout the year. So how do we enjoy it in the off months? Read on and we’ll solve that for you!
The Allure Of Horseradish
Horseradish has a broad appeal for the foodie. The heat is altogether different from hot peppers and dissipates quickly, leaving you wanting and ready for more.
Where peppers build and build until you tap out, horseradish is as much a treat for the sinuses as it is for the tastebuds.
So much so, many have lauded it as a sinus curative throughout the ages. My grandfather and his brother suffered from chronic sinus issues during their youth.
My great grandfather took medical matters into his own hands and held their heads over a barrel of horseradish for a few minutes (he owned a general store). The boys never had an issue again.
While a strong sniff of horseradish is sure to clear you up, I find it much better in my food than in my medicine cabinet.
I’ll include a few recipes to follow, but we use horseradish in a variety of ways both as main component spicing up a dish, and as an accompaniment.
We find uses throughout the year, be they a sauce for steak and roast beef, with shrimp cocktail, or, when we have fresh root, grated over a salad.
The final benefit of horseradish is that you can easily grow it at home.
All you need is some well-drained soil and ample sunlight. No green thumb needed as long as you have provided the correct environment.
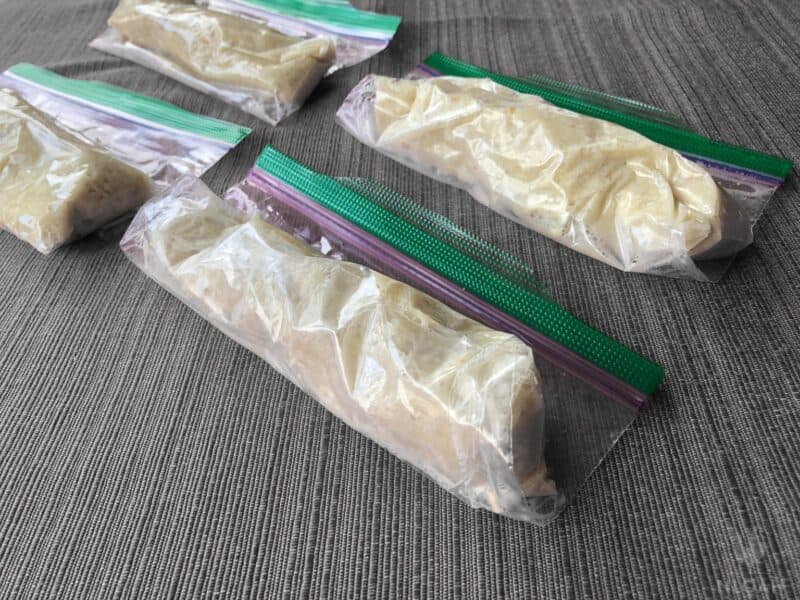
[MIGrey_20220310_Horseradish_BookFinalProduct]
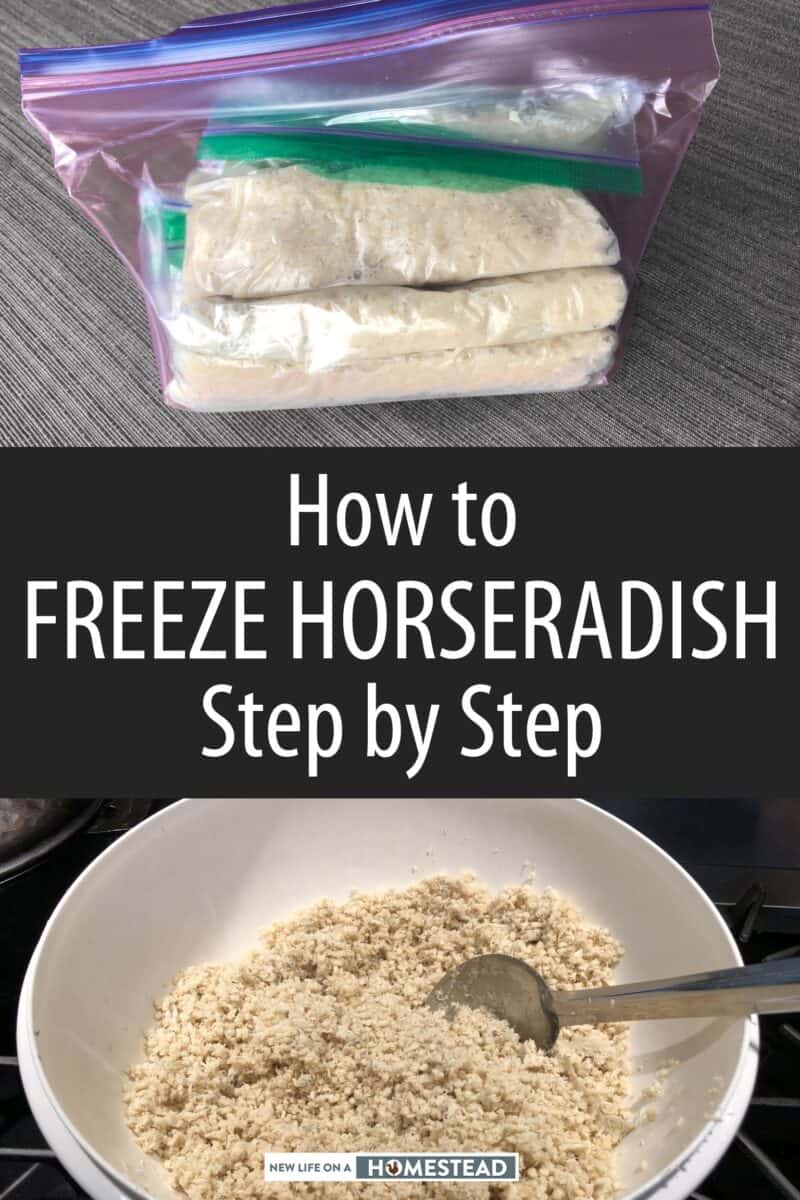
Horseradish ground, packaged, and ready for the freezer
Harvesting Horseradish
To harvest horseradish, you must first have your own small bountiful plot. The good news is that horseradish is hardy and easy to grow.
You just need well-drained soil and plenty of sunshine. It’s best if you can screen the soil to break it up and to get rid of any rocks for the roots to grow around.
Drying, Canning, And Freezing
The traditional methods of food preservation are drying, canning, and freezing. While all apply to horseradish, that doesn’t mean they do the best job.
Dried horseradish results from very finely ground root run through a dehydrator until it is dry as powder.
This product is very similar to Japanese wasabi. In fact, most commercially available wasabi is powdered horseradish with green food coloring added.
I have not tried this technique, however I caution those of you who wish to try it. The fumes are sure to drive you out of any enclosed space. Run your dehydrator in a well-ventilated area.
The process is bound to drive off the majority of the volatile oils that give horseradish its kick. So don’t expect the final product to be as potent as fresh.
Additionally, you can water bath can your horseradish. Grated or ground root can be mixed with vinegar (to lower the pH) and salt, then can.
Canning horseradish presents a different challenge. The heating process also damages the aromatics in the root, leaving the final product a shadow of its former self.
Finally, there is freezing. First, I don’t consider this a long-term option, as the final product remains potent for only about a year. Second, it relies upon electricity for the freezer.
That being said, I believe it’s the best way to have high-quality root from harvest to harvest.
Note: This recipe is a modified version of the recipe in the book “Stocking Up.” I’m sure it’s a lot older than I am judging from the personal notes added to each recipe.
Equipment Needed for Freezing
Freezing has the advantage that it doesn’t require much equipment. All you need is a tool for grinding, a bowl to mix, and a few plastic ziplock or vacuum seal bags.
First and foremost is a tool to grind up the roots. Horseradish roots are very tough and fibrous.
They don’t go down quietly and will require a bit of effort to grind up. Your primary choices are a grater, Cuisinart\blender, and a grinder.
Using a hand grater is the work of the dedicated. To grate up several cups will take time and iron sinuses. It’s a slow process, but if it’s all you have, go for it.
Make sure the grater is secure and steady against the counter\table. You don’t need a slip and busted knuckles!
Next, you can use a Cuisinart or a blender. Given the choice between the two, I prefer a Cuisinart. A blender makes the final product a bit too smooth.
I prefer to know that I’m eating roots. A chunk here and there is perfect, and a Cuisinart is perfect at the job. Add a few roots and pulse until you have hit the right texture.
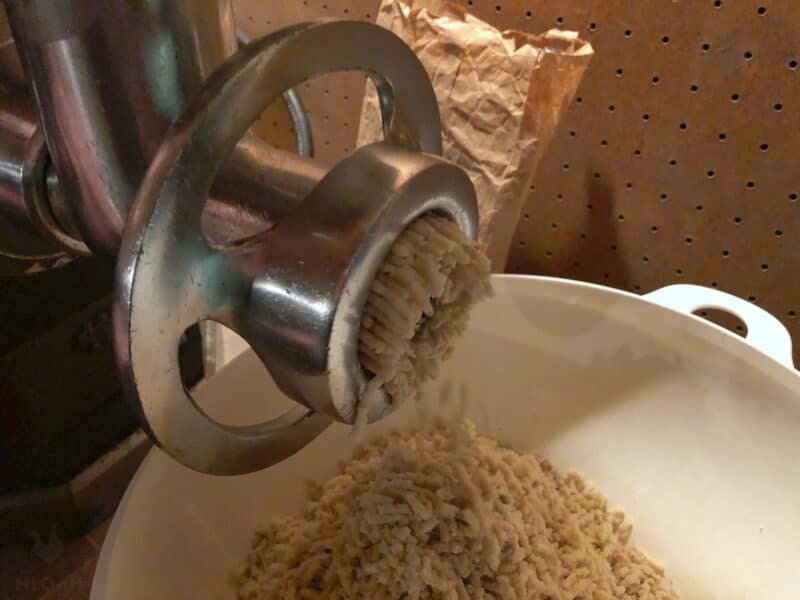
The final option to process the root is a grinder. My family is lucky enough to have a commercial grinder passed down from my grandfather. You definitely don’t need a beast like this, however it does make a quick job of the roots.
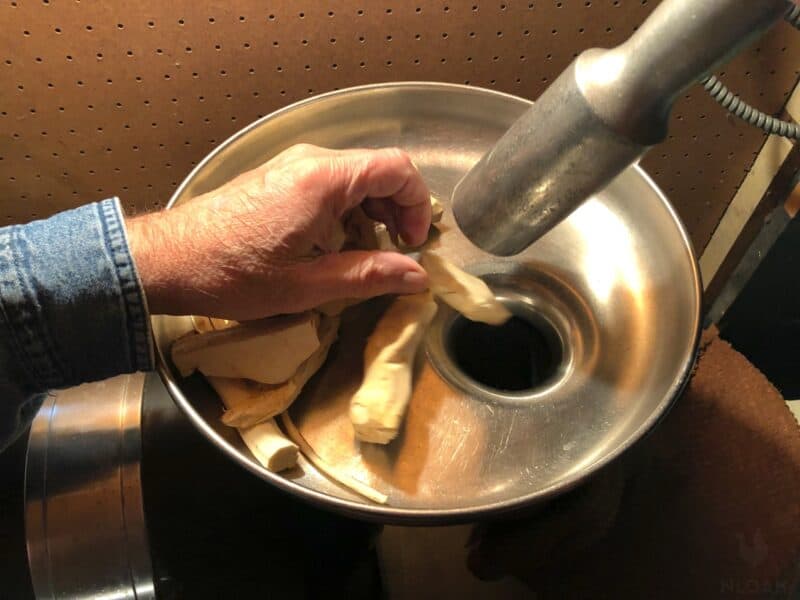
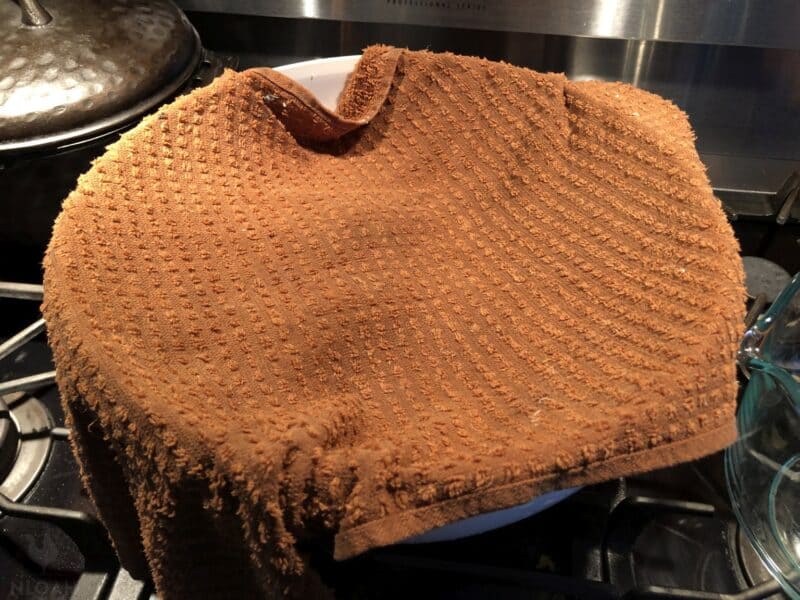
My father discovered a trick that makes the job easier. Drape a wet towel over the outlet and the bowl holding the ground horseradish.
This contains the vapors and makes the entire experience much more manageable.
Preparing For The Grind
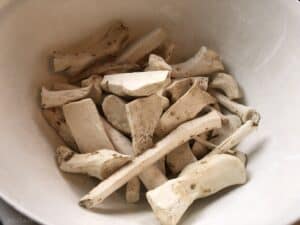
Once you have a pile of freshly dug up roots, you are almost ready for the grinding process.
First, give the roots a good wash and scrub with fresh, cold water. A small brush will be handy for the larger roots, while an old toothbrush is best for all the nooks and crannies.
They don’t have to be perfectly clean, as you will see in the next step. Get the majority of the dirt off and all big clumps.
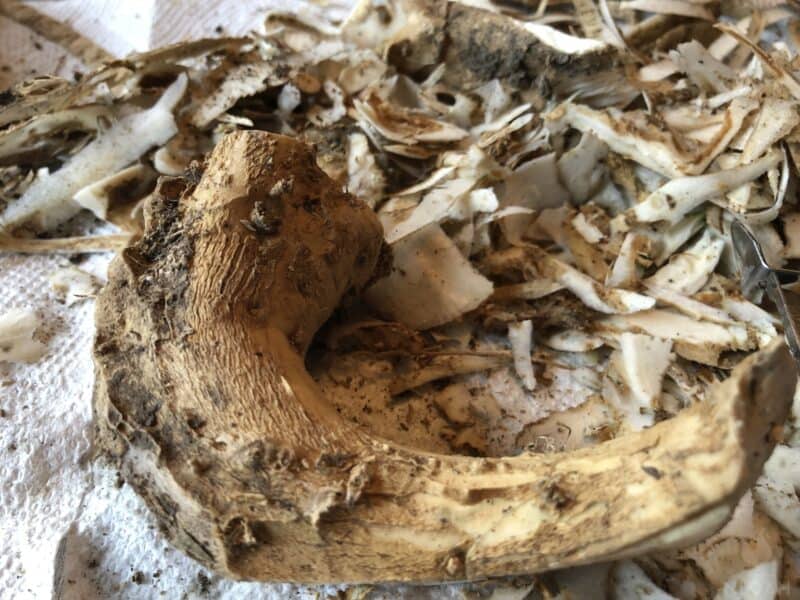
Once cleaned up, pull out your favorite vegetable peeler, and get to work.
Your result should be creamy white roots with no pits, rot spots, or other dark spots. It’ll take some work (watch your knuckles) and the job will get progressively fragrant.
If you didn’t get all the dirt off while washing, give them a quick rinse and pat dry now. Finally, cut the longer roots into manageable pieces.
Your preparation can be done a day or two in advance.
While it’s better to store the unpeeled roots (they last longer), if you’re in a pinch and need to divide up the process, put the roots in an airtight container and pop them in the fridge.

Grinding And Freezer Prep
This is one of the simpler recipes we make throughout the year. Roots, salt, vinegar, water, and you’re all set.
As stated, we use a big commercial grinder that makes short order of the most volatile steps. If you are using a blender or Cuisinart, then the grinding should be quick.
If you choose to go the hand grinding route, first you’re more of a man than I.
Second, it’s best to carry out this labor of love in a well-ventilated area, preferably with an exhaust fan (if you want to maintain the favor of everyone else in the house).
Even if you are using a kitchen appliance, then I highly recommend good ventilation.
My father discovered the method of draping a wet towel over the outlet of the grinder and the bowl that holds the grounds. I recommend adapting this technique to your exact grinding method.
Once the grinding is done, the hard part is out of the way. Now it’s just a matter of measuring, adding in the salt and vinegar, mixing, and packaging.
Again, ventilation is your friend. We do these steps under the stove\range hood with good success.
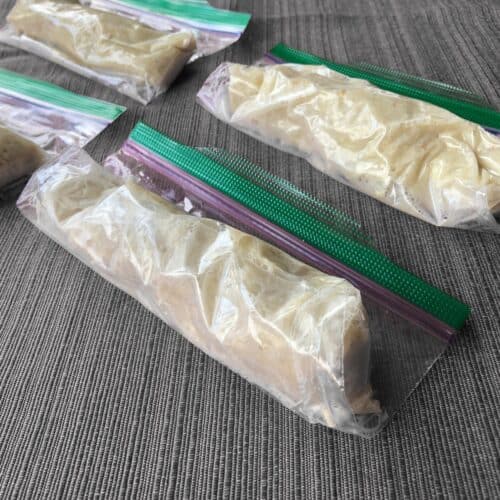
Our preferred freezer packaging is Ziplock freezer bags. One quick note. The smell of horseradish will permeate any container except glass.
Ziplocks contain just enough for a few weeks and they tame the smells if you double bag them and then store them in a separate container.
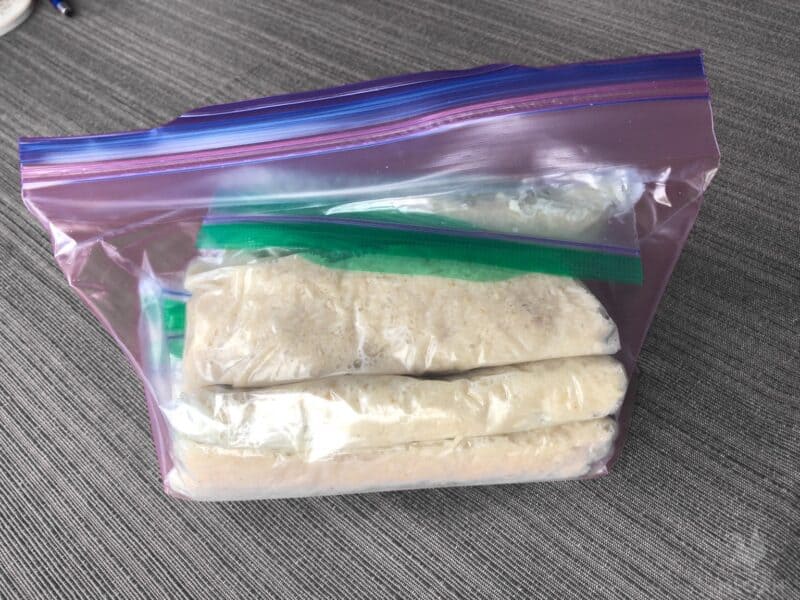
One final warning. Even with the double bagging and an extra container, there will be a little smell leakage.
Find a nook in your freezer with items you don’t mind smelling like horseradish. Keep the Christmas cookies as far away as possible (voice of experience here).
Freezing Horseradish Recipe
Ingredients
- 5-6 cups horseradish root
- 1 cup white vinegar
- 1 cup water
- 1 teaspoon salt
Instructions
- Clean, peel, and cut down roots to a manageable size.
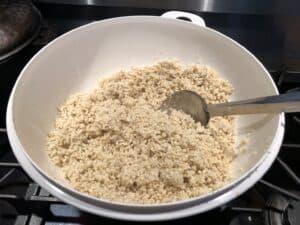
- Grind up the roots using a hand grater, blender, Cuisinart, or grinder. Don’t grind too fine, you want a little texture in the final product. You should have about 4 cups of ground root.
- Add the vinegar, water, and salt to the horseradish.
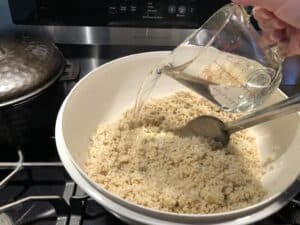
- Mix thoroughly.
- Fill each Ziploc bag with 1 cup of the horseradish.
- Place your bags in a larger Ziploc bag or add the bags to a plastic container to contain the fumes.
- Freeze and store the horseradish for up to 1 year (it will lose some potency).
Notes
Storing and Potency
I’ll be the first to admit that the world isn’t perfect. If it was, a frozen bag of horseradish would be just as potent on day 365 as it was on day 1. Sadly, this isn’t the case.
Freezing isn’t perfect but it will preserve your roots past refrigerator storage. That being said, you can expect the potency to drop off over the months.
We still enjoy it after a year (the maximum we will store it) however it just doesn’t have the same kick. As the year progresses, we just add a little more to our sandwich or recipe.
Horseradish Recipes
The best part about having horseradish on hand is using it. Here are a few of my favorite uses.
Sandwiches
90% of our horseradish goes on sandwiches. Turkey, ham, roast beef. You name it. If it’s savory, we pile on the horseradish.
Add it in with the mayonnaise or your preferred spread. I’m personally a fan of a healthy dose with brown mustard.
During thanksgiving we can go through a package as we enjoy turkey sandwiches. We repeat this excess consumption with the leftovers of our Christmas ham.
All summer long it’s lean roast beef sandwiches. By no means should you limit your sandwich explorations to these three types. Explore. That’s what adds the spice to life.
Horseradish Cream Sauce
Prime rib, roast beef, and steak all beg for a creamy and spicy topping.
Enter horseradish cream sauce. My father slow cooks the largest roast he can find every summer when the family gets together.
Cooked medium rare on the grill’s rotisserie with hickory chips smoking the entire time. We look forward to that as much as we look forward to mixing up a batch of sauce.
This one is about as easy and flexible as it gets. Start with 1 cup of sour cream and add the following to taste: salt, pepper, Worcestershire sauce (just a dash or two), and horseradish. Mix thoroughly tasting as you go.
Adjust the ingredients to your liking and don’t be afraid to add in a healthy dose of horseradish. Note: this sauce is best if you let it sit in the refrigerator for a few hours, allowing the flavors to blend.
Horseradish Cranberry Sauce
Don’t get me wrong, I like cranberry sauce as much as the next guy. But it is always missing something. Welcome to the party horseradish!
Take your favorite cranberry sauce (homemade or out of a can), add a few tablespoons of horseradish and mix well.
Horseradish cranberry sauce has become a staple at our big family meals when we serve a turkey, ham, or even a big roasted chicken.
The utility of the sauce is extended as we also add it to sandwiches. Nothing like a complete Thanksgiving meal between two slices of bread.
Cocktail Sauce
Finally, there is cocktail sauce. I’m not talking about the flavorless, limp tasting stuff that comes out of a jar. I mean real, puts hair on your chest, cocktail sauce.
During the holiday season, we make a good amount of shrimp cocktail. It’s tradition, and on the side is always a cup of cocktail sauce.
This is another easy one that you can tune and make your own.
Start with 1 cup of catsup and add the juice of half a lemon, ½ teaspoon of chili powder, and a few dashes of Worcestershire sauce.
Then ladle in horseradish until your sinuses can no longer take it. Mix well, let sit and enjoy. Shrimp never had it so good!
Final Thoughts
A well-fed life is a life worth living. One key to enjoying your meals and being well fed is adding a little kick.
I like my hot peppers, but I also like to switch it up and add a healthy amount of horseradish when it’s called for.
Horseradish opens the sinuses as much as it entertains the tongue.
There are certain dishes that beg for a healthy portion. For me, this includes sandwiches, shrimp, and a good slice of beef.
What makes this even better is knowing that the key to the meal is provided by family, and especially my father.
If he hadn’t planted those few roots almost 50 years ago our table would be bland compared to the culinary gifts we enjoy today.
Give this meager root a chance. If you have sun, you can make it work. Plant a few roots and watch them grow throughout the summer.
If you’re lucky, you’ll make a condiment that will enrich your table as well as your pallet.

M. I. Grey is an expert in food processing and preservation (including canning), but also an avid forager. He’s also passionate about anything preparedness, and used to work as a security expert.