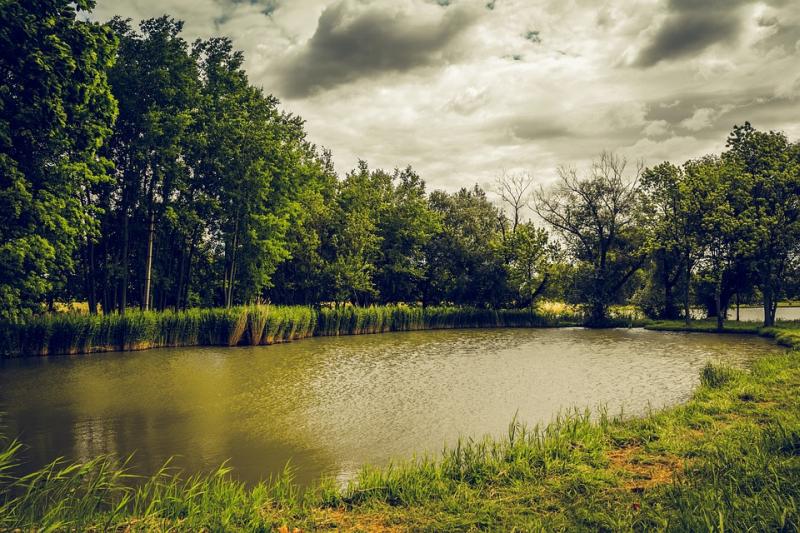
People build ponds for many reasons. Some build them to store water while others to keep fish. For many, they are built simply for the beauty that they can add to a homestead.
Whatever your motivation is, building a pond on your homestead can be challenging, and will cost you some money. Yet it’s a great DIY project and you will enjoy its benefits for many years, not to mention it could be a great water back-up in case of a long-term emergency.
Let’s start by covering the key elements of how to build a pond in detail.
Now, there are two main type of ponds:
- above ground ponds and
- below ground ponds
So let’s talk about each of them and how you can begin to make them.
Above Ground Ponds
Above ground ponds are normally small to medium size water features that can be built anywhere on your property. They are also referred to as Koi or garden water ponds.
The main features of these ponds:
- They require a pump to circulate water.
- They require a rubber or cement liner to retain water.
- Usually, have a waterfall built into them by installing a weir. For added beauty, the waterfall and pond can be separated by a small stream flowing from the waterfall to the pond.
- Above ground ponds are sometimes used to keep ornamental fish like Koi or goldfish.
- Because only a small amount of earth may need to be removed, the ground can be excavated manually using ordinary garden tools like a pick and spade.
How to build an above ground pond
Building an above the ground pond is easier than a below the ground one. It also requires fewer tools, and expertise. In what follows, we’ll look at the building of a simple 16×11 foot kidney-shaped pond. You can modify the size and shape of the pond you build to suit your needs.
1. Decide where to put your pond
Some things for you to consider when deciding where to place it:
• Child safety- If you have children, you’ll want to have your pond in an area where you can keep an eye on them. You’ll also don’t want to make it too deep, to minimize the chances of your children drowning.
• Make sure you don’t build your pond over any electric or plumbing pipes. Before you begin excavation, a site plan of your backyard is important to be able to identify areas that are free form cables and pipes.
• Place your pond at a distance from sewer lines and garbage pits, especially if you intend to keep fish in the pond. Leaking sewer effluent and garbage waste can easily contaminate the water.
• Pick an area that has the right balance between shade and sunlight. You may build your pond in the shade, but don’t go through any tree roots in the process. Building a pond in the shade will also mean that you will have to deal with falling leaves and debris.
• Check with local authorities about regulations on building a pond. In some areas, having a fence around your pond is mandatory.
• Decide in advance, what plants and fish you will have in your pond. This will help you adapt the size and other conditions to the needs of your plants and fish beforehand.
2. Excavate
Excavating an above ground pond can be done with manual tools so long as the earth is not rocky. To excavate your pond follow the steps below:
1. Mark out the area you want to excavate with garden lime or string.
2. Dig with a pick or a garden hoe to a depth of between 14 to 16 inches.
3. Pile the excavated soil in one area of the pond. This will later form the base which you will place your weir which is the mouth of your waterfall.
4. In one corner of your pond, excavate a hole big enough for a pond submersible pump. Dig a hole about 10 inches wide and 10 inches deep.
Watch how you can excavate your pond in the video below:
3. Lining
After excavation, you will need to line your pond:
1. Apply 1 inch of mason sand to the floor of the pond and compact it lightly with a spade.
2. Next, cover your pond with landscape fabric to form a cushion between the earth and the rubber lining. Make sure you put enough landscape fabric to cover the walls, submersible pump pit, and the main floor.
3. Next, you will need to install rubber lining. Unfold your liner and ensure that it overlaps by at least 1 foot on either side. Press the lining onto your pond floor beginning with where the submersible pump will sit, working your way outwards to the main pond floor, the inner walls and then the outer overlapping. Hold your lining in place by filling the submersible pump hole with water.
4. Make sure your liner is long enough to reach the top of your waterfall weir. Measure your weir against the overlap to ensure that it will fit correctly. Leave room for a small margin of error.
Here is a video on pump liner installation:
4. Stacking stones
Stones are an important part of your pond. They are also known as plant shelves because most of your plants will sit on these stones. They also form the walls of your pond prevent the soil from collapsing. Apart from their practical purpose, if you pick the right type of stone, your pond will look amazing.
The steps required to fill your pond with stones:
1. Choose the right stone type. Pick a flat type of garden stone like the New England fieldstone. Have these stones delivered as close to the pond site because they are heavy and difficult to move and handle.
2. Always wear safety gloves when handling stones and be careful not to hurt your fingers. You may want to have an extra helping hand to help you lay the stones depending on how heavy they are.
3. Form a circle of stones around your water pump hole. Ensure that these stones are stable and that they don’t fall into the hole and damage your pump. Lay the rest of your stones on the main pond floor, filling spaces with smaller stones.
4. When you get to the outer wall of your pond, stack your stones on top of each other until they reach ground level.
5. You may want to use builders cement to hold your stones firmly to each other. As you lay your stones remember to leave space to place the weir. The highest part of the pond will be where you stacked your excavated soil to form the base of the weir. The recommended height for this is about 12 to 20 inches above water level.
6. If you use cement to build the walls, give it at least 5 days to dry before continuing construction. If you want to add fish to your pond, be sure to use the curing method described in the section on building concrete ponds.
7. You’ll want to use coping stones for the surface of your pond. Coping stones are flat and easy to work with. Lay a layer of mason’s sand before laying your stones to ensure that they are on an even surface. The spaces between stones can be filled with a cement mix to ensure they form a tight bond.
You can watch the video below to find out how you can stack your pond with stones and river rock:
5. Install the Pump
The submersible pump will ensure it keeps your water fresh. To install the pump follow the steps below
1. Make a base for the pump by lying flat stones on the floor of the water pump hole.
2. Install your pump pipe and ensure that the water and electrical pipes are long enough to reach the surface.
3. Run your pumps power cable either between or under the opening in the rocks. Be very careful not to damage the cord, and electrocute yourself.
4. Next, connect your cord to a GFCI electrical outlet. Connecting electrical sockets needs to be done by a professional, otherwise you could cause an electrical short-circuit and damage both your pump and run the risk of being electrocuted.
5. Make sure you read the pump’s installation guide for any other instructions that you are required to follow before and after installation. It will also guide you on repair and maintenance.
6. Install pond weir
For water to flow seamlessly into your pond, you will need to install a weir. Install the pond weir by following the steps below
1. Place your pond weir between two steady rocks. Make sure that the rocks are not leaning against the weir as this could cause damage to it.
2. Using a spirit level ensure your weir is level from front to back and side to side.
3. Make a mark on your weir r at ¾ of an inch from the top of the weir door to determine where your water level will be.
4. Next, attach your liner to the skimmers faceplate.
5. Fold your landscape fabric so that you don’t attach it together with the liner to the weir faceplate. Landscape fabric is porous and will cause leaks between the faceplate and the liner.
6. Remove the faceplate and stretch your liner onto the entire front panel of the weir. Carefully stretching out your liner will prevent it from leaking later so extra care should be taken while doing this.
7. With your liner still stretched tightly across the face of the weir, place the faceplate over the liner. Puncture the holes with a screwdriver on all 4 sides of the face plate to allow screws to attach the faceplate to the weir.
8. Remove the liner and clean its outer surfaces to ensure that all talcum powder that was added when shipping is removed from it. Clean the faceplate and the weir as well with a cloth.
9. Smear an even layer of silicon between the weir and the liner. Do not place any silicon between the faceplate and the liner because this will cause leaks. A simple ¼ of an inch rectangular shape line of silicon will suffice. There’s no need to apply excessive silicon; this will form bubbles resulting in leakages.
10. Attach your faceplate and liner to the silicon-coated weir and ensure that you have no wrinkles as you tighten the nuts. Start with all 4 corners to ensure that your faceplate is correctly positioned and the liner remains tight. Ensure your screws are tight using a screwdriver and wrench, carefully attach all the screws.
11. Cut an opening in the liner tracing the mouth of the face plate which will allow water into the pond.
12. Hide your weir by carefully placing rocks around the face of the faceplate.
13. Remember to connect the weir pipe to the water pipe from your submersible pump. Check this pipe for leaks when testing the submersible pump.
Here is a great video demonstrating how to install your water weir:
7. Fill pond floor
Filling the pond floor is important to ensure that you have a firm base for your pond. Without proper filling, falling debris could potentially damage your rubber lining and cause leaks. To properly fill your pond floor complete the following steps.
1. Use small building rocks to fill the spaces between the large rocks. Be careful not to damage the rubber lining as you place the smaller rocks by forcing the rocks into position. The correct size rock should fit without having to be forced in.
2. Test your pump by filling the pond just above the level of the pump hole and running it for a few seconds. If installed correctly you should see water flowing from your weir back into the pond.
3. Fill the rest of the pond with water to right under the level of the coping stones.
4. Monitor the water level after a few days to ensure that you have no leaks.
If your pond is losing water, use either cement or a commercial pond sealer described in a section below.
8. Choosing the size of the pump
Before you purchase a submersible pump, do these:
1. Determine how much water is in your pond
You can determine that amount of water in your pond by multiplying the length x width x the average depth of the pond x 7.5 gallons. 1 cubic meter of mass can hold up to 7.5 gallons of water.
The pond in the example above is 16ft x 11ft x1.3 x 7.5, that’s 1,712 gallons.
2. Determine at what rate your water should be turned.
Typically, the water in a pond should be turned once per hour. In this case, we will be looking at purchasing a pump with a rating similar to this one. If you have a filter, you only need to turn your water once every two hours.
3. Ensure that you are buying a submersible water pump. If you don’t have the knowledge it is easy to purchase an above surface pump by mistake. Be sure to clarify this before purchasing.
4. Consult with an electrician on whether you should use a surface or a submersible pump in your area.
Here is a video explaining how you can pick the right size pump for your pond:
Building a Cement Pond
Cement ponds are suitable for areas where rocks and stones are not readily available. Cement can also be used to plaster your rocks and create various shapes and designs.
The process of making a cement pond is very similar to building a rubber-lined pond. Picking the site, excavating, installing and connecting the pump are all the same. The difference is in pouring the reinforcement and lying of concrete.
To reinforce and line your pond with concrete follow these steps.
1. Place a 1-inch layer of mason sand over your pond and compact with a spade.
2. Next, place a layer of polyethene plastic over the sand instead of landscape fabric.
3. Reinforce your pond by laying reinforcement wire along the bottom and side of the walls. Reinforcement wire can be purchased from your local hardware store. You will want to use grade 86 for a pond.
4. Mix and pour your concrete and ensure the walls are at least 4 inches thick. I would prefer having concrete delivered to me rather than going through the trouble of mixing it myself. Concrete can be bought from your local building supply store or concrete mixing company.
If you decide to mix concrete on your own, follow the steps below:
- Mix one part of cement to 4 parts of stone ½ inch stones and 2 parts of gravel.
- Mix carefully before adding any water
- Mix carefully with water, ensuring you don’t add too much of. Excessive water will lead to a weak mix because all the cement will flow to a single area, leaving most of the other concrete weak and form cracks.
5. Use a 4-inch aluminum screed to shape and smoothen out the concrete. Further, smoothen and shape your concrete using a finishing trowel.
6. Let it dry for about one week, making sure to keep the concrete moist so that it does not crack.
The videos below demonstrates how you can build a pond with cement:
and
How to cure a cement pond
Before you add plants and fish to a cement pond, it needs to be cured to remove toxins. Curing a cement pond requires patience. For larger ponds, you may also want to invest in a portable suction water pump.
Follow the steps below to cure your pond.
1. Fill your pond with water for one week and then drain.
2. Refill it with water and drain after two weeks.
3. Fill it again, and drain after 3 weeks.
4. Fill your pond one last time and drain after one week.
After this 7- 8 week procedure of filling and draining, your pond is ready for use.
Before you add any plants of or fish to your pond, test the pH level with a pH tester to ensure that it is around 6. Cement raises the pH of water and could potentially kill plants.
Here is a video on how you can test your water for PH level:
Fishpond sealers
Some people choose to use fish pond sealers over the layer of cement because they lessen the possibility of leaks and make the water plant and fish safe.
Here are some tips on using pond sealer
• Ensure that the type you purchase is toxin free especially if you are going to have fish and plants in the water.
• Explore the possibility of using colors (not just black).
• Use both a roller and a paintbrush to properly coat your pond with sealer.
Liner vs. Cement Ponds
Here are some things to note when making a decision whether you should build a rubber lined or cement pond.
• Concrete ponds should be built by most skilled people because they’re more challenging. Rubber lined ponds are easier.
• Concrete ponds need to be reinforced with rebar.
• Fixing cracks and leaks in concrete ponds is easier and less expensive than in rubber lined ones.
• A rubber lining pond can easily be damaged during construction
• A concrete pond is generally more durable than a rubber lined pond
• Concrete ponds are generally easier to clean than rubber lined ponds
• Cement ponds need to be properly treated before you add fish to them, because cement can be toxic to your fish.
• Rubber lined ponds are cheaper to build than cement ponds.
• Because concrete ponds take longer to dry, they take more time to build.
• Concrete ponds generally add more resale value to your home than rubber ponds.
Watch the video below talking about the two types of ponds:
Below Ground Ponds
These ponds are normally referred to as dams, water tanks or reservoirs, and are usually many much larger than above ground ponds.
Below ground ponds are usually built for practical reasons like emergency water storage, irrigation, and or to keep livestock water.
To avoid the high cost of using a liner, they use clay to help with water retention. In areas with sandy soil a liner can be installed but at great expense.
Typically, a large amount of earth has to be excavated so you’ll need an excavator. Below ground ponds are usually installed with an overflow pipe to control the amount of water in the pond to prevent excess water from causing the dam wall to collapse.
How to build a below-ground pond
An important thing to consider before building a below ground pond is the amount of space you have available.
Larger homesteads and smallholdings depend on belowground ponds to irrigate their crops and supply the household with water for use all year round. You need about 2,500 gallons of water for every bushel of corn you irrigate.
There are different ways of building a below ground pond. It is not a small undertaking, so careful planning should be put in before building. Here are the steps to follow…
1. Select a side to build the pond
An ideal site to build a pond is one with natural land depression, preferably with clay soil that does not drain easily. If this land is also situated on a grassy slope below a spring or artisan well, even better.
All you need to make in this case is a dam wall and provision for a drainpipe made to control the level of water in the pond.
The gradient of your land is an important determining factor in how much it will cost to actually build the pond. It’s obvious that areas with natural depressions and clay soil are better suited for pond construction. If your land is flat, you can still build a pond but you will incur higher excavation costs. You may also face a challenge with draining your pond when needed.
2. Excavate
Most ponds require excavation. The most efficient way to do it a pond is by using professional excavation equipment. Unless you’re building a very small backyard pond, manual excavation is almost impossible.
Before you excavate your land, consider the following:
1. Check with local authorities if you need to submit any plans or proposals to be permitted to build a pond. Some areas have laid down procedures on the standard material, size and depth of ponds.
2. Your local authorities may also have a restriction on which species of trees and other natural vegetation you are allowed to cut down.
3. Check for underground pipes and cables that may be buried beneath the ground you intend to excavate.
4. If you have no prior experience, then you shouldn’t do it yourself. Hire a professional pond builder or a land surveyor at the very least, to assist you with your pond exaction and construction.
5. Excavation is not the only factor that needs to be considered. The reliability of your water source also plays a big role in how and where you excavate. Being modest in your approach to building a pond is helpful. Excavating a pond too large could result in huge unforeseen costs.
3. Ensure your pond can hold water
If your pond is built in an area with gravel or sand, it will have very poor water holding capacity.
Here what to do to improve your pond’s water holding capacity.
1. You will need to line the bottom of the pond with black polyethene plastic. This plastic needs to be stacked in layers up to 3 inches thick to provide sufficient lining. Other material to line your pond like rubber can also be used.
2. You can seal the bottom of your pond using clay. Once water begins collecting in your pond, you will need to throw in clay. The clay particles will the settle at the bottom of the dam and form a tight seal. Clay is the best natural seal for your pond.
3. You may want to consider using a product known as bentonite clay. It has several advantages over using ordinary clay
o Bentonite clay swells up to 15 times its normal size when it comes in contact with water.
o It creates a tight water seal and is specially made for ponds.
To apply it, mix it in the following ratios:
- For clay sound 2 pounds / square foot
- Sandy soil: up to 5 pounds / square foot.
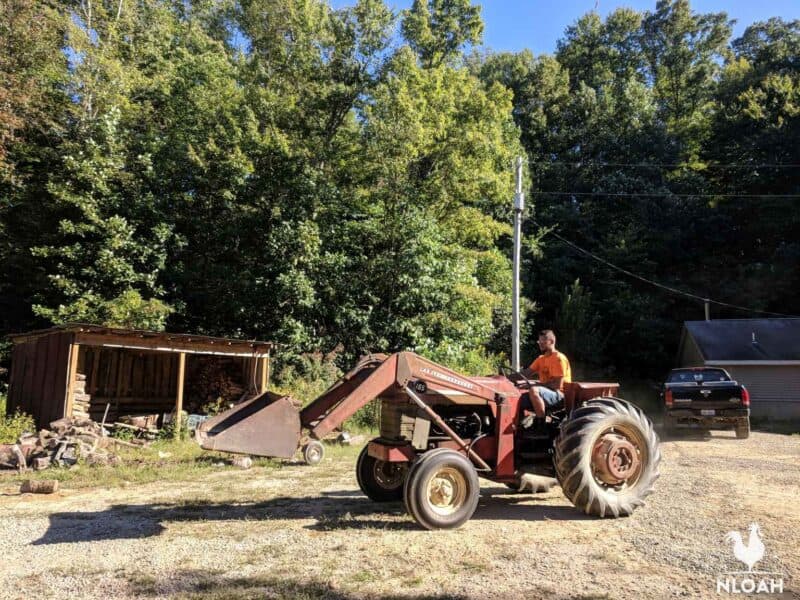
Using a tractor, plough the soil at the bottom of your pond with Bentonite clay and compact with a roller compactor before introducing water into the pond. Here is a video of how you to use it:
If you decide to use your pond as a water storage tank here are some tips.
• Be sure to check what your area legislation allows regarding having a pond or large water reservoir on your homestead.
• Ensure that your pond is nowhere near any sewer lines, or pipes. Leaky pipes could easily contaminate your water.
• Install all pipes to supply your pond beforehand.
• Installing a fence around your pond is a good idea if you would like to keep the big game and other animals away from it. A protective barrier should be built around your pond especially if you have small children around.
• Remember to always consult a specialist before doing any of this.
Hiring a Pond Contractor
If you think building DIY a pond is too complicated, consider hiring a pond contractor. Knowing exactly what you want from a contractor and setting a high standard will scare away unethical contractors and attract the best ones. Before your start making phone-calls, here are some things to consider:
• Review the license and legal documents of the contractor to ensure that they are compliant with industry regulations.
• Check that they have a provable track record, and that they have past experience with building a pond of the size you want.
• Ask the contractor to prepare a proposal on:
o How they intend to carry out the work
o The personnel they will attach to the project and their relevant qualifications
o The machinery that will work on the project
o A bill of materials
o A completion schedule that will set out the progression of the work and deadlines.
• Always have a legal contract in place that holds the contractor accountable for the construction of your pond even after it is complete. Ensure that it is detailed and most elements like price, machinery, personnel and completion period are indicated.
• Never pay for a project upfront in full. Contractors tends to become lazy and make excuses to get more out of you when they have already been paid. For smaller contractors, ask to accompany them when they are buying any material to ensure that the quality spelled out in your contract is adhered to.
• Always pay your contractor on time and help them in any way along the way. Building a pond can be challenging and even the best ones may need a little help hand along the way.
• During the construction phase, you may want to hire an independent expert that will come in for a few hours to inspect the project against industry standards, as well as to verify the technical aspects of the construction, maybe even suggest ways to cut costs.
• Speak to several contractors will help you get the best price and expertise as opposed to just speaking to just one company or person.
Here is a video explaining the aspects of choosing a pond contractor.
Final Words
Making your own pond can be an exciting and rewarding experience. I’ve actually seen people starting out making ponds for fun, then turned it into a career. Most above ground ponds take a few days and are easy to turn into a work of art. Just know that, as with all other DIY projects, careful planning and is necessary.
If you intend to make a pond or have already done so, don’t be shy and share your experience in a comment below.