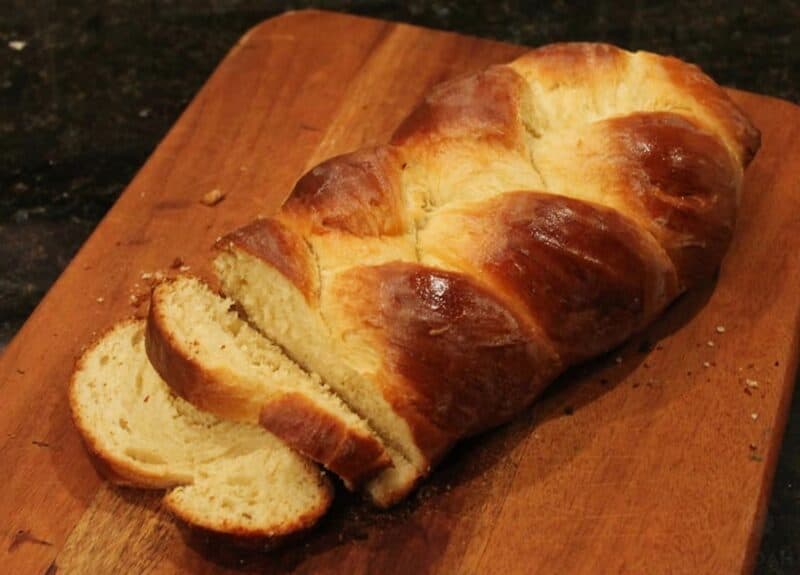
I can honestly say that to date I have never tasted bread better than this homemade challah recipe I’m going to share with you. I’ve been making this bread for several years now, and it never fails to impress and delight.
Although this is a bread machine recipe, theoretically you could make this bread by hand as well. (I say theoretically because I’ve yet to attempt making it without a bread machine.) Really, the only thing the machine does is knead the dough. It would be a little more work to knead by hand, but it’s totally doable.
I’ve used bread flour, unbleached all purpose flour, and freshly ground whole wheat flour (hard white wheat) with this recipe, and although the texture of the bread is a little different with each type of flour it’s equally delicious no matter which you choose. So feel free to experiment!
Disclosure: if you visit an external link in this post and make a purchase, I may earn a commission. Read my full earnings disclosure here.
I’m using my favorite bread machine, a Zojirushi Breadmaker, but you can use pretty much any bread machine that has a dough setting.
Bread Machine Challah Recipe
makes two loaves
Ingredients:
- 1 1/2 cups warm water
- 5 large egg yolks
- 1 1/8 tsp salt
- 1/3 c. olive oil
- 4 1/4 c. flour (all purpose, bread flour, or whole wheat)
- 1/2 c. brown sugar
- 1 Tbsp Instant Dry Yeast
- 1 large egg, lightly beaten
Place the first seven ingredients into the bread machine in order as listed.
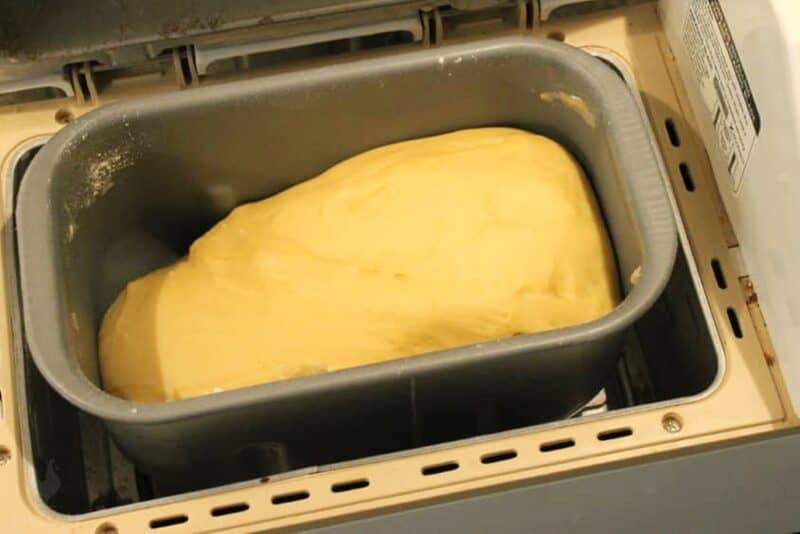
Make a shallow well in the center of the flour and sugar to pour the yeast into. Set the machine to the dough setting and press start.
The time it takes to finish kneading and rising will depend on your bread machine model. Mine takes 1 hr 50 min. You must be there to take the dough out as soon as it is finished. If you leave the dough in the machine for very long it will continue to rise and will bubble over and get everywhere.
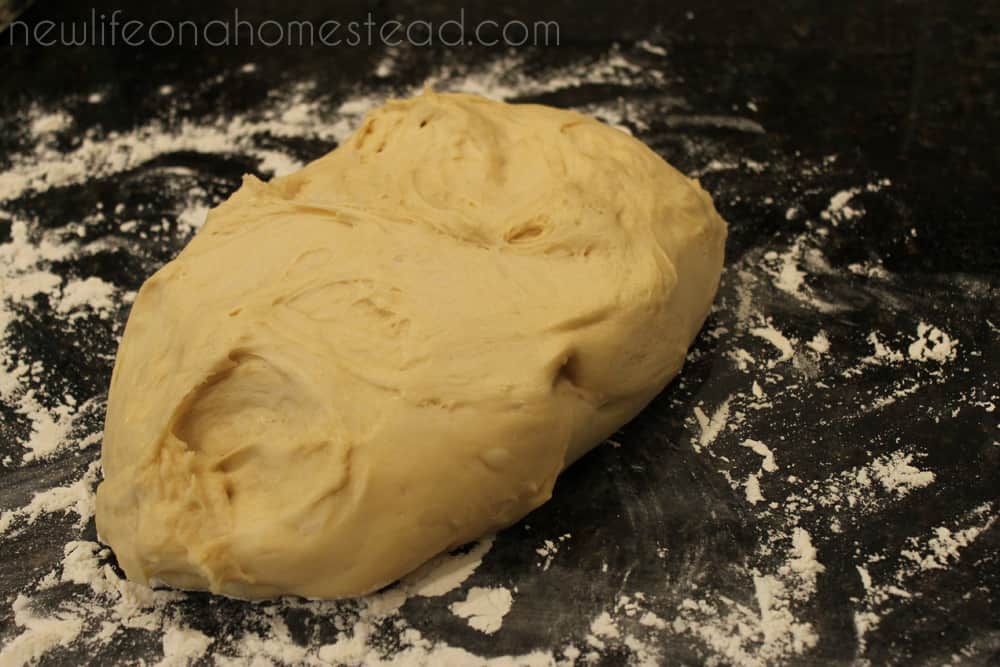
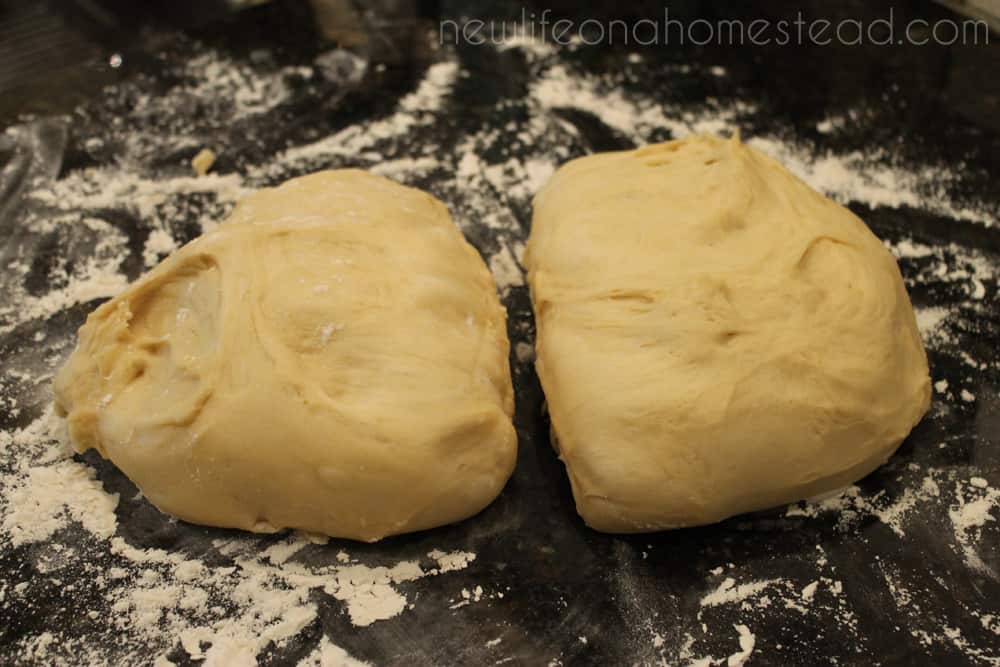
Dump the dough out onto a floured surface. If the dough is sticky add more flour and knead by hand until the dough is stretchy and elastic. You should be able to touch the dough without it sticking to you. I’ve found that when I use freshly ground whole wheat flour I typically have to add more flour to the dough to get it to the right consistency.
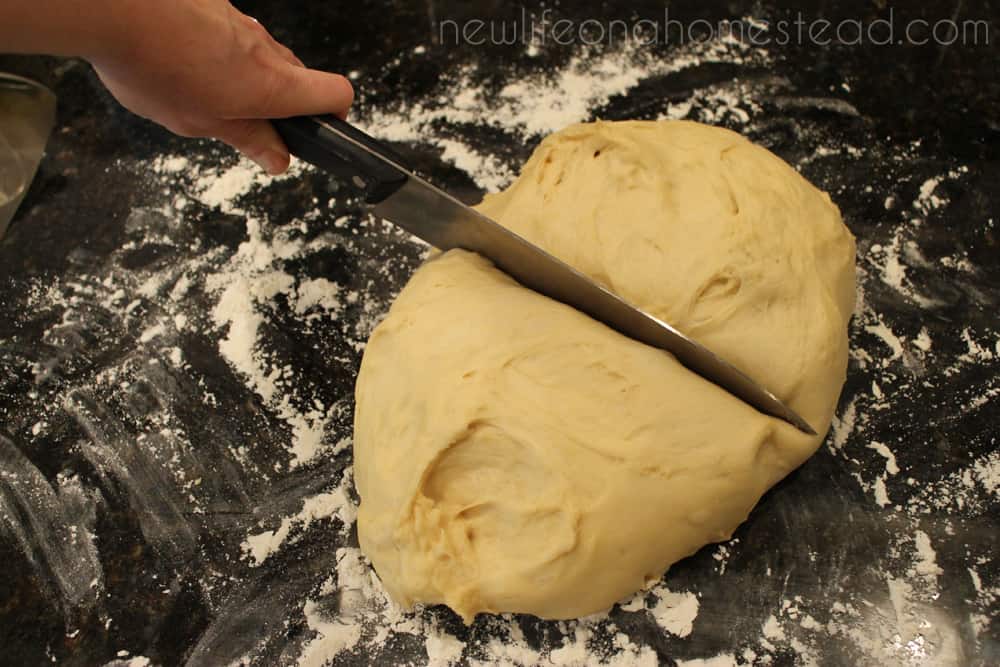
Use a sharp, floured knife to cut the dough in half.
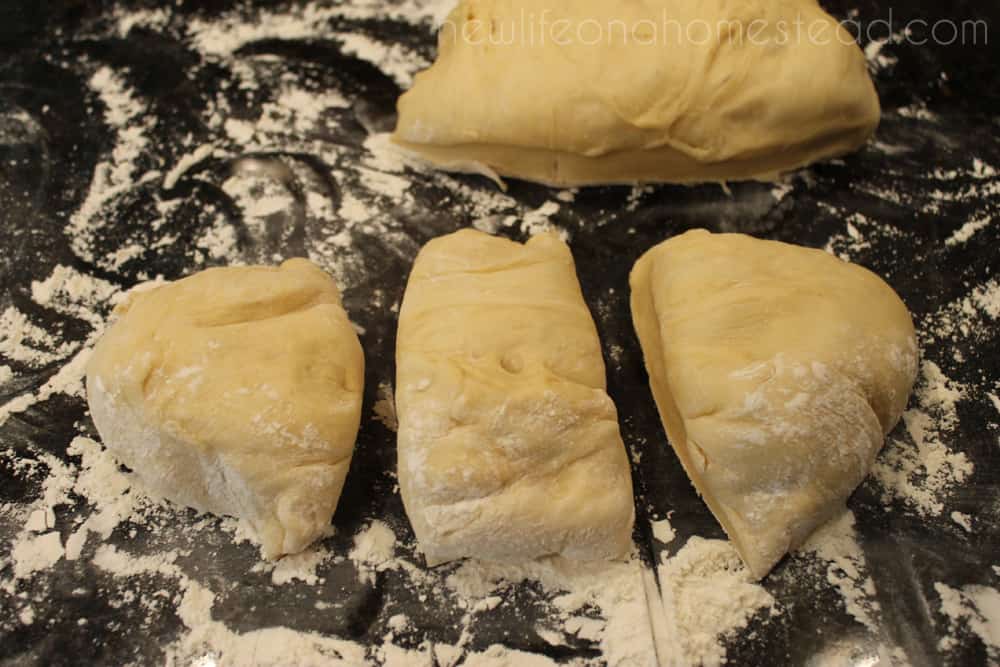
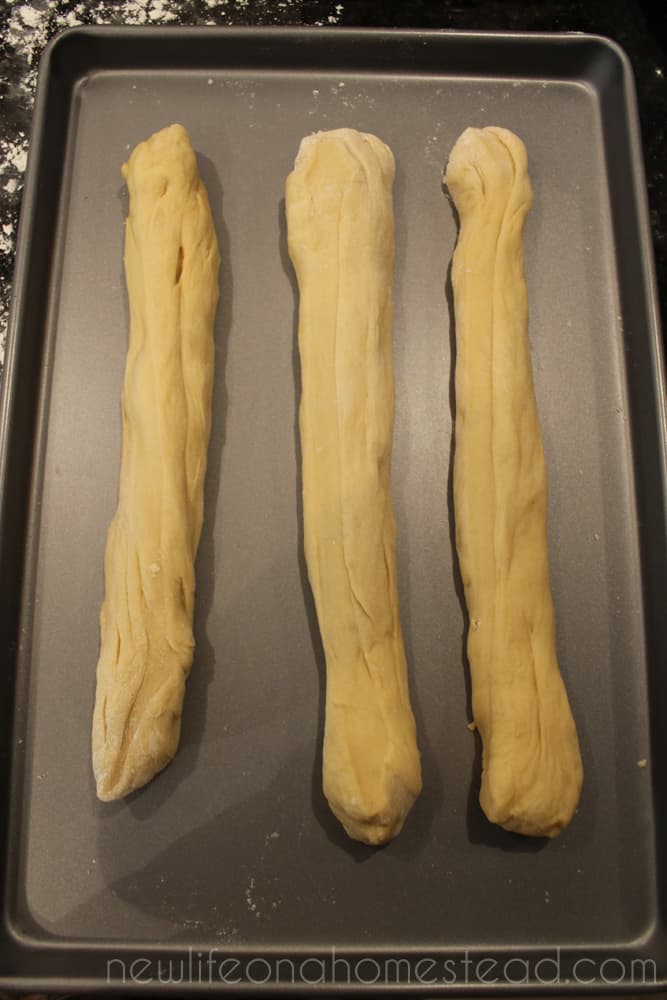
Now cut each half into three equal pieces. As equal as possible, anyways.
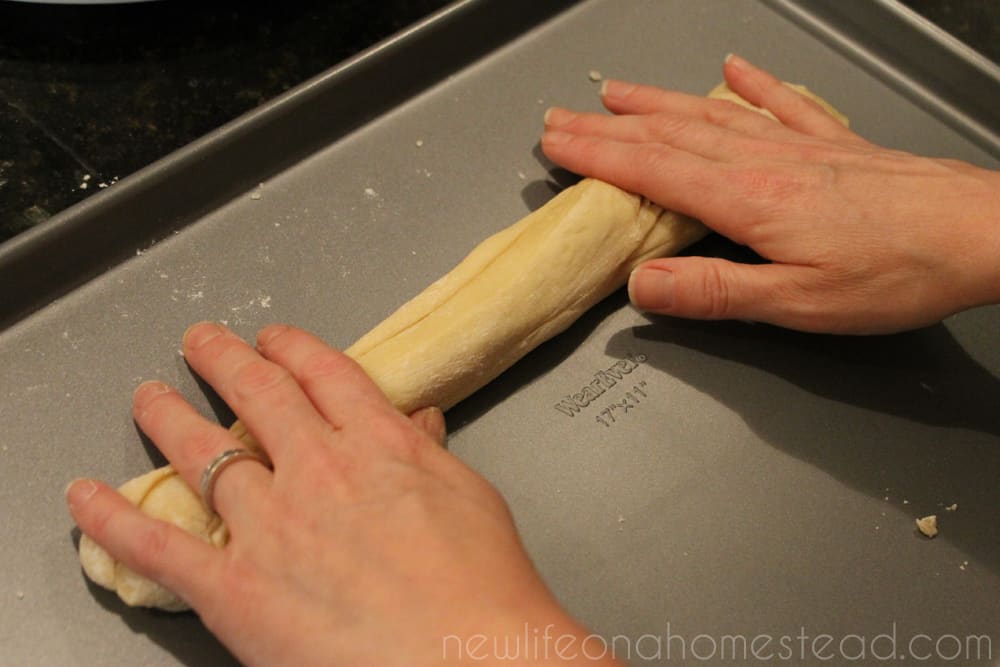
Roll each third into a long snake, like you used to with playdough. Keep the strands about an inch or so thick, and short enough to fit in the baking pan. Keep in mind that the dough will expand as it rises and bakes.
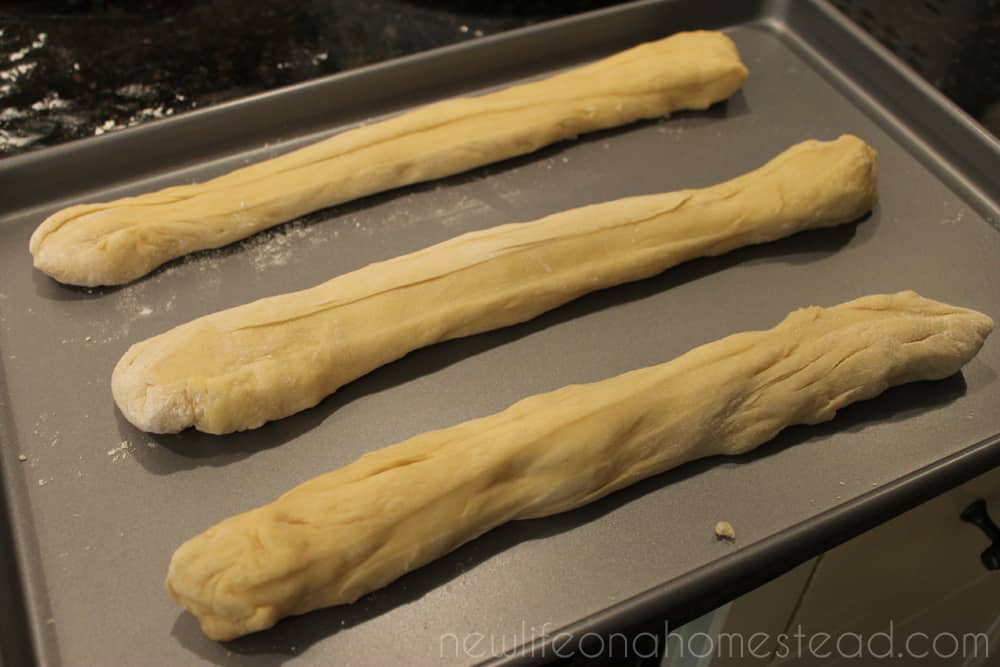
You’ll want all of the strands of dough to be the same length. I prefer to roll the dough directly on the baking sheet I’ll be using. If you roll it on a floured surface and it gets too much flour in it, the finished loaf won’t be as light and fluffy.
When I make my challah, I use two 11-inch x 17-inch non-stick cookie sheets, which fit perfectly side-by-side on the middle rack of my oven. If you try to squeeze both loaves together on one cookie sheet they’ll end up squishing into each other during the baking process.
Now, turn the baking sheet vertically toward you so the dough is easier to braid. You’ll be alternating going over the middle piece with the outside pieces, as shown in the following pictures…
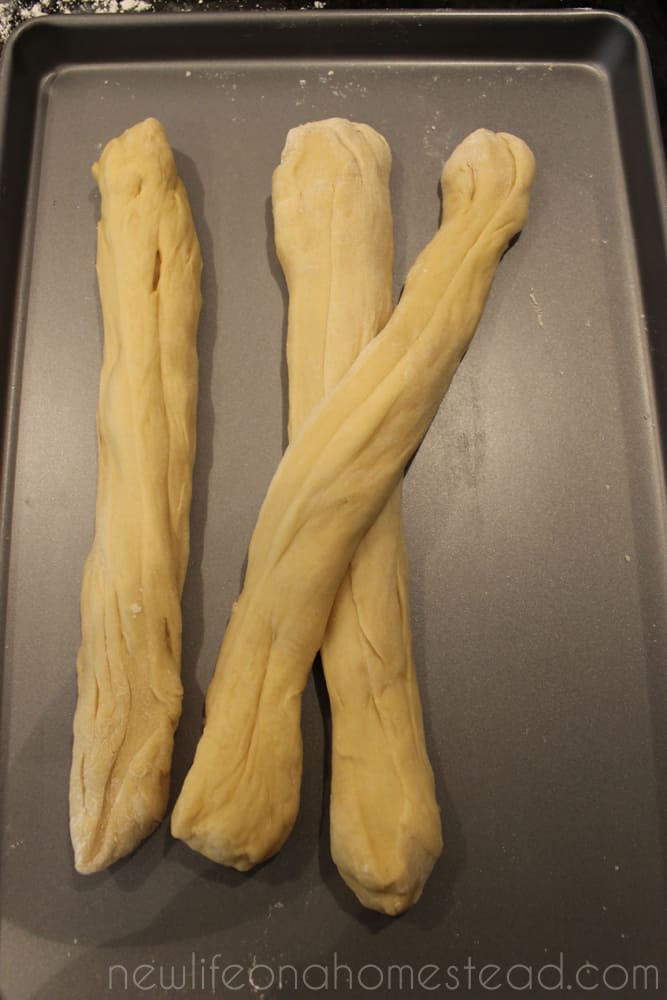
Take the strand on the right and cross it over the center of the strand of dough in the middle.
Now cross the strand on the left over the strand that is now in the middle, just like you’re braiding hair.
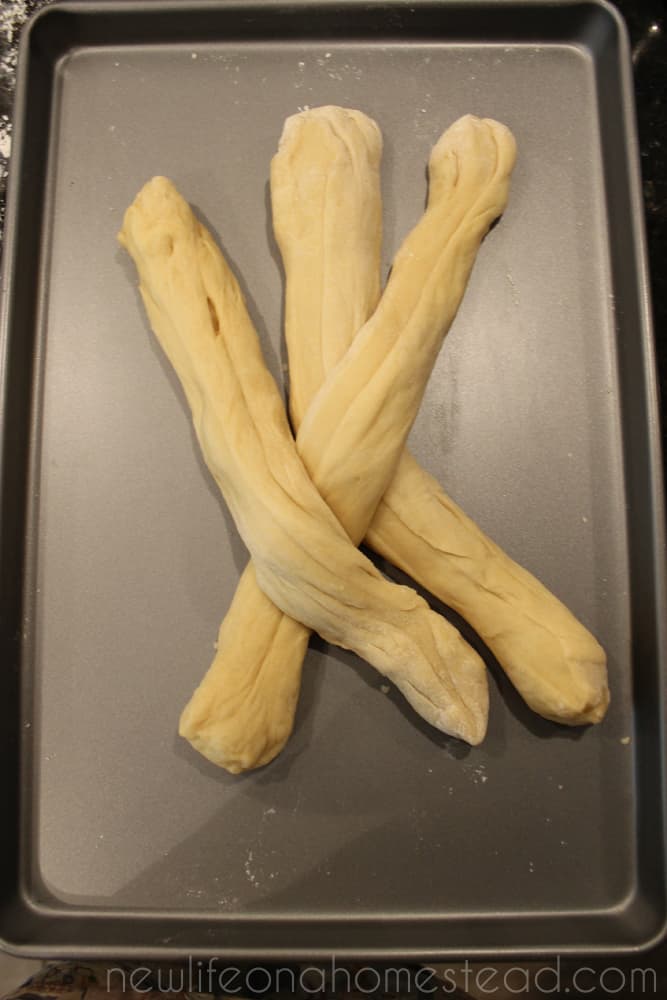
Then right over center again…
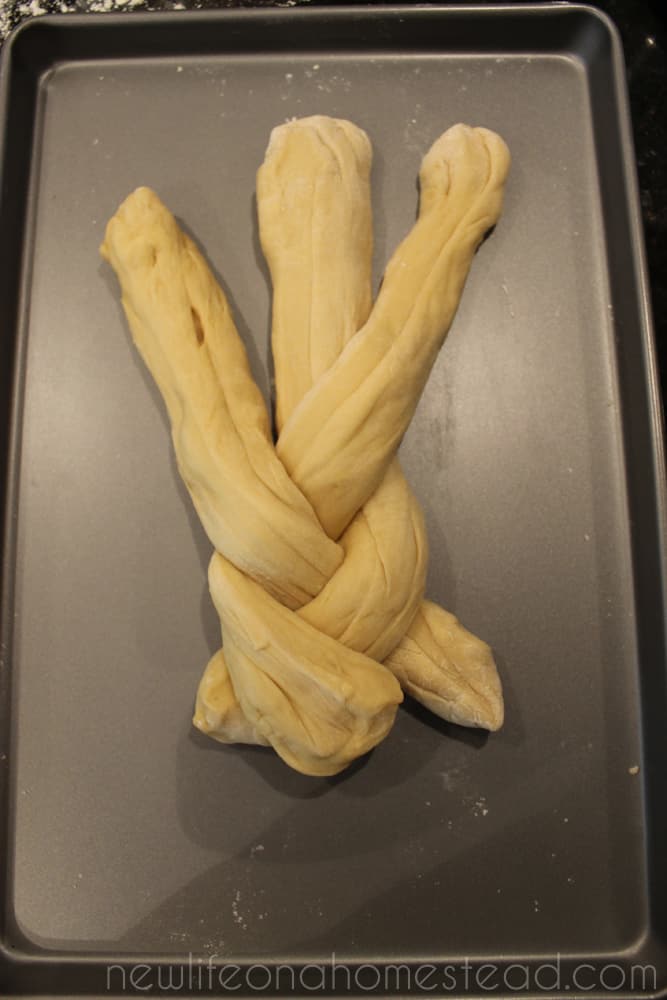
And left over center…
Then once you get to the end, pinch the pieces together where they meet. It doesn’t have to be pretty, it’ll round out during the baking process.
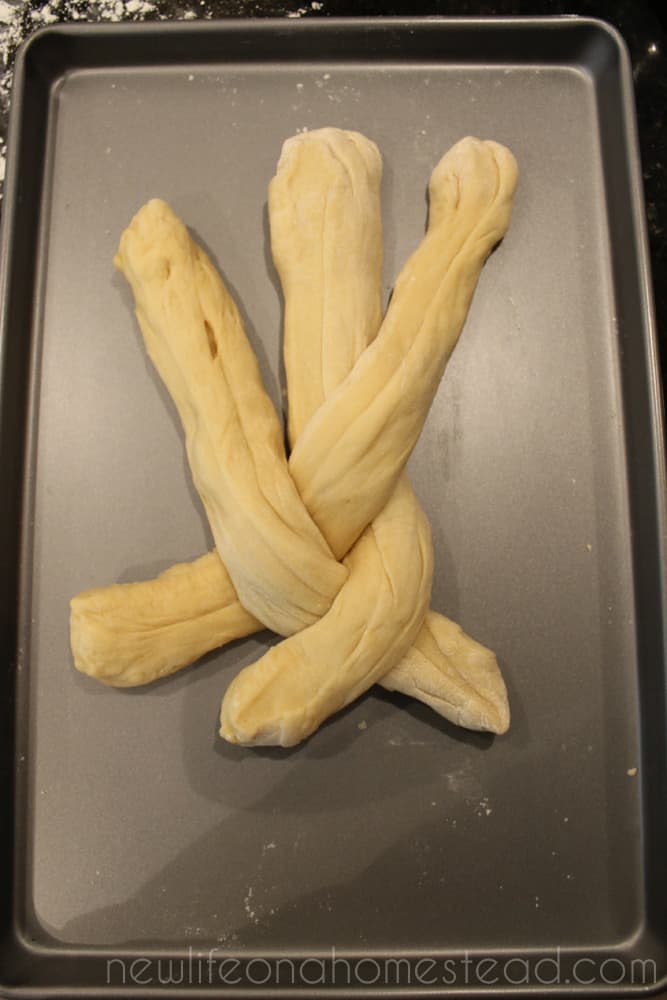
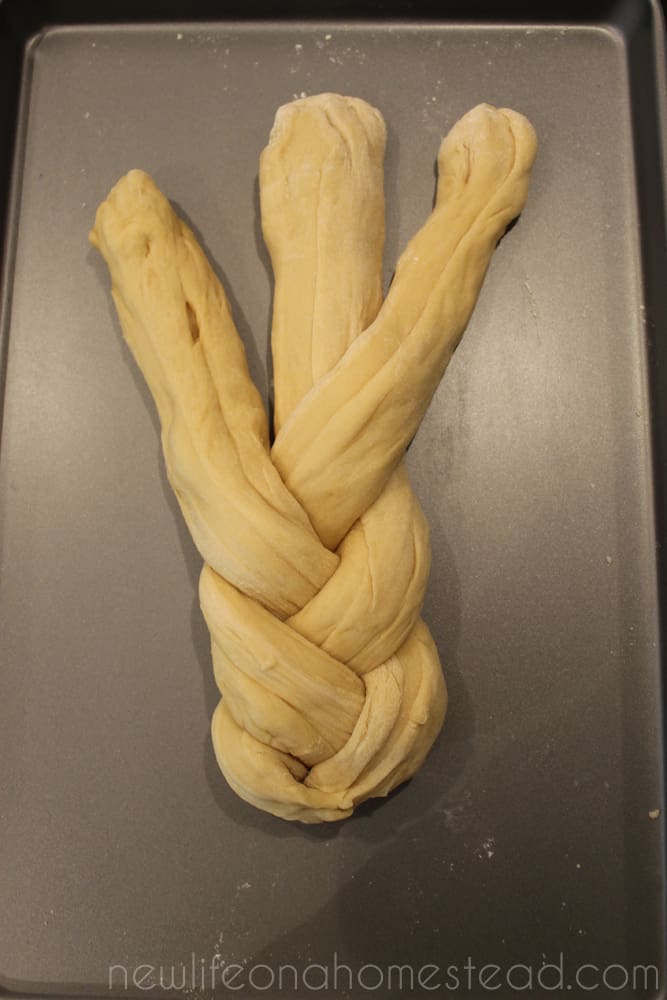
Now, flip the pan around so the other end of the braid is facing you and begin again, this time taking the strands underneath each other.
Take the right piece under the center piece, and pull the center piece to the right and out of the way.
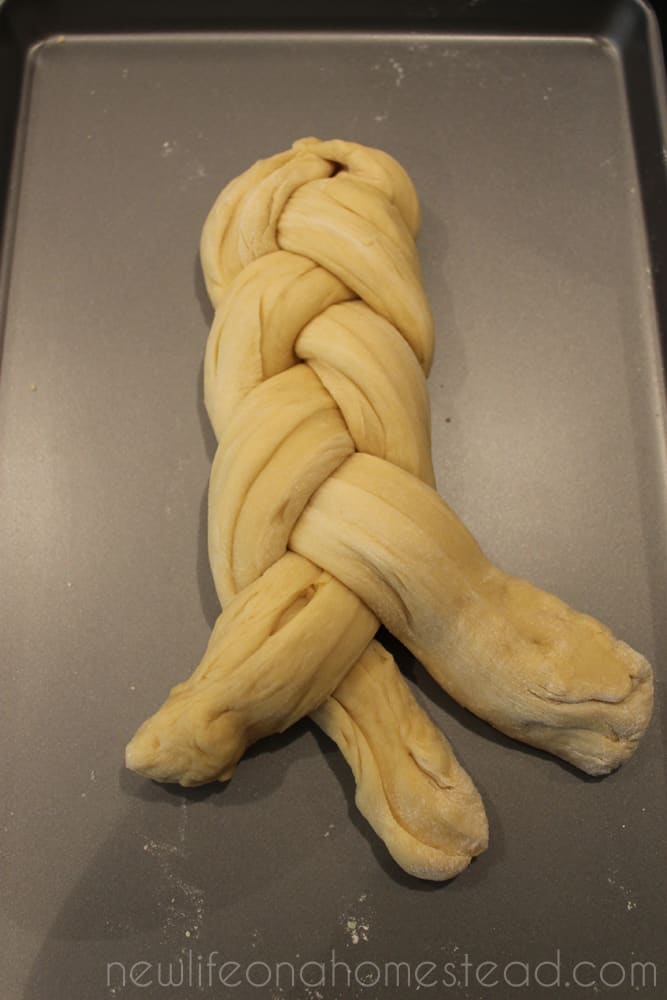
Now take the left piece under the middle piece, and pull the middle piece to the left and out of the way.
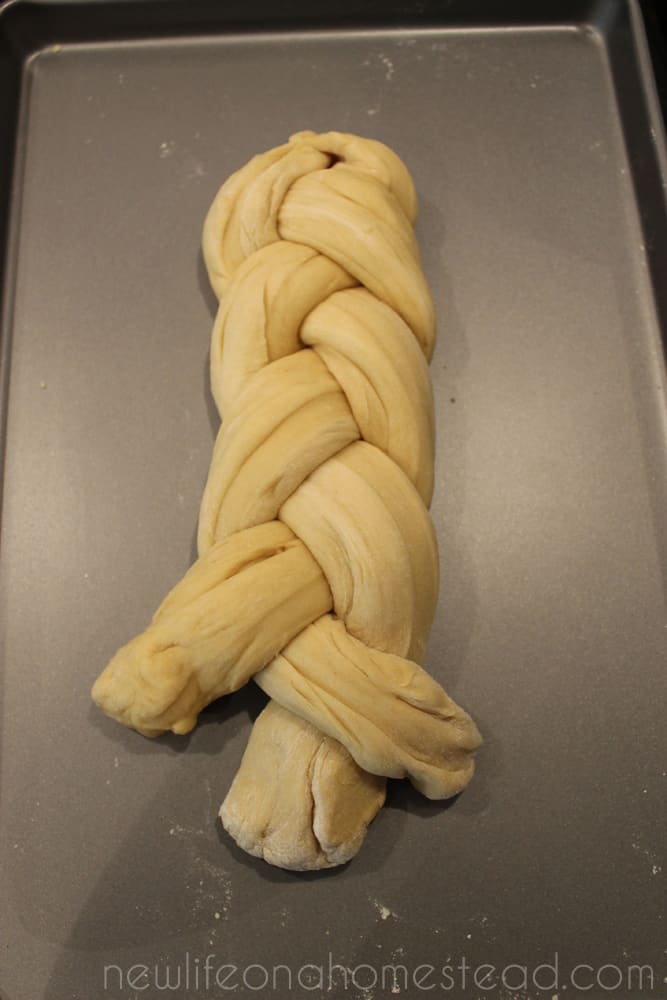
Right piece back under the center.

And pinch it all off at the end.

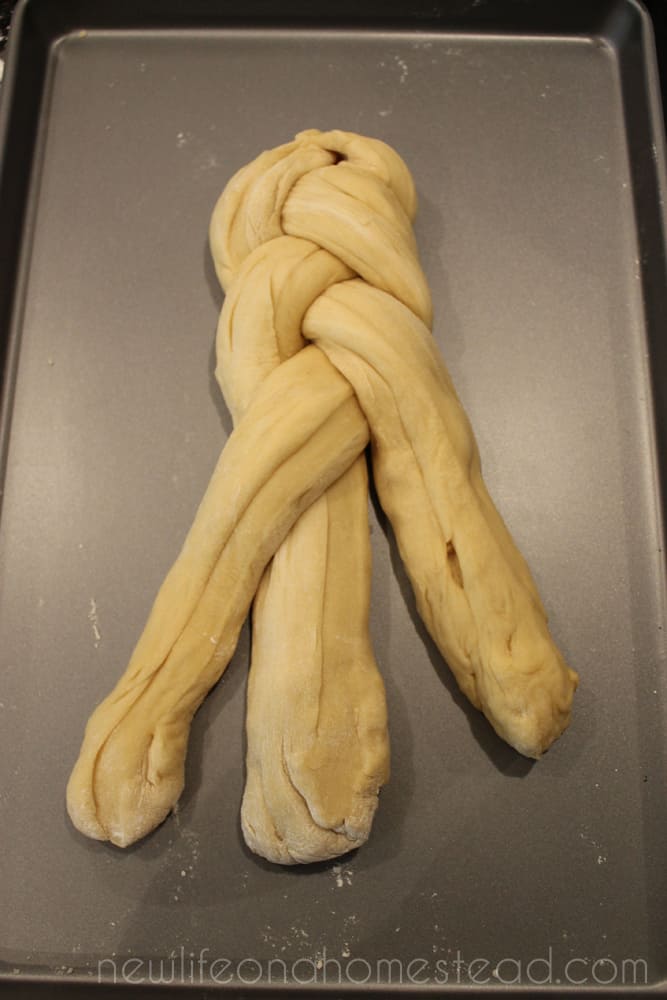
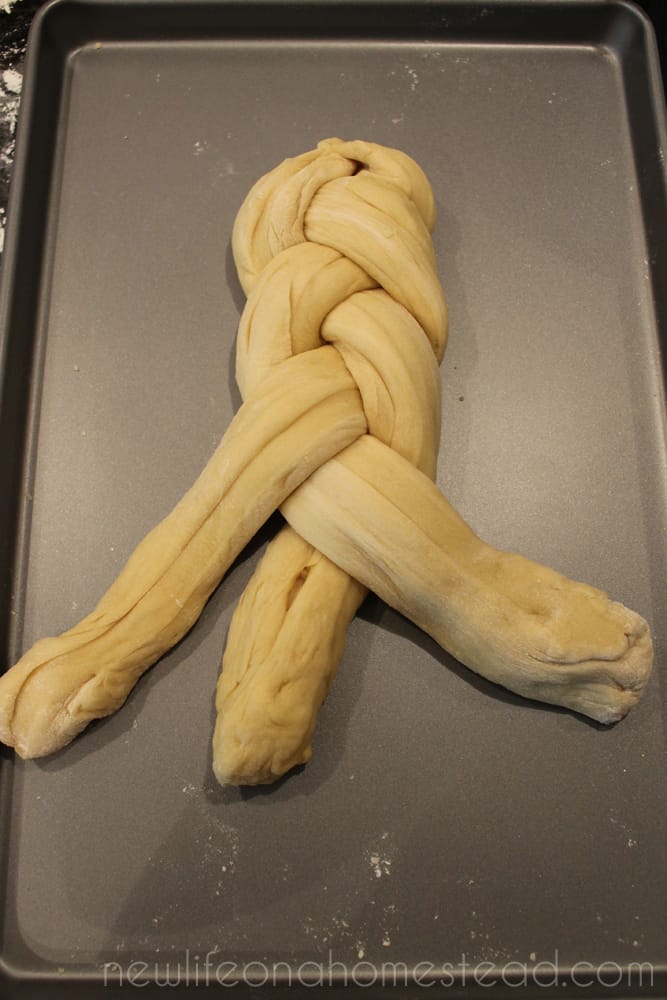
This is how the dough should look after you’ve finished braiding it.
If you still need help with the braiding process, check out this video demonstration:
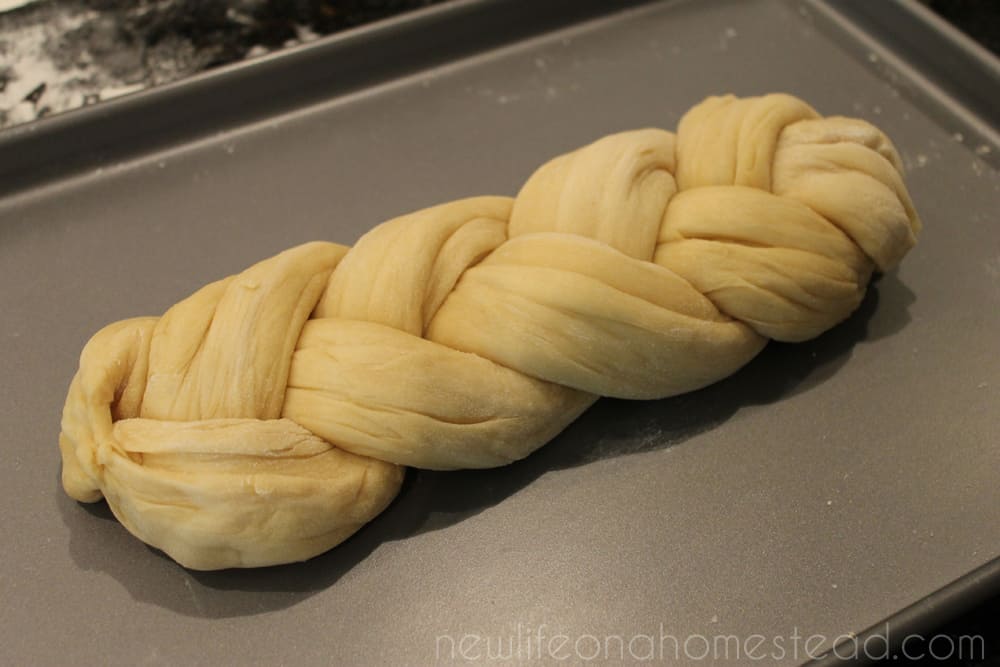
Once you’ve finished the first loaf you’re ready to move on to the second. Repeat the process with the second loaf on a separate cookie sheet.
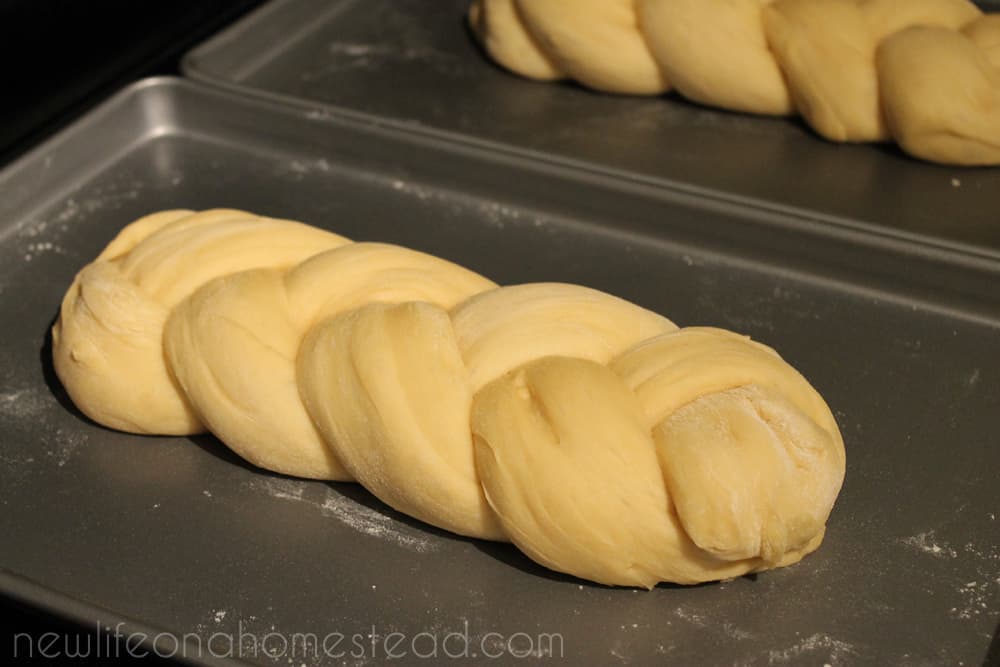
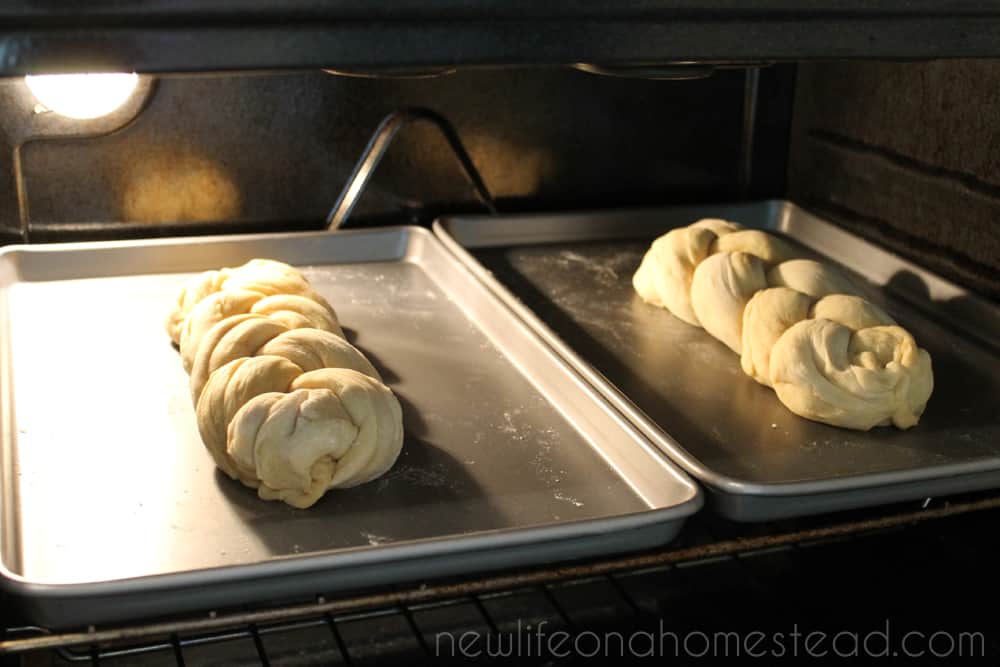
Allow the challah to rise for 30 minutes. You can cover it with a dishcloth and keep it in a warm place. Or, you can turn the light on in your oven and place the dough in the closed oven to rise.
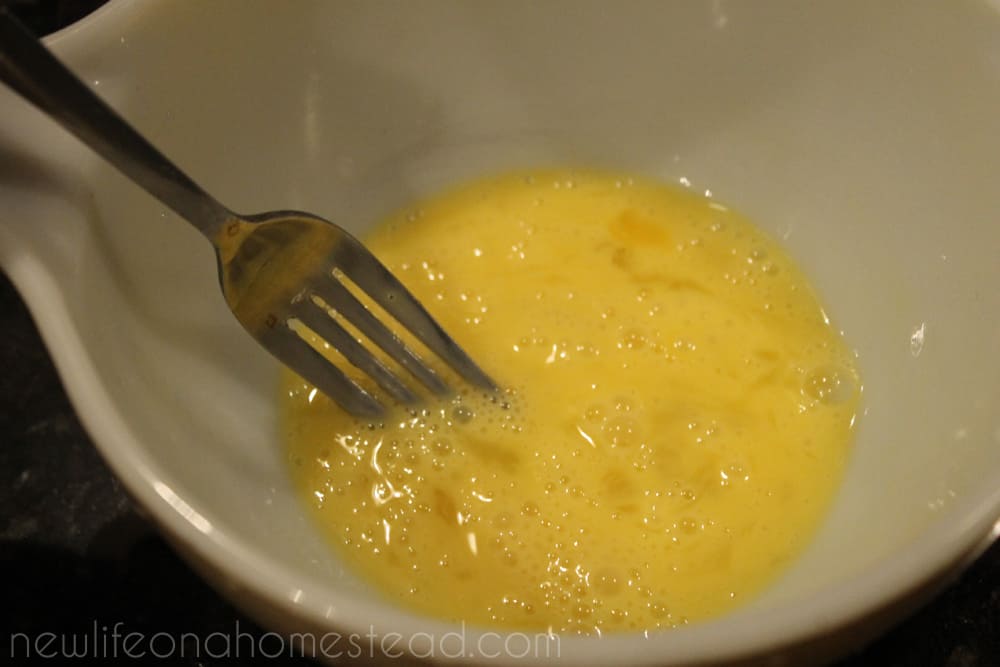
After the 30 min. rise, the next step is to brush the dough with a beaten egg.
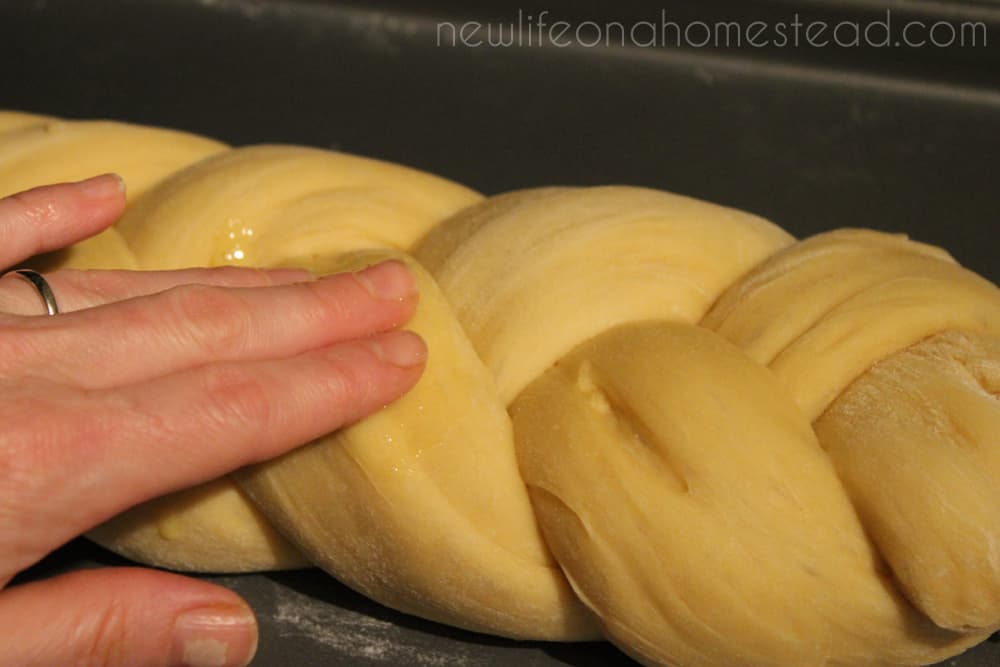
Since I was at my grandfather’s house when I made this batch of challah and didn’t have a pastry brush I had to improvise and just use my fingers. It didn’t work nearly as well as a brush, but it was better than nothing.
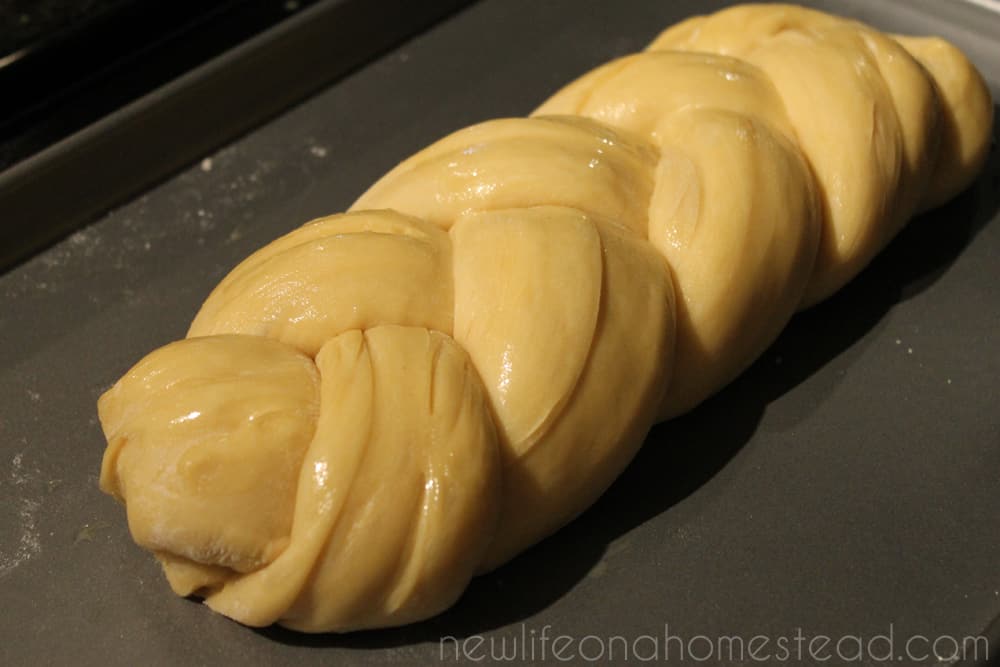
Lightly brush the beaten egg all over the top and sides of the challah. Be careful not to press down too hard on the dough.
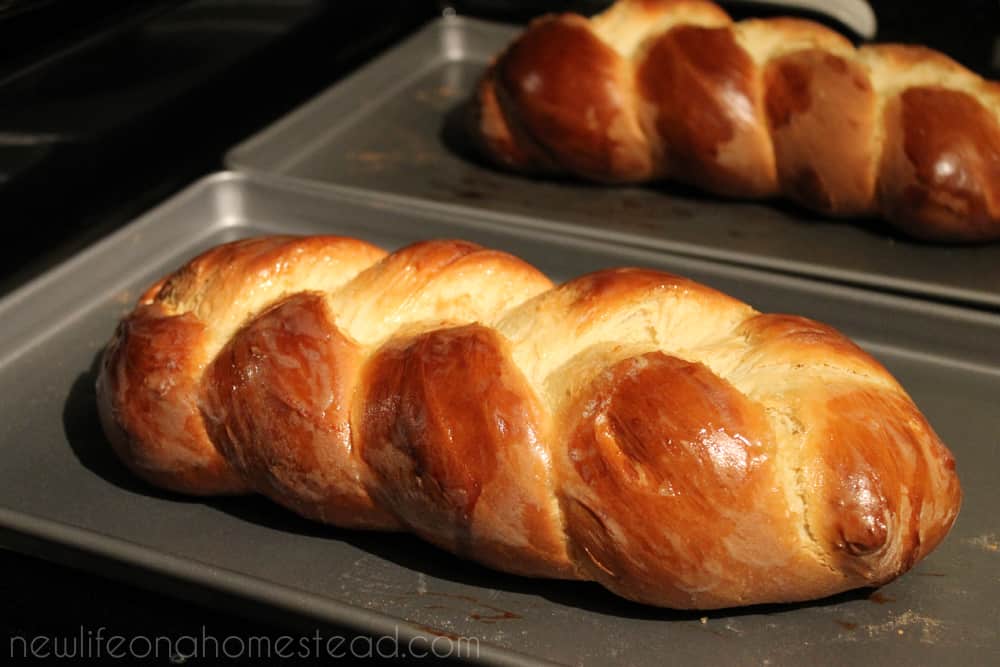
Bake the dough at 350* on the middle rack of the oven for 30 minutes, or until golden brown on top. (You can see the dull places on the bread where my fingers didn’t get the egg wash on the dough. It definitely helps to have a pastry brush for this.)
Allow to cool for several minutes before slicing and serving. It tastes amazing spread with softened butter. If you want to die and go to heaven, spread it with honey butter.
My family of six goes through both loaves in one meal.
Let me know if you give this challah recipe a try!

A city girl learning to homestead on an acre of land in the country. Wife and homeschooling mother of four. Enjoying life, and everything that has to do with self sufficient living.
Hi. I’ve made this a few times in my bread machine and I find it comes out too sticky to work with. I’ve kept adding flour and it comes out delicious but I don’t understand why it soooo sticky. Also I find that my braids are not well defined. What am I doing wrong. TIA.
Thank you!! Delicious..I had to add additional flour once the dough was ready. Will be making again 🙂