
If your tomato seedlings have come of age, it’s time for them to be transplanted into a pot with more room for them to accommodate their roots. fail to do it and they’ll eventually become rootbound – their roots will start to grow in circles inside the pot, and this will mean in thin, leggy stems, yellow leaves, and fewer tomatoes for you later on!
They’ll definitely need something bigger, but you need to do this before they need it! As such, repotting helps to ensure that your plants have enough room to grow strong roots and achieve proper top growth, and obviously, maximize the yield later on.
When to Repot
Tomato seedlings need to be repotted when they have a first set of true leaves if they were planted close together.
If they are in their own seed cells, you should pot them as soon as the second set of true leaves appear – you can transplant after the first set of leaves if you’d rather but it’s better to wait until you have more than these first true leaves since the tomato plants have more space in their individual seedling trays.
These sets of leaves are integral when it comes time to transplant tomato seedlings.
True leaves are the ones that look like the leaves of the tomato plant, not the cotyledon leaves. When you pot them up, make sure to use a pot that is only slightly bigger than the current one. You don’t want to put them in a huge pot because it will dry out too quickly and stunt their growth.
Another general tip you may see (and one that I find particularly helpful) is that tomato seedlings should be repotted twice: once when they are around 6-8 weeks old, and again when they are around 12 weeks old.
Steps to Repotting Tomato Seedlings
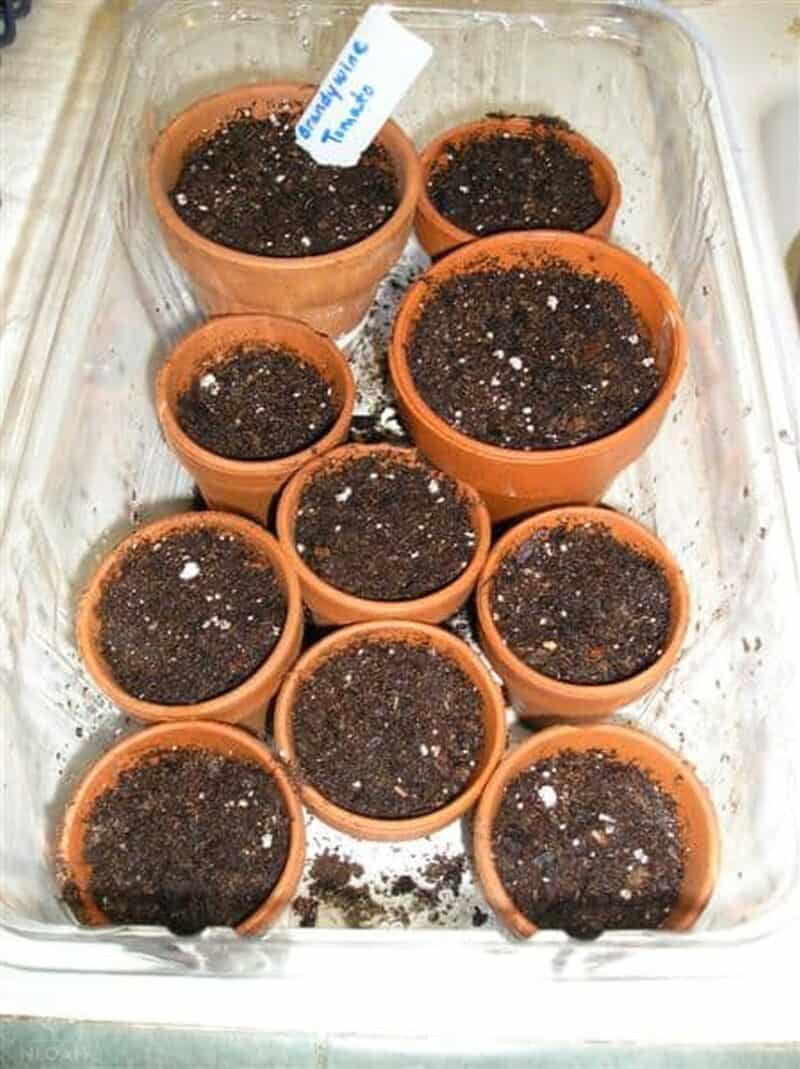
A few weeks ago I told you all about how I was starting my tomato seeds. I started some in mini terracotta pots, and some in re-purposed plastic cookie trays. Now that they’ve sprouted, and are growing well, I will share with you how to transplant the seedlings into larger pots.
Once you see green, it’s time to take them out of the plastic “greenhouse” and put them in the light. I let the ones in the tray grow until they are this big:
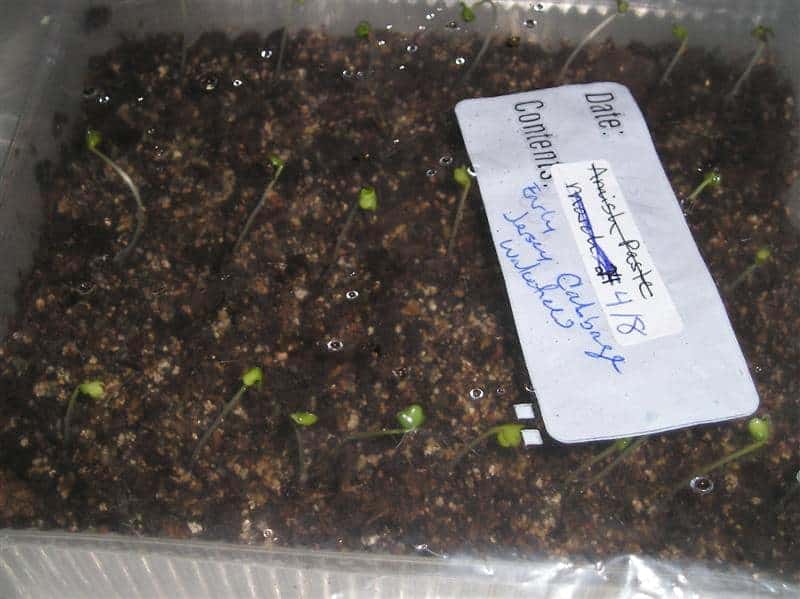
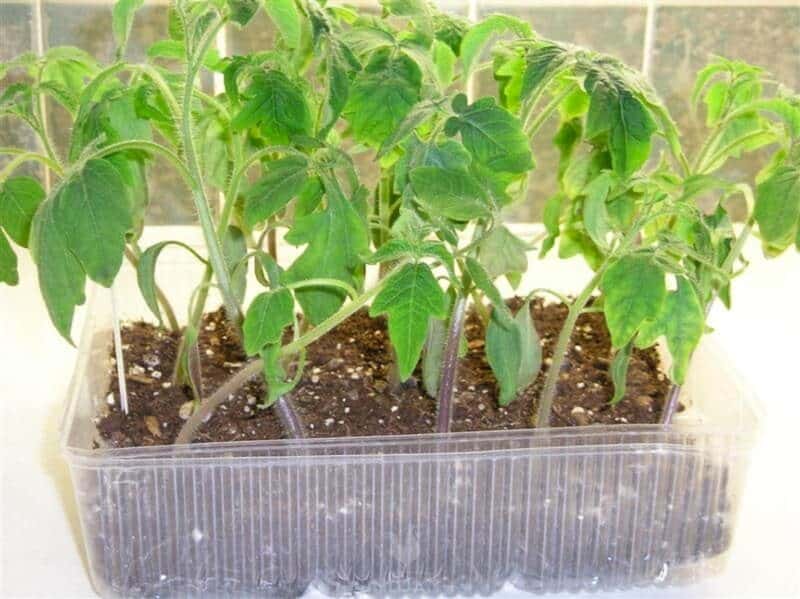
Here is my tray after thinning the seedlings. Looking good! These guys are ready to be transplanted:
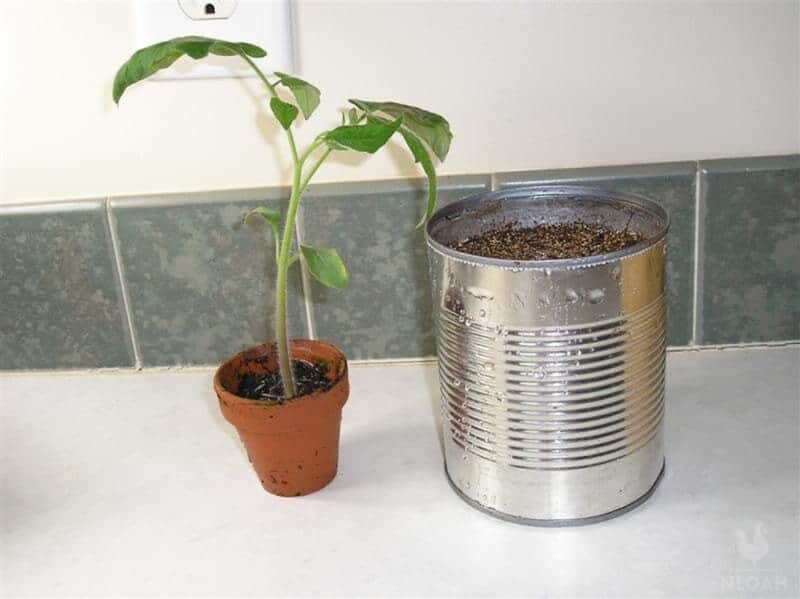
Here’s one of the tomatoes grown in the mini pots. At this stage it was ready to be transplanted to a larger pot as well! I chose a tin can with a few holes punched in the bottom for this particular seedling:
Want to know how to repot your own tomato seedlings? Here are my best tips!
Water Plants Well
When transplanting, it’s always important to water the plant thoroughly a few hours beforehand. This allows the roots to soak up water and makes it easier for them to adjust to their new environment.
Remember, tomatoes like lots of moisture and while you don’t want the soil to be sopping wet, you do need to make sure you are growing your plants in the high humidity conditions they need, especially if they are exposed to drying conditions by being grown on heat mats.
It is also important to replant in well-draining soil and to avoid over-watering them after transplanting.
Choose the Right Pot
Choose a pot that’s large enough to accommodate the plant’s roots. A pot that is too small will restrict the plant’s growth and make it more susceptible to stress and disease. Second, make sure the pot has drainage holes to allow excess water to escape. Otherwise, the plant’s roots may rot.
What if There are Multiple Seedlings Tangled Together?
If you find yourself with a tangle of tomato plants, don’t panic! You can try to gently untangle the roots, being careful not to damage them.
But if you have a real mess on your hands, I’ve found that a better technique is just to snip part of the stem above the soil line. Yes, you’ll lose one of the plants – but if you try to untangle the roots, you may kill both of them inadvertently.
Once the roots are free, you can repot the plants into individual pots. Be sure to give each plant plenty of room to grow, and water them well. With a little care, your tomato plants will soon be thriving.
Fill Containers with Soil
One of the most important steps in repotting tomatoes is to fill the containers with soil before you begin. This helps to ensure that the roots have something to grip onto as they grow, and it also helps to support the plant as it grows.
If you’re using a potting mix, be sure to add enough water so that it’s moist but not soggy. Once the mix is in the container, gently firm it down so that there are no air pockets.
Remove Bottom Two Leaves
First, remove the bottom two leaves (already done in this photo). You want all of the nutrients focused on going to the “true leaves” now.
Using a butter knife, gently go around the inside edges of the pot, loosening the roots. Then, tip the pot upside down (never pull the plant up by the leaves or stem!), and slide the root ball out of the container.
Break Up the Root Ball
Gently massage the root ball to break it up a little, so that the roots aren’t too tightly bound.
Bury the Stem
When re-potting the plant in the larger container, bury the stem deeper than before.
Tomato plants will grow new roots along the stem when planted deeper. This is a great way to help your plant establish a stronger root system, and to keep them from getting too leggy (tall and spindly).
Add More Soil and Water Well
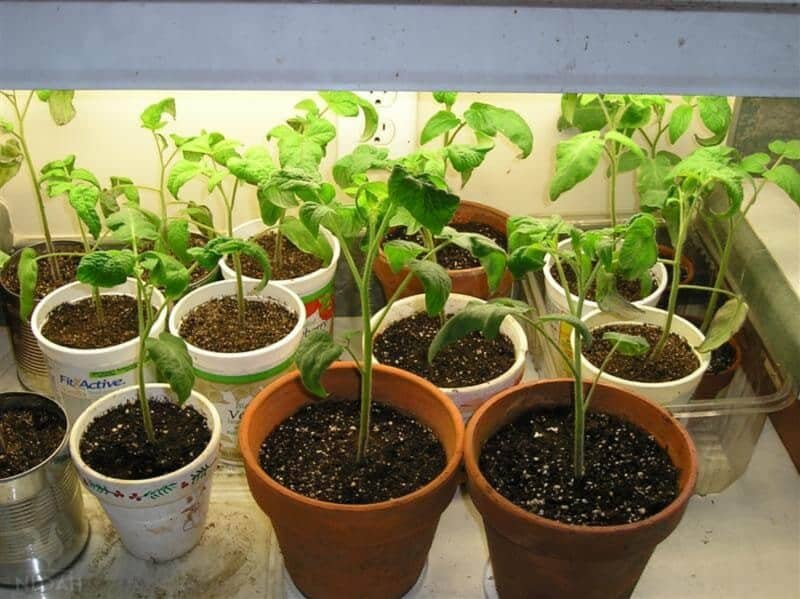
Here are some of my Amish Paste tomatoes after transplanting from the flat container into these little yogurt cups:
Make Sure You Don’t Use Seed Starting Mix
35 tomato plants total, all transplanted, and basking in the fluorescent lighting! Everything was looking beautiful… And then this began to happen:
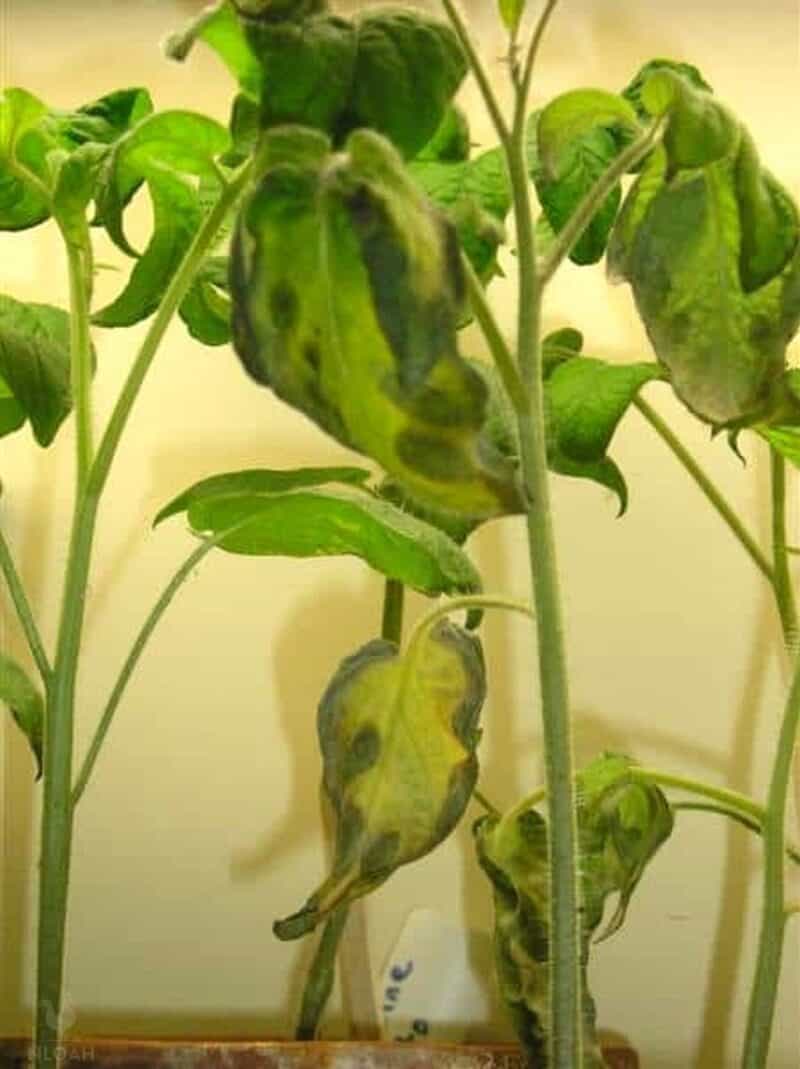
The leaves of some of the plants began to dry up around the edges. What was wrong with them? Long story short, this was a sign of over fertilization. When I transplanted the seedlings into larger containers, I was supposed to re-pot them using a standard potting mix, or garden soil- NOT more seed starting mix! The seed starter has a lot of fertilizer in it.
On the other hand, the plants which were potted in terracotta pots are doing fine! It’s only the ones in the tin and plastic containers which are suffering. I wonder if the terracotta is absorbing some of the extra fertilizer:
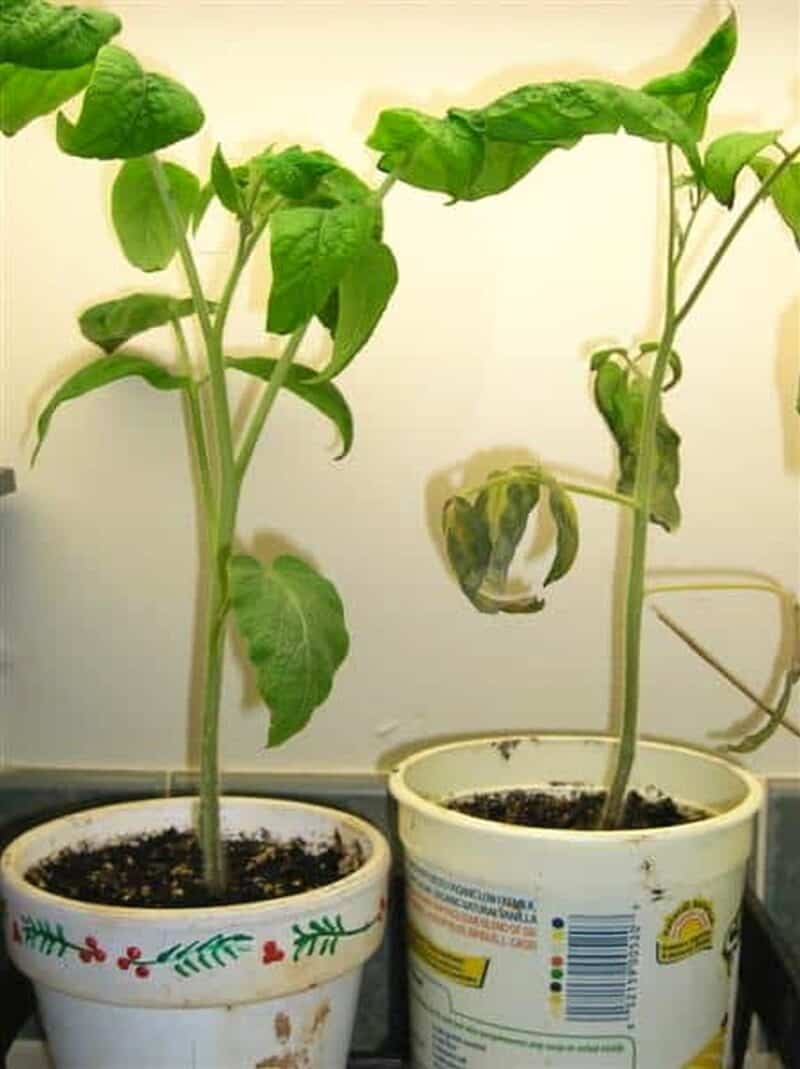
See the difference? The terracotta potted one on the left is looking wonderful. The one in the yogurt container… not so hot. The top leaves are still okay, but the first two bottom leaves are pretty fried.
So anyways, here’s your big lesson…
When you transplant your little seedlings to larger containers DO NOT RE-POT THEM USING SEED STARTING MIX!
Lesson learned.
Another note to self: the terracotta potted plants are much larger, and much healthier. I won’t ask why, I’m just thankful to have some that still look okay!
Transplant Into Garden
One of the most important things to consider when transplanting tomato plants is the timing. Tomato plants should be transplanted into the garden after the last frost date in your area. Wait until soil temperatures are at least in the mid-60s range to transplant young tomatoes in the garden.
In addition, you need to choose a location that receives full sun and has well-draining soil. Tomato plants need plenty of sunlight and nutrients to thrive.
Once you picked a location, prep the soil by adding compost or manure. This will help to improve drainage and provide essential nutrients for the plants.
When transplanting, be sure to bury the stem of each plant up to the leaves. This will encourage new root growth and allow the plant to take better advantage of its new environment.
Final Thoughts
Ready to grow healthy tomato plants? Knowing how (and the best time) to transplant tomatoes is important if you plan on starting tomatoes from seed indoors.
If you’re like most gardeners, you are anxiously awaiting the first signs of life from your tomato seeds. The time has come to start repotting those seedlings!
By following these simple steps, you can ensure that your plants have plenty of room to grow and thrive. Have you ever repotted tomato seedlings before? What tips do you have to share?

Get your gift and learn things like:
- how to make this really quick pest spray
- how to prevent egg waste
- two cheap automation devices that will make your life easier

A city girl learning to homestead on an acre of land in the country. Wife and homeschooling mother of four. Enjoying life, and everything that has to do with self sufficient living.
Thank you for this wonderful help with the little ones. I have babies at the cotyledon stage and didn’t know if they needed true leaves to survive transplanting ~ they’re really tiny and I was afraid they’d get too crowded. Now I know how to help them out !
Have a blessed season !!
Hey Kendra,
I’m good friends with a mutual friend, Kelly Prosch.
This is my first year of growing tomatoes from seed. Here’s a couple of my thoughts…..
One, don’t play with the root bulb….to much stress. I started from the peet pellets and transplanted the whole bulb into a bit larger pot and now need to transplant into larger buckets (whatever).
Two, I used Miracle Grow potting soil with time-release feed and added egg shell, coffee grounds, and epsom salt. My plants are doing wonderfully. Next need to figure out how to harden off so many plants. Yikes.
I found Jerry Baker’s latest book, “Terrific Tomatoes, Sensational Spuds, and Mouth-Watering Melons” extremely helpful.
I’m hoping to have a bumper crop of tasty tomatoes to put up this summer. Pray your plants make it!
Hope to meet you someday.
Sandy
Oh my gosh – I’m so glad I read this. I did the same thing last year and had no idea what happened. Thanks!
Plants a fickle fickle thing. I am sorry that some of them are not doing well. My guess is they will come out of it. Just wanted to let you know that reading this gave me the motivation I have been lacking to repot my plants. I am going to go do it now!
Wondering if you punched holes in the bottom of the yougurt containers for drainage. Barbara
barbara- yes, i did 🙂
Just a random thought and may or may not be helpful … but in planting in the past, I’ve noticed that terra cota pots will absorb extra moisture and then release it back into the soil as it drys out. If the soil is kept really moist, a terra cota pot will mold or mildew. The plastic and metal may also be releasing toxins into the soil?