
It can seem like an eternity for chicks to hatch in your incubator or in a clutch of eggs beneath a hen. Once you notice the first peck hole in the egg the excitement builds and you call for everyone else on the homestead to come watch and share the joy of new life. But, sometimes, a chick gets “stuck” in the egg, and it seems like it’s never going to make its way out on its own…
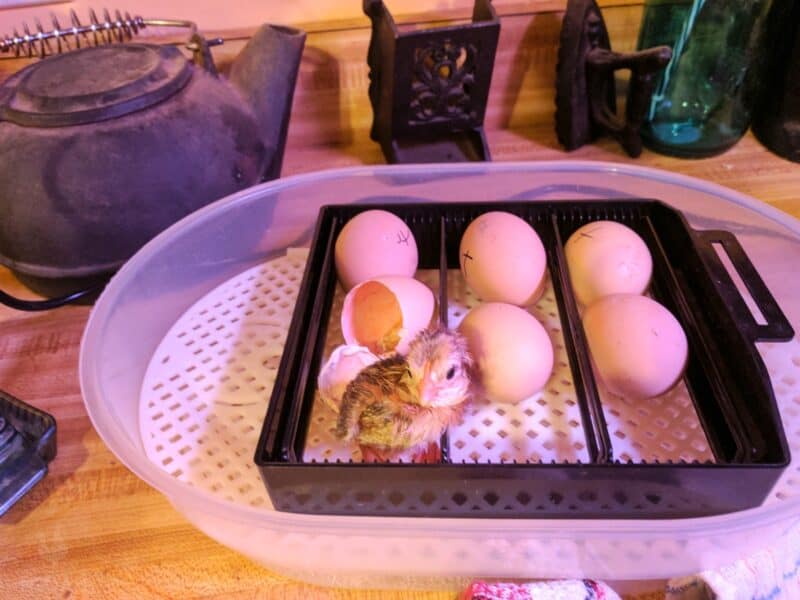
Usually – perhaps the bulk of the time, if the chick is left alone it will eventually make its way out of the egg all on its own… but it could take hours. Other times, a chick could be in distress, ill, or too exhausted to complete the hatching process, and simply give up and die.
Your instincts tell you to help the adorable chirping little struggling chick immediately, but that is definitely not always the best course of action.
Warning> Don’t Do It Unless You Have No Choice!
Yes, sometimes. First, you need to learn how to tell if a chick that is stuck in the egg actually needs help hatching, and only then proceed with extreme caution to get it out. Even if you are careful and the chick requires human intervention to hatch from the egg, it can be harmed in the process.
Only do this as a last resort to save a baby chick’s life, because the risks are pretty serious – and often lead to death:
- hemorrhaging,
- increased risk of infection,
- premature exposure of the yolk,
- or the chick can survive but with permanent damage.
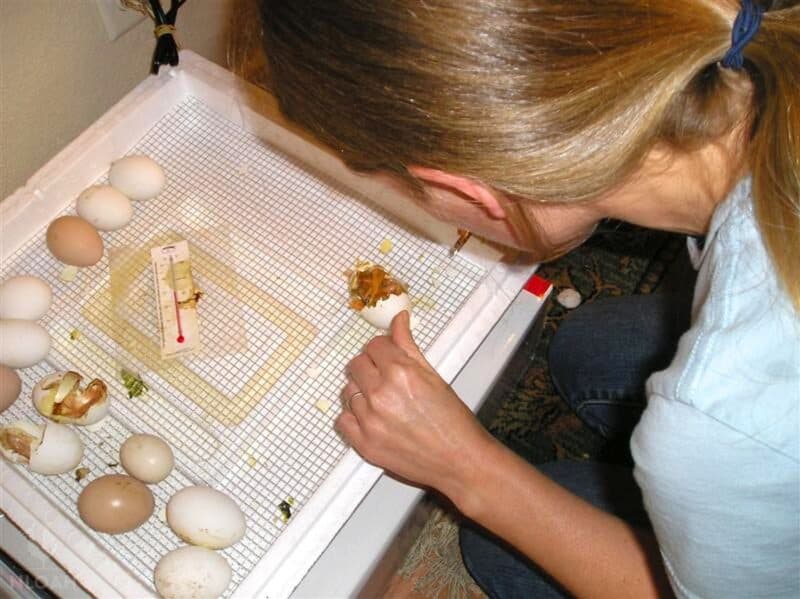
When You Should Consider Helping It
When everything works as it is supposed to, once a baby chick has pipped the first hole in the eggshell it will come out on its own should be around 24 hours.
In a nutshell, you should only help a chick hatch if it’s still struggling after 24 hours with little progress. If you decide to do it, you have to be very – one wrong move and your chick could bleed to death! On the other hand, you should NOT help it:
- if you see active blood vessels on the membrane
- if the yolk hasn’t been fully absorbed yet
- if it’s been less than 24 hours
- if you see blood vessels or any sign of blood
- if the other eggs are making progress (because by opening the incubator, you could cause their membranes to dry out)
- or if you see the chick making progress
Keep in mind that there is no actual guidance from authoritative sources on how long to wait before you do this, and the success rate is not particularly high… so don’t get your hopes up!
Some chicks make their way out of the egg in record time, while others can take considerably longer. Some peck constantly, while others might take a break – and a nap, for hours in-between each little crack they make in their protective eggshell.
Comparing hatching times is helpful to learn more about the process and to discover an average hatching time for a single clutch of eggs, but expect the hatching times to vary from slightly to greatly.
It can be hard to curtail your excitement as the end of the 21 day (or so) incubation period comes to an end.
Once that first chick is out of the egg and wobbling around, the eagerness to see all of the baby chicks come out can get quite intense – especially if you have equally excited children also peeking into the incubator window.
Before taking a drastic step to help a chick out of its eggs, answer these simple questions first…
What Are The Chicks In The Other Eggs Doing?
Look in the incubator and see if any other chicks are showing signs of pipping – even if some have already hatched. The opening and closing of the lid will alter both the temperature and humidity levels inside and can impact hatching.
If you’ve been in and out of the incubator several times to get chicks out, there is a real risk that the membranes will dry out (due to a rapid loss in humidity), and the poor chicks will get stuck in them. The membrane can “shrink wrap” itself around the chick when these environmental changes occur, so minimize opening up the incubator unless absolutely necessary.
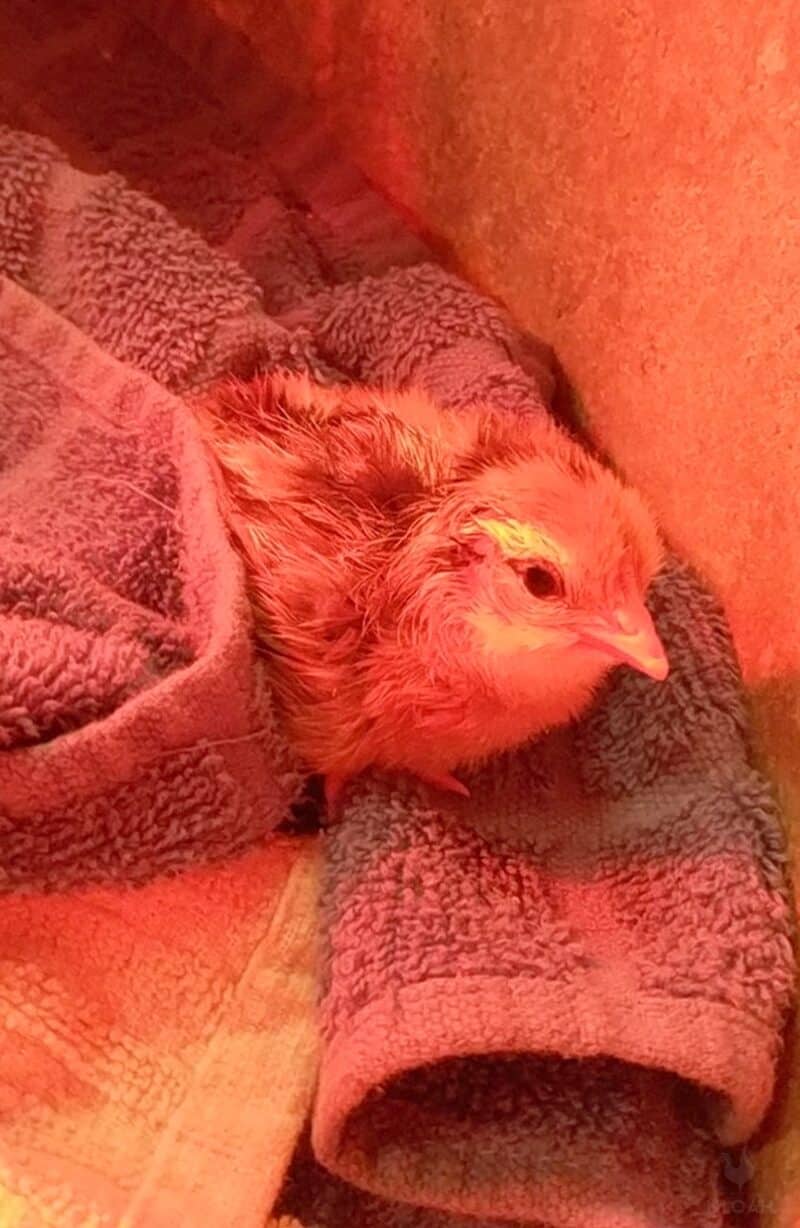
Depending upon the type of incubator, there is no real reason to immediately remove the chicks, they have the nutrients they need to survive for up to 72 hours (if need be) or until they can get themselves out of the eggshell, are walking on their own and are nice and dry.
Some are over-achievers, so having one or two hatch and then a big lull in-between the next ones is really not uncommon. If this is the case and the others are still far away from breaking out, you can remove the chicks that are walking around but do so within 1 to 2 minutes, otherwise you risk killing the ones still struggling.
Has The Chick Been Lethargic for More Than A Few Hours Straight?
If the struggling chick shows signs of being lethargic for several hours, it may have given up the process entirely, and died or is near death. If this happens and other eggs are still unhatched inside of the incubator, it’s probably best to leave the unhatched egg right there to avoid causing the drying of the membranes that could harm the other chicks.
Is The Chick Still Trying To Fight Its Way Out Of The Egg?
If the struggling chick is still trying to get out of the egg but getting nowhere fast, help truly could be necessary. Just remember, there could be a health reason why the chick cannot hatch, and opening the incubator can harm other chicks, so choose wisely before reaching inside the incubator.
Also consider the state of the membrane and the incubator humidity. If either blood or veins are present, definitely give it more time.
Is There Blood?
Look for visible signs of blood. If the struggling chick has not yet absorbed all of the yolk in the egg or there are either blood present or visible veins, resist the urge to do an emergency chicken delivery. This may sound counter-intuitive, but the best chance at survival a chick in this state will have is on its own.
How Long Has The Chick Been Trying To Hatch?
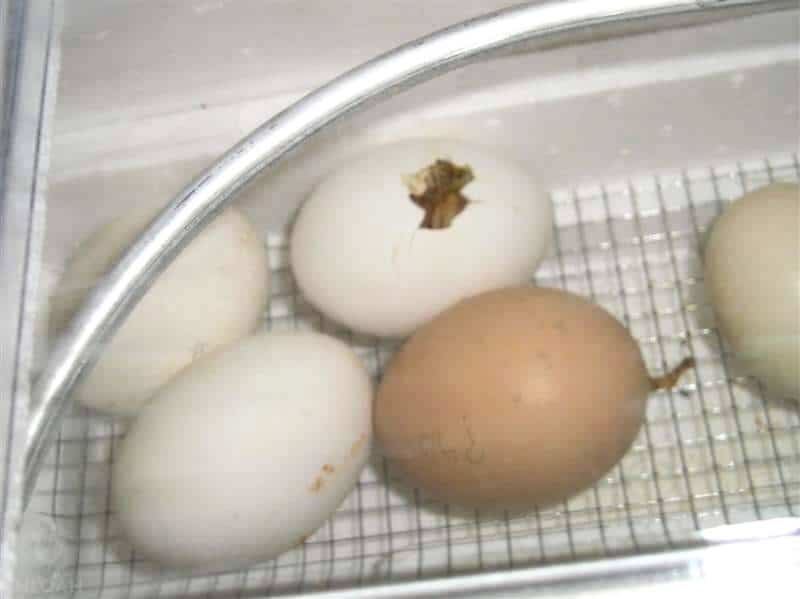
Once you’re past the 24-hour mark and the chick still has not hatched from the egg, you really need to check the humidity and ventilation of the incubator. If those are not right, you need to fix them right away. Leaving the egg inside the incubator until the others hatch is likely the best option to avoid causing problems for other chicks.
In the video below you can clearly see the membrane left on the inside of an egg that hatched to get a better idea of how thick a wall a chick must get through:
The black “X” on each egg was placed there so that I could know for sure they were turning properly via the automatic arm attachment in the incubator.
Why Do Chicks Get Stuck In Their Eggs?
There could be many reasons why a chick cannot hatch on its own, but these two that are far and away the most common:
Humidity
Fluctuating or low humidity levels in the incubator can also significantly impact the hatching process – sam thing if you are incubating ducks or guineas. If the humidity levels are too high, excess moisture can actually kill the chick. If humidity levels are too low, hatching might never occur, or cause a chick to be ill-formed or too weak to complete the process.
Humidity levels in an incubator should be kept at roughly 85–87°F wet-bulb for almost the entire duration of the incubation, then increased to 90°F wet-bulb for the remaining three days for the best chance of hatching healthy chicks. Humidity needs to be increased so the membrane that houses the chick inside of the shell does not become so hard that the chick cannot penetrate it with its beak.
But do read the manufacturer’s instructions, follow them closely, and only take the advice above as a rough guidance.
Poor Ventilation
believe it or not, a baby chick can easily suffocate due to lack of ventilation. Make sure sure the fan is not positioned to blow directly on the eggs, or you risk drying them out. There’s a balance between humidity, ventilation, and temperature, and you need to watch all three closely the whole time.
How to Safely Help a Chick Hatch
Equipment
- tweezers
- washcloths dry
- Bowl
- plenty of light
- thermometer
Instructions
- Sanitize tweezers. Either wash them in soapy water by hand then then boil them in water for 10 minutes. A quicker way is to use 70% rubbing alcohol after you wash it.
- Fill a bowl with warm but not hot water. Aim for around 100 °F (or around 38 °C).
- Place a washcloth over the bowl so it touches the water – but just barely. Think of it as a soft safety net for the chick if you can get it out of the egg safely.
- Carefully lower the chick in the egg onto the washcloth and even more gently attempt to moisten the dry membrane at all points where it is attached to the chick.
- Using another washcloth that has also been slightly dampened with warm water, fold it over the chick in the egg for a few moments and then remove it.
- Repeat this process numerous times to weaken the membrane. This often requires extreme patience – at least in my opinion, but is essential to helping the chick hatch.Warning! Do not, under any circumstance, try to pull the dry parts of membrane off of the chick, even if it appears to be smothering. Doing so can not only tear the chick’s tender skin but rip its veins.Another warning! If you see any blood or visible blood vessels at any point, abort the process and put the chick back in the incubator.
- You can gently try to break parts of the moist parts of the eggshell with tweezers, if it seems vital to getting the chick out, and to reach more membranes. If the shell will not crack easily, it could be that the membrane is still too dry, and needs to moisten again with the cloth again – maybe multiple times.
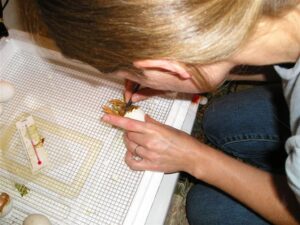
- Use the tweezers or your fingers to carefully and slowly detach only moistened membrane from the chick – if absolutely necessary because it is still struggling. ONLY do this with a moist membrane that lifts away easily, and never touch the chick's skin!You can use your fingers too, but only to remove the final pieces of membrane at the end.
- If the water in your bowl starts to get lukewarm or cold, replace it with more warm water.
- If you get a live chick out of the shell, gently wrap a dry washcloth around it so it does not get chilled, and pat it dry as thoroughly and quickly as you can.
- Return the chick to the incubator as quickly as possible so it can get warm and stay warm.
The survival rate of chicks hatched with human intervention fluctuates greatly depending on how long and hard the chick struggled, how much help was needed, and its health before it even tried to hatch.
I have had one out of four chicks survive after having to help them hatch. My little chick was one of the lucky ones that was not stuck in the egg because of poor overall health or deformities and went on to become a great laying hen.
The best way to ensure a good clutch of eggs that can hatch all on their own is to monitor heat and humidity levels closely throughout the incubation process, and refrain from opening the lid to the machine until it is essential to do so.
What Happens if You Help a Chick Hatch?
If you find a chick that has hatched or is in the process of hatching, it is best to leave it be. That said, in some cases, it is necessary to help the chick out. Here are some tips to care for your chick after you’ve helped it hatch.
How Long Can a Chick Stay Without Food After Hatching?
A baby chick will typically spend its last few days of incubation absorbing the yolk that it was born with. This process is known as “yolk sac absorption” and it offers a nutrient-rich food source that can sustain it for up to 72 hours.
Can You Touch a Newly Hatched Chick?
Newly hatched chicks have only a thin layer of down to protect them from the cold. In addition, their bones are not yet fully developed, and their immune systems are not yet strong enough to fight off diseases.
How Long Does it Take a Chick to Dry After Hatching?
All in all, after at least an hour, and up to several. After a chick hatches, it is important for it to dry itself naturally – in a warm environment to prevent chilling. The downy fluff that covers is going to be wet when he finishes hatching, so the baby bird will often spend its first few hours drying on their own while walking around.
Once the chick is dry, it can regulate its body temperature to a point, but it still needs a warm environment. Ideally they should stay at temperatures of around 92 – 95°F (33 °C – 35 °C) for the first week.
How Do I Know If My Chick Is Weak?
Chickens are notoriously hardy creatures, but even the occasional chick can be born weak or sick. While it’s not always possible to tell if a chick is weak just by looking at it, there are a few key signs to watch for.
First, check to see if the chick is able to stand up and move around. If it’s lethargic and uncoordinated, it may be weak. Second, see if the chick is eating and drinking normally. If it’s not interested in food or water, or if it seems to be having difficulty swallowing, this could be a sign of weakness.
Finally, take a close look at the down. If it’s thin and fluffed out, there’s likely a problem, and you need to figure out what it is. It could be a nutritional deficiency, stress, col, or potentially an illness.
How Can I Increase My Chances of Hatching Chickens?
Chicken eggs need the right conditions if you want them to hatch. If you’re hoping to incubate chicken eggs, there are a few things you can do to give them the best chance of hatching – and avoid having to consider the assisted hatch process.
Start With Healthy Eggs
This may seem like an obvious point, but it’s worth mentioning because it’s so important. Eggs that have cracks or are otherwise damaged are less likely to hatch. Make sure to check your fertile eggs for damage before you start the incubation process, that you don’t wash them and that you keep the pointy end down until you are redy to start.
Keep the Eggs Warm
A chicken egg needs to be kept at a temperature of around 100 F (37.8 C) ideally. But, if you have a still-air incubator, you should keep the temp slightly higher at 102 F (38.8 C).
You can use a commercial egg incubator or make your own using a Styrofoam cooler and a heat lamp. DO your best to keep the temperature inside the incubator steady the whole time.
Turn the Eggs Regularly
During the incubation process, it’s important to turn the eggs at least 4 to 6 times a day so that the embryo inside doesn’t stick to one side of the eggshell. This can be done by hand or using an automatic egg-turner.
Ensure Adequate Incubation Humidity
Another important factor in hatching chicken eggs is humidity. As mentioned before, it needs to be at 85–87°F wet/bulb, ant at 90F wet-bulb in the last three days of the incubation process.
You can increase humidity levels by adding water to the bottom of the incubator or by using a moisture-control tray that comes with some commercial models. The relative humidity is an important factor to consider when it comes to hatching chicks in an incubator!
Don’t Open the Incubator Too Often
Once you’ve set up your incubator, resist the urge to open it too frequently in order to check on the eggs. Every time you do, you risk letting in cold air that could lower the temperature inside and jeopardize the hatching process.
Check for Signs of Problems By Candling
If you suspect that one of your eggs isn’t developing properly, you can candle it.
Candling hatching eggs is a process of using a light to check the progress of the embryos inside the eggs. It is generally done 7-10 days after the eggs are incubated, and then again 3-4 days before they are due to hatch.
Candling is important because it allows you to monitor the growth of the embryos and to identify any eggs that have not developed properly. It can also help to confirm that the eggs’ development is on track.
To candle hatching eggs, you will need an egg candler, a bright light source, and a dark room. The egg candler will focus the light so that you can see inside the egg. Start by turning off all the lights in the room and closing the curtains or blinds. Hold the egg up to the light so that you can see through the side of the shell.
You should be able to see a dark shadow that looks like a spider inside the egg. This is the embryo. If you cannot see anything, or if you don’t see any blood vessels or if there are cracks in the shell, then the egg is not developing properly and needs closer examination.
Repeat this process for each egg, being careful not to handle them too much as this can damage them. When you are finished, turn on the lights and allow your eyes to adjust before resuming your other activities. If there doesn’t appear to be any development, there’s a good chance that particular egg wasn’t fertilized (or that the embryo died early in the incubation process).
Be Patient
Hatching chicken eggs takes 21 days on average, so don’t be discouraged if they don’t hatch right away. Just make sure that you’re providing them with the proper care and conditions, and eventually, you should see some little chicks!

Get your gift and learn things like:
- how to make this really quick pest spray
- how to prevent egg waste
- two cheap automation devices that will make your life easier

Tara lives on a 56 acres farm in the Appalachian Mountains, where she faces homesteading and farming challenges every single day, raising chickens, goats, horses, and tons of vegetables. She’s an expert in all sorts of homesteading skills such as hide tanning, doll making, tree tapping, and many more.
I think it is so cute when you hear the chicks chirping but only have a tiny hole to breath out of. My chicks started pipping at 19 days of incubation, I have about 20 that are pipping already and another 14 that haven’t started. But every time I go in there to check I see more have started. My first 2 chicks are drying and warming and doing good. Now the rest need to hurry up so I can move everyone to the trough where I set up their home for the next month or so, or until they start getting out. I am going to use an old trampoline frame to house them until they get bigger. just wrap it in chicken wire, put wire on the ground and put some type of cover over the top. (DON’T FORGET A GATE SO YOU CAN GET IN) That way they will be safe from predators, put some type of house and something off the ground for them to roost in and on. Now they will be safe until they can go in the chicken yard with the big girls and boys.
Just an FYI, chicks are small enough to easily run back and forth through chicken wire so you’re going to need something with a smaller hole, perhaps some hardware cloth.
Thats interesting but very different from my experience. I have helped lots of lethargic chicks hatch and they are just fine. Its a slow process because you need to remove the egg little by little so they don’t bleed to death but I have had no issues. If they are struggling there is no need for them to die if you give them a little help.
I’ve used a heating pad and do have the right temp I’ve turned them.will they hatch they are guineas.
Thank you! I helped an egg hatch thanks to your instructions & I think the chick is doing great! Only time will tell!
Hey there,
I have a chick that zipped about an hour ago. The zip turned to the bottom from other chicks bumping the egg. Should I turn it up or will it be able to get out on its own still
My chick has been trying to get out of his egg for 3 days now. It is peeping but not pecking at the egg. I tried helping him but the shell is really hard. My other chicks all hatched 2 days prior to this chick. What can I do?
Wow, I wish I’d found your page sooner…think I’ve compromised my other chicks by leaping in too soon to help another one out…so angry at myself for being so impatient ? I will definitely take on your tips for the next time though…thank you