
With the fall months quickly nipping at my heels, I am beyond ready to start canning up my favorite winter soups. A family favorite is homemade vegetables…
My kids and husband love reaching for a jar off the pantry shelves during the blusteriest parts of winter. Nothing beats a hot bowl of homemade soup when your body is literally chilled to the bone.
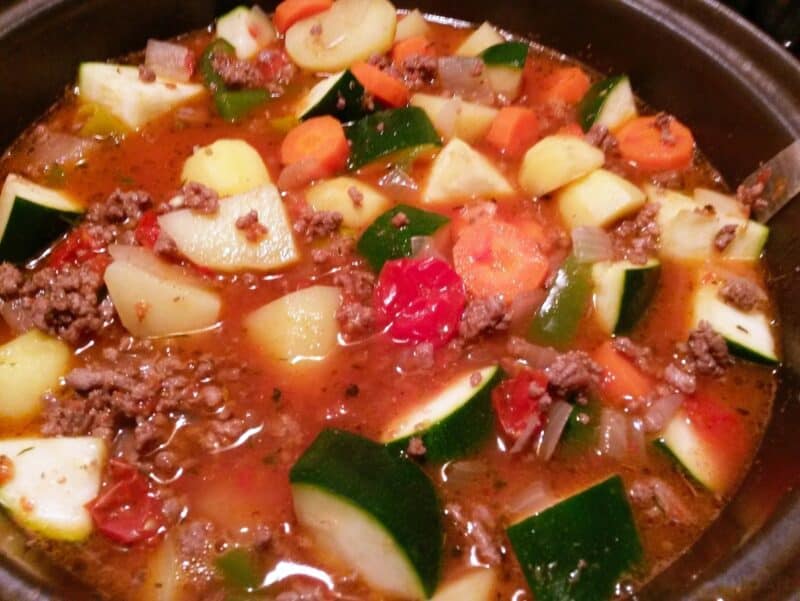
Out of all the soups that I make and preserve, I make the largest batch of veggies. Everyone in my household loves it. Plus, it contains all sorts of yummy vitamins and nutrients.
When I was a little girl I can remember my mother doing the exact same thing. We didn’t have much money but we had a ton of kids, so mom was always trying to cut down on the food bill. Growing and making our own food helped her accomplish this.
Each summer, mom would harvest the vegetables from our large garden and begin the process of preservation. She would freeze some of them and can the rest. Many of her veggies ended up in soups and preserved on the pantry shelves.
I grew up in a family of 5 children, so it typically took 3 to 4 quarts of soup to feed all of us plus mom and dad. You can imagine how many jars of soup mom had to can in order to keep a few veggie soup meals on the shelves for us to enjoy throughout the winter months.
Canning vegetable soup is relatively easy, and it allows you to taste the fruits of your summer harvest all year long. Just keep in mind that low-acid veggies always need to be pressure canned. Never use a water bath! This is why, in what follows, ’m going to give you a pressure canner recipe.
Please know that you are not strictly adhered to the veggies listed below. Feel free to use whichever you enjoy. Many people like to add things such as rutabaga and cabbage. In fact, if you are low-carbing, replacing the potatoes with rutabaga is ideal. They are much like a white potato without all the starch.
You may need to adjust the salt and pepper a bit based on your tastes. Add them in slowly. You can always add more but you can’t take any out. Without further ado, let’s get canning!
Does Vegetable Soup Have to Be Pressure Canned?
Yes, always. You MUST use a pressure canner when canning vegetable soup. This food is low in acid and makes it unsafe to be processed with a hot water bath canner.
Feel free to use quart, pint, or even half-pint jars for your soup. I like to can up a few half-pint jars for single serve sizes. They make a wonderful lunch for my children who homeschool. Soon, you’ll be enjoying a jar of homemade vegetable soup on a cold day with your family, too!
What Types of Vegetable Soups Can Be Canned?
You can process just about any type of vegetable soup in a pressure canner. If you want to use a water bath canner, unfortunately, tomato soup is really the only safe option since it’s the only kind of vegetable with enough acidity to make water bath canning safe.
Some vegetable soups that can be processed in a pressure canner include:
- Classic chicken soup with vegetables
- Beef stew with vegetables
- Potato soup
- Leek soup
- Carrot soup
- Cabbage soup
- Cucumber soup
- Onion soup
- Minestrone
Avoid canning cream-based soups, like cream of broccoli or cream of mushroom, since the dairy doesn’t hold up well to the high heat of canning.
Adding Beans to Canned Soup
Beans are a good way to spoil the process – here’s why… While fresh beans are fine to be tossed into the stock pot along with the rest of the veggies, most people have or by dried beans.
If this is you, you definitely need to rehydrate them before you cook and then can them. Do NOT assume that they will rehydrate on their own in the process – because they won’t!
As per NCHFP’s guidelines:
“For each cup of dried beans or peas, add 3 cups of water, boil 2 minutes, remove from heat, soak 1 hour, and heat to boil; drain.”
Now, if the beans are frozen, you need to fully thaw them first. This is to avoid any cold areas towards the center of the individual beans. The good news is, frozen beans do not need to be rehydrated (unlike dried ones). The bad news is, I couldn’t find any official guidelines for canning thawed beans, so I recommend, if you want to be really safe, to either use fresh or rehydrated dried beans.
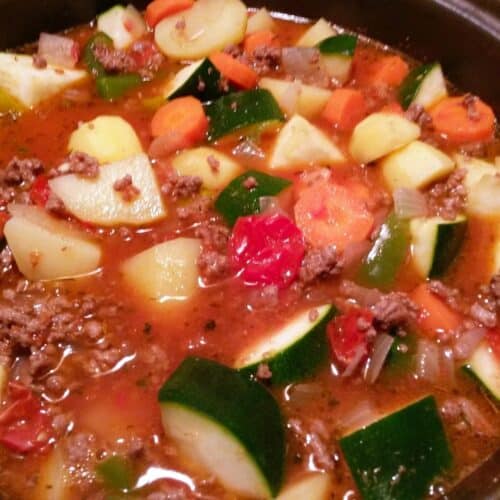
Vegetable Soup Canning Instructions
Equipment
- Pressure canner
- Canning jars, rings, and lids
- Jar lifter
- peeler
- Stockpot
- Knives
Ingredients
- 4 quarts tomatoes 24 large tomatoes, peeled, cored, and roughly chopped
- 12 potatoes cubed
- 30 carrots chopped
- 8 cups fresh lima beans dried beans need to be rehydrated first!
- 8 cups uncooked corn right off the ear is best
- 5 cups onion chopped
- 12 garlic cloves chopped
- 12 cups water enough to cover the solids and leave 1" of headspace
- salt and pepper to taste
Instructions
- First things first, you want to sanitize your jars, lids and rings in the dishwasher or in hot, soapy water by hand. Since you'll be processing them for over 10 minutes, you don't need to sterilize them. Leave the jars in the hot water until you are ready to use them.
- After you've prepped all of your vegetables, place them into a large stock pot along with the 12 cups of water and salt and pepper, and boil for 5 minutes.
- Next, ladle the hot soup into the hot jars and leave about 1” of headspace at the top. Make sure each jar is half-full of solids – this is important!
- Remove any air bubbles with a butter knife.
- Place the lids and rings on the jars and screw them on tightly.
- Process the pint-sized jars for 60 minutes and quart-sized jars for 75 minutes at 10 pounds of pressure in a pressure canner if you have a weighted-gauge canner, or at 11 pounds of pressure for a dial-gauge canner. These need to be adjusted for altitude. See table below.
- Remove jars from canner, set aside to cool. You will hear popping sounds, this is a good thing, it means the processed jars are sealed.
- After 24 hours, inspect the jars for signs of spoilage. Store the good ones in the pantry, and eat or place the failed jars in the fridge for consumption.
Notes
- If you live at a higher altitude, processing times and amount of pressure may vary. Please refer to your canner owner’s manual for instructions.
- I leave the peels on my potatoes and carrots for extra nutrition and texture. Feel free to peel your veggies if you prefer.
- The 5-minute boil time for the soup is intentional. Completely boiling the veggies and rendering them soft will result in you having mushy vegetables after you process the soup.
Processing Times and Pressure
So you need to adjust the pressure according to the type of canner you have (weighted-gauge or dial-gauge) and your altitude. Processing times stay the same regardless of altitude — only the pressure changes.
Weighted-Gauge Pressure Canner
| Jar Size | Process Time | 0–1,000 ft | Above 1,000 ft |
|---|---|---|---|
| Pints | 60 minutes | 10 lb | 15 lb |
| Quarts | 75 minutes | 10 lb | 15 lb |
Dial-Gauge Pressure Canner
| Jar Size | Process Time | 0–2,000 ft | 2,001–4,000 ft | 4,001–6,000 ft | 6,001–8,000 ft |
|---|---|---|---|---|---|
| Pints | 60 minutes | 11 lb | 12 lb | 13 lb | 14 lb |
| Quarts | 75 minutes | 11 lb | 12 lb | 13 lb | 14 lb |
How Long Does Canned Vegetable Soup Last?
Vegetable soup that has been canned at home can last up to 12 months when stored properly in a cool, dark place. In most cases, it will last even longer than that, but the quality might diminish.
The key factor in prolonging shelf life of canned goods is temperature. If the temperature is too high, the food will spoil more quickly; if it’s too low, the food won’t be as flavorful or nutritious. Cans should always be kept away from light as this will also cause them to spoil faster.
When storing canned goods of any kind, it’s important to examine them for any signs of spoilage before you open a can.
The most obvious sign of spoilage is a bulging or dented can — this shows that the food inside may have gone bad and should not be eaten. Plus, if you open one and the contents look or smell off in any way, then it’s best not to risk consuming it and instead discard it safely away from pets and children.
If you want your home-canned veggies soup to last as long as possible, here’s what you can do:
- Store cans in a cool (50-70°F) and dark place away from direct sunlight.
- Check cans periodically for signs of spoilage (bulging/denting).
- Rotate cans so that older ones are used first (first in/first out rotation).
- Label cans with expiration dates so that they don’t get forgotten about over time.
Canning Notes and Recipe Variations
Here are a few common questions I’m asked when canning vegetable soup, as well as a few tips.
It’s Important to Sterilize Your Jars!
Making sure your jars are completely sterile is a vital step to the canning process. Any little bit of bacteria or fungus can cause your vegetable soup to go bad, even after it has been sealed. You don’t want to open up a jar of soup and find mold growing in it.
Even worse, you don’t want to have the soup grow botulism, something you can’t see, consume it, and become gravely ill.
Can I Use Other Vegetables in This Soup Recipe?
Yes! You’re free to use any other kinds of vegetables in this soup. Since it’s being pressure canned, you shouldn’t have to worry too much about substituting or adding new vegetables – just try to use an approved recipe if you go too far outside of the box.
Some vegetables you may want to add to your home-canned vegetable soup include:
- Green beans
- Broccoli
- Peas
- Zucchini
- Cauliflower
Again, these are not included in this recipe, so just double-check for any timing or pressure variations you might need to make based on an approved recipe.
❌ Adding Pasta Noodles or Rice
When it comes to pressure canning soup, many add in noodles or rice; but, this isn’t recommended. Adding these ingredients before you fully process the soup may result in a mushy texture and could potentially affect the processing time necessary for a safe final product.
For this reason, it is better to wait until after canning and reheat your soup with the noodles or rice added. This will offer an optimal texture when consuming your canned soup.
❌ Can I Add Dairy, Cream, or Thickening Agents, Like Flour?
Adding dairy, cream, and flour to home canned vegetable soup is not advised as these thickening agents can and will interfere with the canning process by preventing the flow of hot liquid to reach the center of the jars.
Plus, when exposed to heat for a long period of time like during canning, proteins within the dairy (such as yogurt or cheese) will break down, causing an unpleasant texture.
Instead of adding these ingredients during canning, it’s best to save them for after. For example, stirring in some cream right before serving adds delicious flavor without compromising your health.
Is It OK To Use Herbs?
When you are pressure canning soup, it’s perfectly fine to swap out various herbs and spices. These won’t affect canning safety, so they’re perfectly fine! Some popular herbs to consider adding to your own vegetable soup include:
- Rosemary
- Thyme
- Basil
- Sage
Other Ways to Preserve Homemade Soup
Preserving homemade soup is an easy way to make one large batch of soup and enjoy it for multiple meals throughout the week.
Freezing is the most common way to store your soup, as it removes the temperature from being a factor in spoilage. It is best to invest in airtight, freezer-safe containers that won’t leak or absorb any unpleasant tastes or smells within your freezer. If you are storing large quantities of soup, do not fill the container all the way up; leave some room at the top since liquids tend to expand when frozen.
Make sure to date your containers so that you can keep track of how long they have been stored and discard anything that has been there too long.
Another solid preservation method is dehydration, which requires the use of either a dehydrator or an oven set to low heat to slowly remove any moisture from the soup. Dehydration results in crispy, chip-like pieces that can be rehydrated later on with a bit of water or broth–it’s a great way to prolong the flavor, by the way!
Final Thoughts
I hope you and your family enjoy this vegetable soup as much as mine do! Sometimes, when I crack open a jar of veggie soup, I’ll place it in a pot to simmer and brown a pound of hamburger in a skillet. Once the hamburger is cooked, I’ll drain the fat and toss it into the soup for an even heartier meal.

Get your gift and learn things like:
- how to make this really quick pest spray
- how to prevent egg waste
- two cheap automation devices that will make your life easier
Jessica Faidley is a stay-at-home, work-from-home, homeschooling mom who loves to teach her children how to live off the land.
Herbalism is another topic that Jessica has studied. Keeping herself and her family healthy through a natural approach is her way of doing things.
Can you use dry lima beans? Do you need to cook them first or can you add them fry?
I make Vegetable soup from bought canned vegetables and Hamburg. I keep it hot then put it into my hot jars and lids and put in a water bath for 60 minutes. Would that be safe being the vegetables were already canned?
From all my reading on canning, and I’ve done a lot! You MUST pressure vegetable soup to be safe. Water bath is not sufficient.
I live at 1010 altitude and was wondering… am I safe to use the under 1000
I make a canned chicken soup base product that will keep for years on the shelf, and is a quick and easy way to have a hot, satisfying meal in the dead of winter, or if you are sick and need some quick comfort food.
Cut up the whole chicken into large pieces, put in a pot and cover with water. Simmer until the chicken is cooked through. Remove the chicken and allow to cool, then remove bones and skin, and cut/tear the chicken meat into small pieces. (You can put the bones and skin back into the stock pot and continue to simmer, adding richness to your stock.)
Separately, chop up celery, carrots and onions.
In a clean quart canning jar, in the following order, add one cup of onions, one cup of celery, one cup of carrots and one cup of chicken. Add enough broth to cover the chicken, which should leave about 1″ of head space. Remove air bubbles, wipe jar rims, and put on lids and rings, finger tight.
Process at 10lb (if under 1000′ altitude, 15lb if above 1000′) for 90 minutes, then turn off heat. I leave the jars in the canner until it cools to 0psi and then remove the jars and allow them to cool, draft free, for 24 hours. I then remove the rings, check the seal and wash jars and rings. Allow to dry and with a permanent marker, write the year on the jar lid. Store jars in a cool, dark, dry location.
When ready to use, dump the contents of the soup in a pot, and add a quart of chicken stock, heat and eat.
I’ve opened jars that were almost 8 years old and the soup was just as good tasting as the day it was canned.
Having clean jars, bands and lids is important, but sterilizing prior to use is a waste of time, imo, if you are pressure canning. The entire contents of the jar, and the jar, ring and lid, are heated to 240F during the pressure canning process, a heat level greater than the 212F boiling water used in the sterilization process.