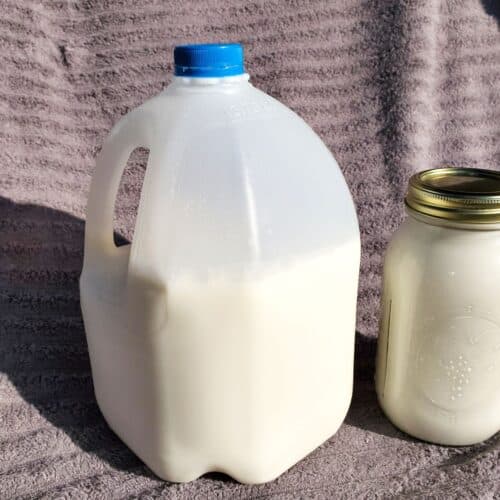
Set the milk out to warm up.
Gather the desired size of jars, I use quarts.
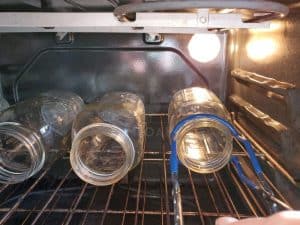
Inspect jars for cracks or knicks as you clean them.
Sterilize jars. I prefer the oven as it saves me stove top space but you can use whatever you are comfortable with. You can boil them, place in the oven at about 320 degrees Fahrenheit (160 Celsius) for ten minutes or so, or by sanitizing in the dishwasher. The high heat is what sterilizes the jars.
Remove from the heat source, and allow the jars to cool.
Put water into your canner. Mind you, this is for pressure canning so it only takes about two inches of water or so. For a water bath canner you will have to completely cover the jars with water.A good rule of thumb is the second knuckle is about two inches, so fill the water to about the second knuckle, and you should have plenty of water: Prepare lids and bands according to the instructions from the manufacturer.
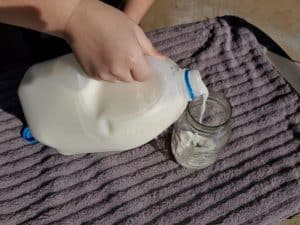
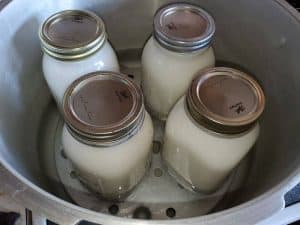
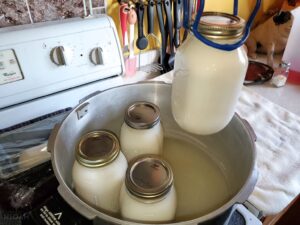
Once the milk has warmed and the jars have cooled pour the milk into the jars.You do not want to pour cold milk into hot jars as it will cause the jars to break.
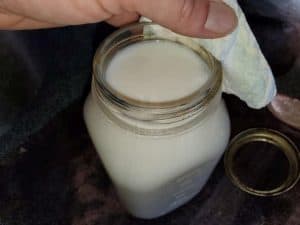
Fill the jar to one inch of headspace, then wipe the rim with a clean, dry towel.
Place the lids, and then the bands onto the jars. The bands should only be finger tight.
Fill the canner with the filled jars.
Turn the stove on high, and place the lid onto the canner.
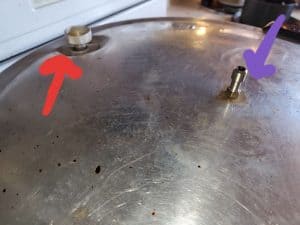
Once the pressure has been reached and your valves have set you will need to let the canner vent for ten minutes to be sure that adequate temperature is reached.The red arrow is pointing at the pressure valve, and the purple arrow is pointing to the vent pipe. The pressure valve is raised, meaning that it is ready to start to pressure can. The vent pipe is where the pressure gauge or weighted jiggler goes: After ten minutes is reached with venting, start the jiggler or gauge to reach ten pounds of pressure.
As soon as ten pounds of pressure is reached, turn off the stove and remove the canner from the heat.
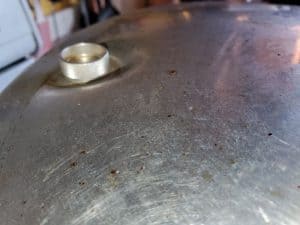
Allow the canner to depressurize before opening. The valve has dropped back down indicating that it has depressurized, and can now be opened:
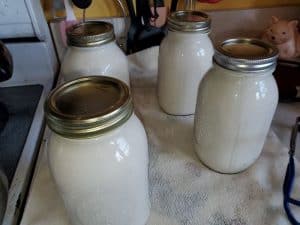
Remove the jars with the jar lifter and set on a towel to cool. Leave space between each jar to promote adequate cooling.
Do not touch or mess with the jars while they are cooling. You should hear the jars ping as they seal, it is such a happy sound.
After 12 to 24 hours check that the jars have sealed. The center should be pressed down and not make the “popping” sound.
If the jars have cooled, they can be stored away until you need to use them. This is the canned milk as it cooling: