Oven dry canning isn’t actually canning. It is referred to as canning because it is the process of putting food up in mason jars for longevity. Oven canning dry foods is not a new technique, either. It has actually been around since the 1940s.
What Exactly Is Dry Canning?
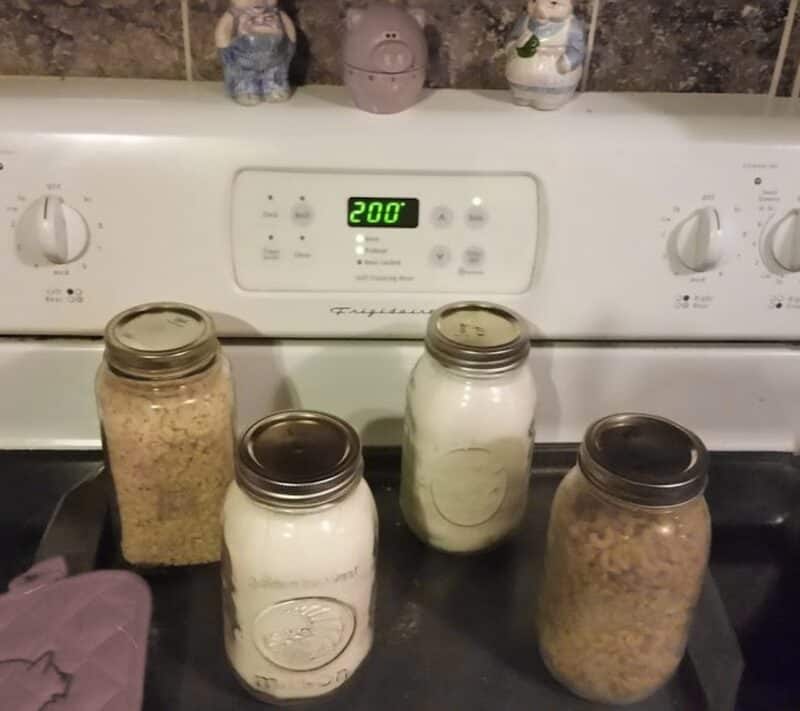
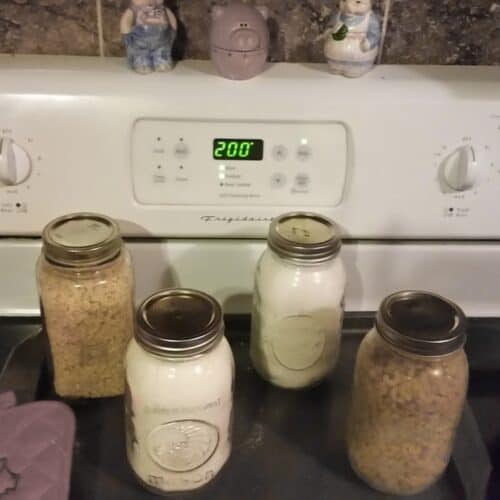
Dry canning is a method of processing your dry goods (grains, beans etc.) by placing sealed jars prepared with dry goods into the oven to heat. The oven is heated to 200 °Fahrenheit (93 °Celsius). The temperature is said to be enough to create a sterile environment.
Is It Dry Canning Safe?
Please be advised that the USDA deems dry canning as unsafe, and so is the HFP. You are solely responsible for the outcome if you choose to do it. Neither the author nor www.newlifeonahomestead.com express any liability from the side effects as a direct or indirect result of you dry canning your produce. If you’re not an experienced canner, do not do this.
Oven canning dry goods, is it safe to use and store? Some people will argue that dry canning is not safe but if it is done correctly then it can be. There is a worry of botulism as with any canned food. Botulism thrives in moist, low-acid foods.
The bigger concern is that the jars are not safe to be put in the oven because they aren’t made to withstand high temperatures. This is a heated debate, some people are worried it could happen, and others have been doing it for years or even their entire lives without any issues. More on that later.
Oven canning dry foods are neither of these, they are dry. Therefore, the dry foods do not provide conditions for botulism to continue to exist in them after processing.
The items of foods that are being canned in the oven are already dry, you are making them even drier by removing any excess moisture from the product.
Cost Effective
Now for the cost-effective part, buy in bulk and then process it into usable portions. You can store your dry foods in airtight bags, and food-grade buckets and containers but you will more than likely need to purchase them. There is no saving if you have to purchase the storage bags, buckets, and oxygen absorbers.
Hand warmers are not food safe, so you shouldn’t put them in your containers to use as oxygen absorbers. Buy your food items for cheaper in bulk and then store it in portions like you didn’t. It sounds like a win to me.
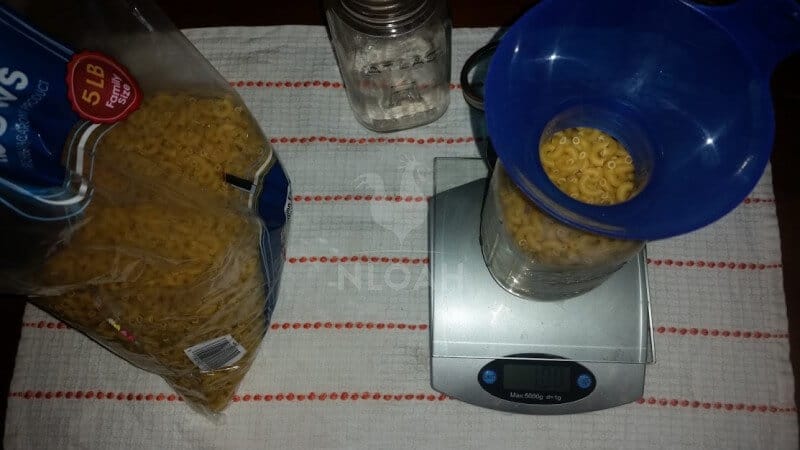
Here is my big bag of elbow noodles that I have weighed out to one pound, which is a serving size for my family. I put the jar and canning funnel on the scale then zeroed it out so I know how much is in my jar.
Side note to think about, if I store flour in a bucket and used oxygen absorbers to keep it, it will stay safe and fresh. Then I need to use some flour so I open the bucket, now it won’t stay fresh any longer.
If the flour is put up in a mason jar then I am more likely to use it before it is no longer fresh. Therefore saving money is out the window if you have to throw out half a bucket of dry goods due to it being stale.
Purpose of Dry Canning
Why would you want to dry can food items that are already dry? Using the oven to dry can food is done so that it can kill eggs and larvae of bugs preventing them from hatching.
I know that sounds gross, but dry food does have that issue, little crawly bugs can come to life in your flour. Ewww. It also reduces the amount of moisture in an already low-moisture food to help prevent staleness.
Canning of dried goods can give you some freezer space. I used to keep my flour and sugar in the freezer to prevent them lil bugs from coming to life.
Now, I preserve it in the oven by dry canning it and storing it on the shelf as compared to the freezer. therefore freezer space has been opened up for putting up meat and things that actually need freezing.
It protects your dry goods from rodents. Yep, I am talking about nasty little field mice and the occasional hamster that your kid lost. The mice moving in will happen, you then need to be sure that they can’t get into your pantry.
Those little buggers will eat anything that they can sink their teeth into. They do not care if they are wrapped in plastic bags or paper. They will chew through it.
Just because you stored your bulk of flour in that food-grade plastic bucket doesn’t mean anything to a mouse. They will accept that challenge and eat your expensive bucket getting your flour too.
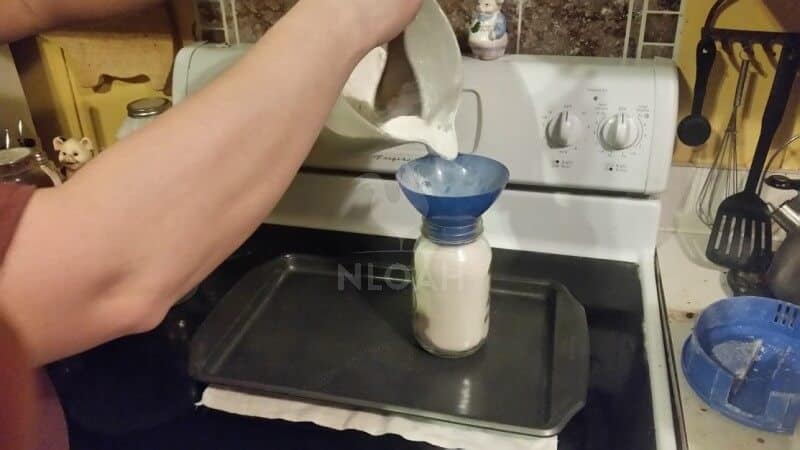
Here I am pouring flour out of my pitcher that I generally store it in. I had set it out of the freezer to get room temperature before canning it in the oven.
Storage
Items are easier to store if they are in mason jars for more space saving. You can stack your bags of rice and beans, but hopefully, they are out of reach of mice. Big bulk bags of pasta and heavy sacks of flour and sugar really take up some space.
Not to mention, my bulk pasta is a big plastic type bag that will easily rip down the side if I’m not careful. The answer is to store them in a mason jar. Once the jars are canned and cooled then you can store them in a cool dark place.
What Foods Are Typically Dry Canned
It is safe to can any dry foods that have less than ten percent moisture overall. Foods that are high in oils, such as nuts, can not be dry canned.
Foods must be low in oils to dry can or they will go rancid under this preserving method. Read the labels on your packages to check if there are any oils; if there are be sure that they are listed at or near the bottom of the list.
Foods That Are Typically Canned
- Dry beans
- White rice
- White flour
- Wheat
- Whole grains
- Oatmeal
- Pasta without eggs
- Powdered milk
- Cheese powder
- Gelatin
- Low fat ready to eat cereals
- Sugar
- Freeze-dried food
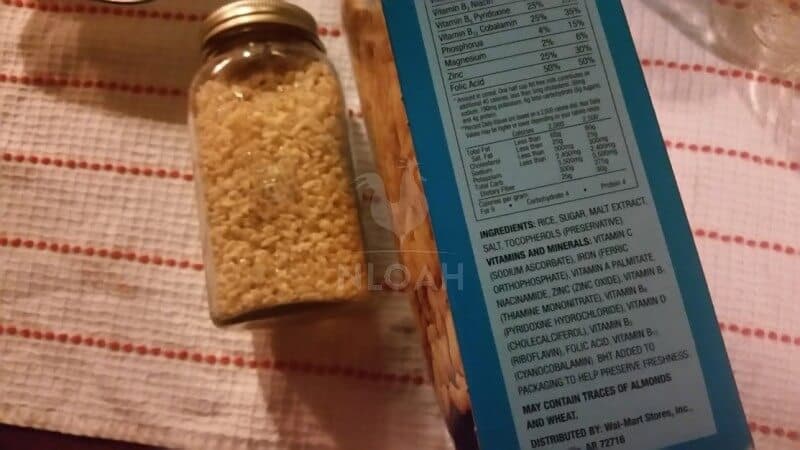
This cereal was in need of a new container. The bag got ripped down the side where they cut it open. I have the ingredients next to the jar showing what all is in the cereal including any oils or lack thereof.
Foods You Should Definitely Not Can
- Cornmeal
- Seeds
- Nuts – due to their natural oils
- Pearl barley
How To Dry Oven Can Step By Step
Equipment
- oven
- Mason jars
- lids
- rims
- Baking sheet
- towel
Ingredients
- dry goods
Instructions
- Wash, dry, and inspect mason jars for knicks and cracks.
- Allow the jars to COMPLETELY dry.
- Fill jars with dry good using a canning funnel.
- Leave ½ inch headspace, tap jars making sure that they are full.
- Place filled jars on large baking sheet.
- Place jars in the oven on the sheet.
- Heat oven to 200 degrees Fahrenheit.
- Once the oven is heated to 200 start timing for one hour.
- Remove from oven one jar at a time so they stay hot.
- Wipe the rim clean, place lids, then tighten the bands.
- Once the bands are tightened set them aside on a towel to cool.
- Label the jars and then store.
The purpose of placing the jars in the oven while it is preheating is so that the contents in the jars can heat up slowly to avoid the jars cracking. It is important to remove the jars from the oven one at a time so that they can remain hot to seal.
Once the jars have cooled they should seal, you may not hear a ping sound so to check if it is sealed, press down on the center button to be sure it is sunken in. If it is sunken, it is sealed.
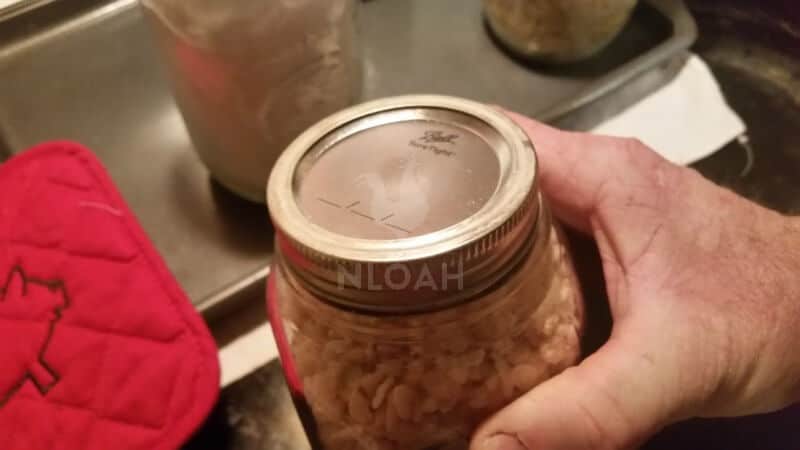
If you look right you can see that the center is sunken in meaning that the jar is sealed.
If dry canning in the oven is something you think you may like to do then there are a few issues you may need to be aware of.
- The oven temperature is not a pressure chamber and may not be the actual temperature in the oven. You may want to check with an actual oven thermometer.
- There is a risk of your jars breaking. Some of your mason jars may not be able to handle the dry heat environment for long periods of time. The jars may crack, shatter, or even explode. Especially the thin ones. The other thing that may cause this is if the jars are heated too quickly and have a cold item in them.
- Lastly, there is a lack of proof by researchers to indicate that the dry canning in the oven is or isn’t safe for processing. Even though years of doing so have shown that it is safe.
Condensation Issues? Check this video out:
Now that you know all about canning dry goods in the oven and feel better about your decision to do so, I hope you enjoy canning your non-traditional foods that you never really thought about before.

Sarah Rodriguez is a homesteading wife and mother of five living in Appalachia. She grew up in a homesteading and logging family.
She and her husband Arnie work their 10-acre homestead together alongside their growing family. Sarah honed her self-reliance skills through 4-H and FFA at an early age and is now teaching her children to live off the land, raise livestock, and the importance of both sustainability and frugality.
For those who are concerned mainly with the heat from the oven:
This recipe calls for 200*. If using canning jars, jellies regularly can up at 260* – 275*, and then processed in a hot water bath at just under boiling (212*) – thus, they are at or above the recommended heat for a prolonged period of time.
If pickling using the hot pack method, jars are kept at 200* in the oven while awaiting their contents. The vinegar mixture used to pour over the fruit or veggie in those jars is boiling.
The argument that the jars are not made to withstand this heat is not valid.
What *may* happen is an off-gassing depending on the foodstuff being canned. That is rare, especially in single-item canning operations. For instance, I would not normally prepare all the dry ingredients for baking a product into a mix and can that. I would use canned dry ingredients to make a baking mix to store in a sealed BAG for later use.
I dry canned half gallon jars of flour and was told I shouldn’t do that because the temp will degrade the flour and make the oils go rancid. I know people who have done it the flour bakes like normal. What’s your input on this?
Thanks, John
I only dry can to provide an airtight seal and kill off bug eggs… We’re mainly taliking flour… I do half gallon jars at 210 for 90 mins. Open the oven, put on the lids, and let it cool in there… Sealing the jar well after opening to use some, is enough to keep it fresh and bug free as I use it, meanwhile the other jars are still “canned” with no issues… Thank you for the refresher…
I dry canned flour in march. 1 quart ball canning jars. Opened today and flour is hard as a rock.
What did I do wrong?
moisture got in somehow not in oven long enough, rings weren’t put on tight enough (needs to be put on a little bit tighter than the water canning).
I have dry canned for a LONG time. I do it a bit different. I preheat the jars at 200 degrees, then fill them, bake for 1 hour, and then clean the jar lip and put on the lid and ring just like your article says.
This is where we differ in our approach. After putting the lids and rings on I put the jars back in the 200 degree oven for an additional 30 minutes. Then I remove from the oven and let them cool. I have never had a failure nor have I ever encountered any moisture in the jars.
Hope this helps.
I’m new to this and have read that others put them back into the over. I think I’m going to start doing that as well. Just to be safe.
Help. I don’t know even how to ask a question. Brand new at this and although I turned oven to 220 convection somehow it was 350 and pasta is brown…toss it or save it?
If you dry sugar in the oven, does the sugar melt???? If not, what temp would you put the oven on and how long???? Thanks!!!
Do not oven can sugar. It can also turn hard as a rock from what I have read. Also, never vacuum seal sugar with a vacuum sealer. It will definitely turn hard as a rock.
I have vacuum packed sugar for years, yes it gets hard so I make a small cut in top of bag squeeze bag and it’s fine.
Thanks for sharing. Looking at the articles on the USDA and HFP websites, it appears they were both addressing issues with oven canning wet items in lieu of pressure canning, not dry canning shelf stable stable items such as grains or legumes.
sarah, i have dry canned stone ground cornmeal no issues what’s the issue?
white and powdered ok brown not so well
Tried it today first time. Thanks for a article that finally tells the right way to oven can. Worked fine. Corn meal, salt. And green tomatoes.
My list has sugar. Flour and anything else. I am not a scanner. Thanks again
Why can pearl barley not be dry canned?
Hi, I dry canned white rice at 225 for 60 min. On 1 unsealed lid I found condensation under lid. So I checked a sealed lid, condensation here as well. I decided to reheat at same temp then let cool and use O2 absorbers. Any dampness in food scares me. How can I stop this? Ty
This happened to me too! Did you figure out what to do? I have no idea!
Did you freeze the rice before dry canning? Are you oven canning with the lid off?
?What do you do if a couple of your jars you had in the oven with dried peas does not seal/
Question, do you differentiate between fresh ground and store packaged flour? will the fresh ground be too moist? thanks for your thoughts.
Has anyone dry canned using one gallon size jars? Are they safe to use?
I have and I have not had any issues. I used the product within 3 years.
I was dry canning flour and two lids did not seal……..can I redo the process and try to dry can the flour again with new lids? Will it hurt the flour?
In my experience yes that would be fine, it won’t hurt the flour
How about mixes with baking soda? Will this work for that?
Also, dry canning at altitude. We’re almost 5,000′ high, here in the AZ desert. Can anyone help?
The article I read said no dry canning baking mixes that have shortening in them. Otherwise proceed is what that article said
Can I skip the step of freezing first, my all purpose flour or Jasmine Rice before oven canning? Does the oven canning process alone, take care of any buggy stuff and heat sanitize?
I have not had an issue with condensation in my jars when I have dry canned in the oven. I’m not real sure why unless maybe the humidity was to high in your kitchen? Sorry, not much help on that
I did this today and heard pops but see condensation. What went wrong.
I also tried canning pinto beans and kidney beans everything went well but I noticed condensation on inside of my jar!!! Was this the 10% left in the beans? After it cooled I seen it was gone so I assumed it was reabsorbed??? I am just concerned that nothing will mold. My jars were dry and heated and my lids were dry heated. Has anyone had this happen before? Thanks for your help.
I just started oven canning, so I’m no expert. But I live in Iowa and it’s very humid here right now, even with the air conditioning on. I oven canned pinto beans. Saw condensation as well. So I redid the whole process. At the end, I pulled my jars out one by one and quickly put the lids/bands on and then back in to oven. After they were all back in the oven with lids, I shut the oven off and DID NOT open the oven until it was room temp and I could handle jars with my bare hands. They all sealed and no condensation. Hope that helps!
someone on Facebook mentioned doing an extra step, place your clean jars in a preheated oven of about 250 for about 35 minutes, take out and make sure there is no moisture, fill jars, replace in a 275 degree oven for about 1 hr. and 20 min. take out and place lids on….
that would take a little extra time but may be worth it……
You know I haven been looking for info to dry jars this way and couldn’t find any info at all as to the temp of the oven and time jars spent in there to dry…so thank you for that!! Big help!!!! 💖
Mine are popping as i type but have condensation too!!! Looking forward to a reply w/ advice. Thank you
All the people with moisture problems, just wondering if everyone is completely drying the inside of their lid when pulling them out of the boiling water.
I like this method of drying. Can you dry and preserve brown rice this way. We buy oriental brown Jasmine rice in bulk and this tends to get those bugs in them.
Put the Rice in the freezer for at least 72 hours before processing. This will kill all the little buggies.
Also add an oxygen and dehydrator pack before sealing with the lid.
How about diotomaceous earth to get rid of any buggies that hatch? Its non toxic to people but dries out exoskeleton of bugs.
The oven heat also kills the bugs/larvae. It’s not necessary to freeze prior to oven canning.
I have my oven preheated at 200° and leave filled flour quart jars in 2 hrs 20 min; then add in the lids/flats on a separate cookie sheet for the last 10 min (with the filled jars still in the oven) to get lids hot before sealing.
I love this topic, thank you for covering it. I do have a question. Is it all types of sugar that can be dry canned or just white? I.E brown, powdered?
I wouldn’t try putting sugar through this canning process. Sugar when exposed to heat will turn into caramel. I accidentally made some caramel once when I tried to take a shortcut on making rice cereal one morning. I put sugar in the water and then cooked the rice. I ended up with candied caramel rice instead. Sugar and salt generally don’t need to be preserved as they don’t react with oxygen in the air or spoil in any way. They are shelf stable as is. The only reason that anyone might want to can sugar or salt is to protect it from any biological weapons that could be released in the future. In which case for sugar, you’ll want to use the Food Saver vacuum method along with some moisture absorber packs. Using saltine crackers at the bottom of the jar works too.